Best Sellers
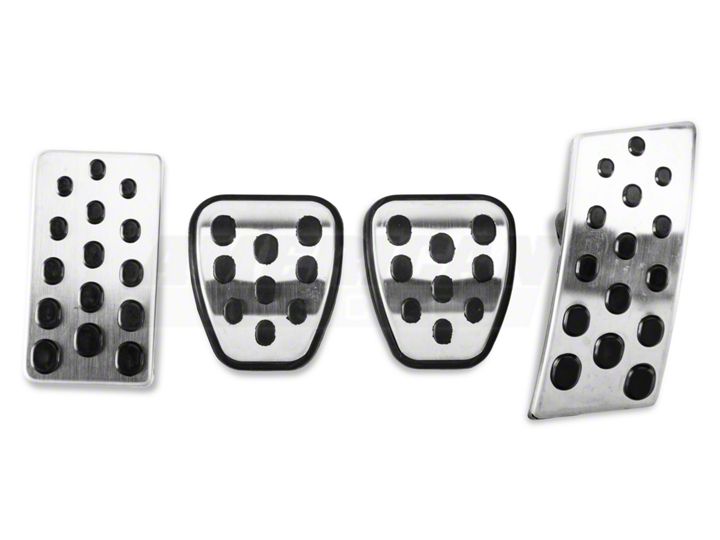
Mustang FRPP Bullitt Pedals Installation Guide
Installation Time
30 minutes
Tools Required
- 13mm Socket w/Ratchet
- Flat Screwdriver
- Stove
- A Kitchen Pot
- Kitchen Tongs
- An Iron Will

Shop Parts in this Guide
Installation
1. Remove the stock dead pedal cover, held on by plastic clips, by inserting a body fork tool (or flat screw driver) between the plastic pedal and the metal backing bracket and prying up at clip area.
2. Remove the stock brake and clutch pedal covers by pulling rubber cover off of the metal pedal assembly.
3. Remove the stock accelerator pedal by removing the accelerator cable form the top end of the accelerator pedal assembly. Remove the two 13mm nuts that hold the accelerator pedal assembly to the floor and remove assembly from vehicle. Using a punch and hammer, drive the pin that holds the plastic pedal to the metal assembly out of the plastic pedal, stopping before driving the pin out of the metal assembly.
1. Install the Bullitt accelerator pedal to the stock metal accelerator assembly in the exact same way the stock pedal was attached. Drive the pedal retaining pin through the mounting hole on the back of the Bullitt pedal securing Bullitt pedal to accelerator assembly. Re-install accelerator assembly into vehicle and tighten 13mm nuts. Reinstall accelerator cable.
2. Install the Bullitt Dead Pedal Cover onto metal bracket by aligning tabs on Bullitt Pedal Cover with the holes in the metal bracket and basically stomping on the pedal to get it to snap in.
3. Now the fun part, installing the brake and clutch pedal covers. Take your time with these. Once you get the first one on, it’s fairly simple to get the other one on. Instead of using sharp tools to try and align the pedals and get them to stretch, we are going to use science to our advantage.
4. Take a pot and fill it up with 1.5" to 2" of water. Put it on your stove and turn the stove to high so that the water boils. Do not watch the pot, as a watched pot never boils. Once the water is boiling, toss the Bullitt pedals into the pot. Let them sit for about 2-3 Mins. The hot water will soften up the rubber and make it easier to wrap around the pedal assembly.
5. After the 2-3 Mins, take your kitchen tongs and take the pedals out of the pot.DO NOT USE YOUR HANDS! THE PEDALS WILL BE HOT! BURNING YOUR HANDS IS NOT A STEP IN THESE INSTRUCTIONS!It's best if you put them on a kitchen towel to dry off. Let them cool for about 1-2 Mins.
6. Now it’s time to go into your car. Lean your seatback as far back as you can and slide your seat all the back. You want as much room as possible to put these on. Once the rubber and metal have cooled enough so that you can handle it, stretch the rubber over the pedal. With my installation, I found it was easiest to go from the top to the bottom, although it can be difficult to get the side not to roll as you put the bottom on.
7. Once you get the pedals on, you're good to go. If your pedal cools and have problems getting the rubber to fit over the pedal, go back and boil more water and put the pedal back in to soften the rubber and run back outside.
You're done!
How to Install Ford Racing Bullitt PedalsAutoHow.tv, AmericanMuscle's video sponsor - http://www.autohow.tv/node/19


