Guaranteed 12/24 Delivery Still Available see item page for details! available on most items - Details
How to Install J&M Caster Camber Plates on Your 1994-2004 Mustang

Shop Parts in this Guide
Installation
1. Place front end of vehicle firmly on jack stands
2. Remove front wheels and tyres
3. Place a floor jack under the control arm and jack up until slightly loaded
4. Remove upper strut mounting nut
5. Remove the three nuts that hold the stock strut mounting bracket in place and remove from vehicle
6. Lower jack to bring strut shaft down through the top hole of strut tower
7. Push the strut down through the factory hole and clear of the bottom plate. It might be necessary to remove the strut from the vehicle
8. Remove bottom plate
9. Remove the factory dust cover from the strut leaving the factory bump stop in place
10. If using the 4th bolt option on 94-2004 plates please follow steps a-f
- Locate the new lower bolt plate with three studs
- Install this lower bolt plate up from underneath the strut tower so the plate is underneath the tower and the studs protrude into the engine compartment
- Slide the supplied bolt plate all the way to the most positive location in the factory slots (toward the outside of the vehicle
- Place the main support camber plate without the bearing housing attached also in the most positive camber position possible
- Mark the 4th bolt location which will also be the most positive camber position on the optional slot
- Center punch and drill using a 1/4" pilot hole to finish with a 13/34" drill bit
11. Install new bottom plate up through the 3 mounting slots of factory tower
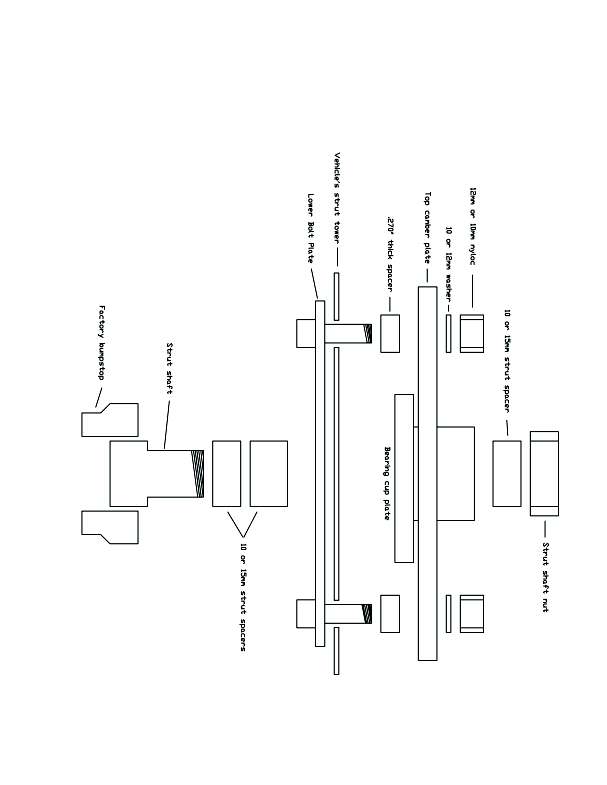
12. Install the.310" long spacers onto the three bottom plate bolts
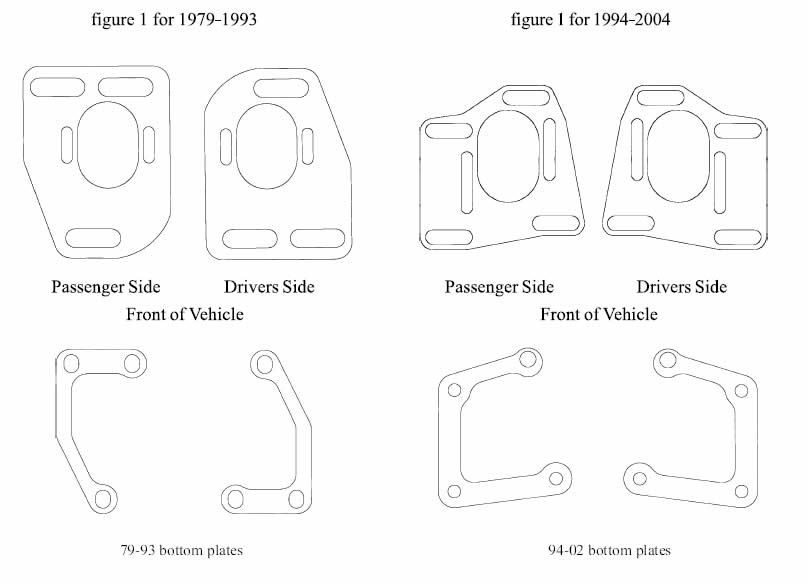
13. Install the new top plate as illustrated in figure 1
14. Depending on your strut and your hood, you will need to space the strut with the supplied (2-10mm and 1-15mm long spacers per strut) spacers to bring the strut as close as possible to your hood without hitting.
15. Once accomplished check to ensure strut does not bottom internally
16. Repeat on other side of vehicle
17. Have your vehicle professionally aligned

Alignment recommendations for street applications
Caster
We recommend you set your caster at the maximum positive possible, but make sure both sides are equal. (Slight adjustment may be needed for road crown)
Camber
Most street vehicles will achieve good tire wear with -.5 degrees of negative camber. Depending on your driving habits you may need to adjust your camber to compensate for tire wear.
Toe
Set toe to the factory specifications

Related Guides
-
Installation
-
-
