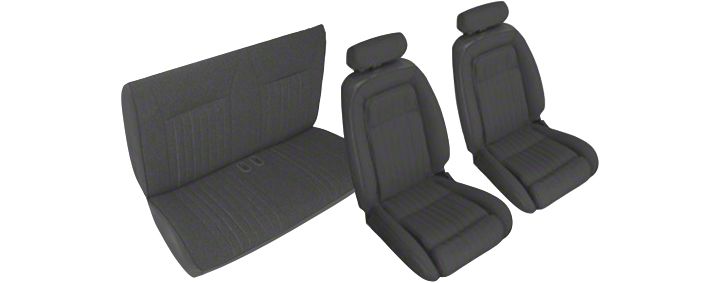
How to Install a Black Front & Rear Sport Seat Upholstery - Convertible on your 1990-1991 Mustang

Shop Parts in this Guide
Installation
Seat Upholstery Installation Instructions
Please read completely before beginning installation.
Note: The seat upholstery is made to fit as tight as the originals. Caution must be exercised when installing over pad and frames. Do not pull at seams excessively as it is possible to tear upholstery as these points.
Note: Some vehicles, such as the 1988-Up Chevy Trucks and Full Size Blazer have the original seat upholstery heat laminated to the foam making it very difficult to remove the old upholstery. Our seat kits for these models do not require the removal of the old upholstery. Our sets will go right over the original and hog ring where the original seat cover is attached.
Installation Note: Some models, such as the 1994 and newer Mustang, will require the use of a contact spray adhesive (most brands are acceptable), in order to get a good bond where the insert portion of the seat (center of seat) meets the side bolsters. The contact spray adhesive should be applied to the underside surface of the seat upholstery and the front surface of the foam buns. Let sit until tacky before attaching the seat upholstery to the foam buns.
Installation:
Remove the seat from the vehicle and separate the seat back from the bottom.
Remove the old seat upholstery and hog rings. While removing the original upholstery, note the fastening points. The new upholstery will fasten at, or near, these same locations.
Inspect the pad, springs and frame; make any necessary repairs or replacements. Determine which upholstery is the backrest and which is the seat bottom; they are not interchangeable.
Tum back-rest upholstery inside out and place on top of tIJe back rest. Slide down evenly while unrolling upholstery working each side until they are even; then install hog rings where required working from the center to each side. (Do the same with the head rests or arm rest if these come with your seat upholstery). Wherever your upholstery has velcro for attachment, no hog rings are required. Adjust velcro to align back rest pleats with bench seat pleats.
Tum seat bottom upholstery inside out and place on front of seat. Make sure the center of the upholstery is aligned with the center of the seat back upholstery. Pull the upholstery over each front comer working each side toward the back until they are even; then install hog rings one at a time where required working from the center to each side.
Note: If your upholstery set has a plastic" J" channel, there are no hog rings required in that area.
Simply snap the plastic channel on to the metal flange on the bottom of the seat frame.
Re-assemble seat and install back in vehicle.
Helpful Hints: Installation is easier if the upholstery is heated. Warm vinyl has more elasticity and is easier to contour. Heating is best accomplished by laying the upholstery in the sun or using...a !lair dryer but, please be careful not to melt the vinyl.
A thin layer of plastic put over the cushions will help make the seat upholstery slide down over the back rest and seat pad.
If the upholstery is in a bind, Do Not PUll. Work each side evenly until you can continue with the installation.
If working on bucket seats, start on the passenger seat first. If you have a problem the driver side sea! is a reference and allows you to drive the vehicle until the problem is solved.

