
How to Install J&M Stainless Steel Teflon Brake Lines - Front (94-98 Cobra) on your Ford Mustang
Installation Time
60 minutes
Tools Required
- Jack
- Jack Stands
- Lug Wrench or 13/16” Socket
- 10mm Socket
- Socket Wrench
- Torque Wrench
- 3/8” Line Wrench
- 11mm Line Wrench
- 15mm or 17mm Wrench
- 10mm Wrench
- Flathead Screwdriver
- Clear Plastic Hose with 1⁄4” Inside Diameter, aprox. 2’ Long
- Plastic Cup
- Brake Fluid

Shop Parts in this Guide
NOTE: These lines were part of a Cobra brake upgrade on my GT. Therefore, the caliper in the before pictures will look slightly different than the Cobra calipers. However, the hose replacement procedure is exactly the same, so this guide will still be 100% accurate for those who are just swapping out the factory Cobra hoses for these J&M Stainless Steel hoses.
Step 1: Loosen lug nuts with lug wrench or 13/16” socket.
Step 2: Raise vehicle and support on jack stands.
Step 3: Remove wheels.
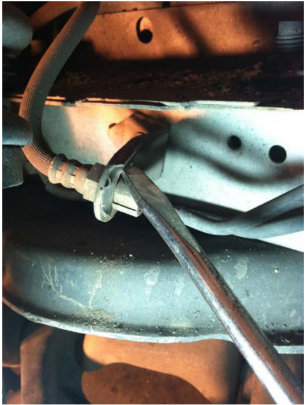
Step 4: Remove the retaining clip on the brake hose using a flathead screwdriver.
Step 5: Remove the banjo bolt using a 10mm socket.
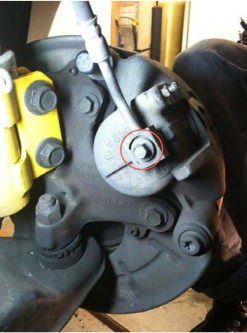
NOTE: The flare nuts on the right and left sides of the vehicle are different sizes. The right side has a 3/8” flare nut and the left side has an 11mm flare nut. This also means the new hoses have different sized ends on them, so you’ll have to test fit them to figure out which one is which. They are not marked.
Step 6: Disconnect the brake hose from the hard line using the appropriate size line wrench (see note above for size). You can use either a 15mm or 17mm wrench to hold the brake hose, depending on which part of the hose you put the wrench on.
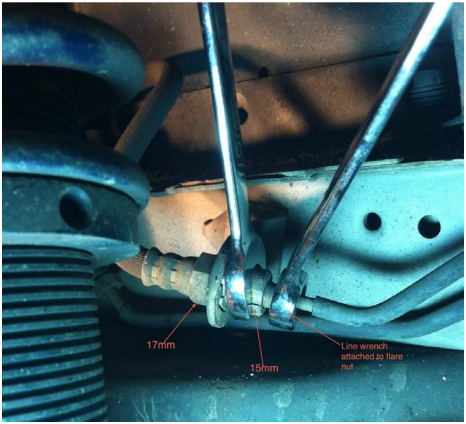
Step 7: Remove the old hose.
Step 8: Attach the new J&M Stainless Steel Teflon hose to the hard line.
Step 9: Wait for fluid to start running out of the new hose and then reattach it to the caliper. Be sure to replace the old copper crush washers with the new ones provided with the lines. One washer goes between the bolt head and the line and the other washer goes between the line and the caliper. Torque the banjo bolt to 29 ft-lbs.
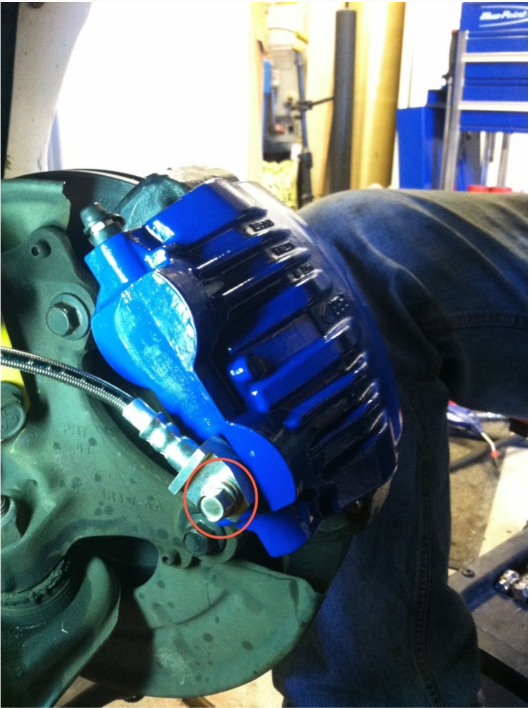
Repeat steps 4-9 on the other side.
Step 10: Bleed the brake system. There are two ways to do this without buying extra tools. If you have another person, use step 11. If you are by yourself, use step 12.
Step 11: Be sure the brake fluid reservoir is full. Next, pour some brake fluid into a plastic cup. Remove the cap on the bleed screw and attach one end of the 1⁄4” inside diameter clear plastic hose.
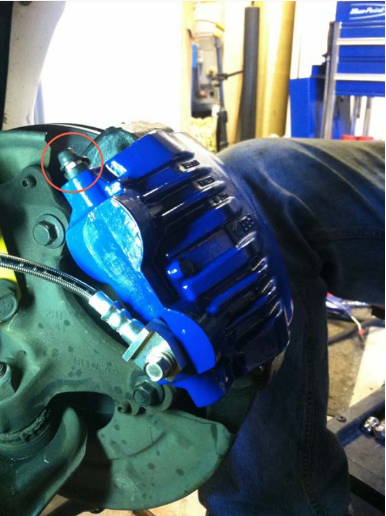
1. Submerge the other end of the hose in the brake fluid in the cup.
2. Have a friend sit in the vehicle and pump the brake pedal several times. Then have the friend press and hold the brake pedal.
3. As he is pressing the pedal, slightly loosen the bleed screw on the caliper to open it.
4. When the bleed screw is opened, the brake pedal will progress to the floor. DO NOT RELEASE THE BRAKE PEDAL.
5. While the pedal is on the floor, close the bleed screw.
6. Once the bleed screw has been closed, release the brake pedal and repeat the process.
7. Once you see a steady stream of brake fluid, with no air bubbles, coming through the hose, you’re finished with this caliper.
8. Refill the brake fluid reservoir and repeat the entire process on the other side.
Step 12: When you don’t have another person to help with the bleeding procedure, you can use gravity bleeding. Be sure the brake fluid reservoir is full. Next, pour some brake fluid into a plastic cup. Remove the cap on the bleed screw and attach one end of the 1⁄4” inside diameter clear plastic hose.
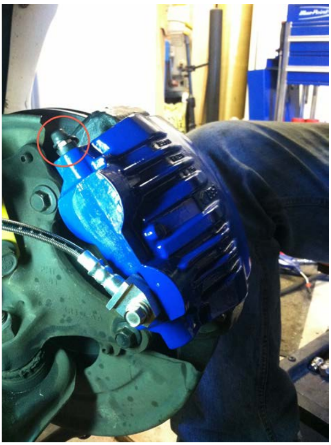
1. Submerge the other end of the hose in the brake fluid in the cup.
2. Slightly loosen the caliper bleed screw to open it.
3. Leave it open.
4. It may take a few minutes, but you will start to see fluid and air bubbles in the clear hose.
5. Leave the bleed screw open until you see only fluid, with no air bubbles.
6. Once you see a solid stream of fluid flowing out of the bleed screw, and there are no air bubbles present, tighten the bleed screw.
7. Refill the brake fluid reservoir and repeat the process on the other side.
Gravity bleeding will take a bit longer than the procedure outlined in step 11, but it will bleed the system just as well.
Step 13: Once both sides have been bled, check the brake fluid level in the reservoir and add fluid if necessary.
Step 14: Pump the brake pedal several times to check the stiffness. If the pedal feels spongy, repeat the bleed procedure. Otherwise, move on to step 15.
Step 15: Reinstall the wheels and torque the lug nuts to 100 ft-lbs using a star pattern.
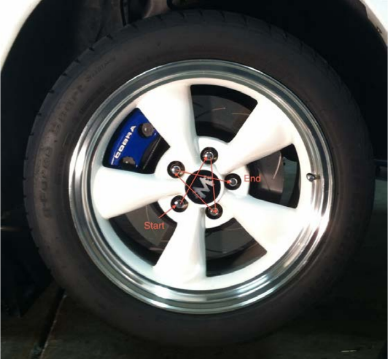
Step 16: Before test driving, with the emergency brake engaged, start the vehicle and check the pedal pressure one more time to be sure that it does not feel spongy and does not progress to the floor. Once you have determined that the pedal feels okay, release the emergency brake and move forward slowly and check one last time to be sure the brakes are working properly. Once this is verified, you’re finished!
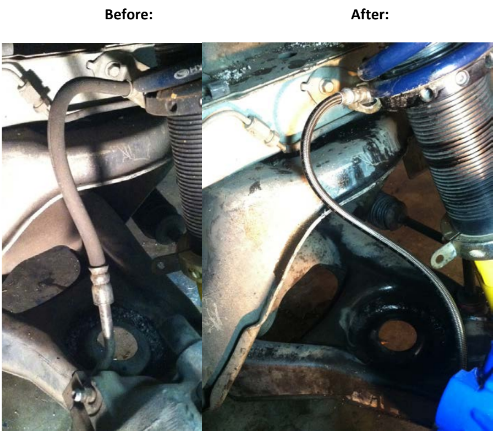
Installation Instructions Written By AmericanMuscle Customer Kevin Cross 1/1/2014

