Best Sellers
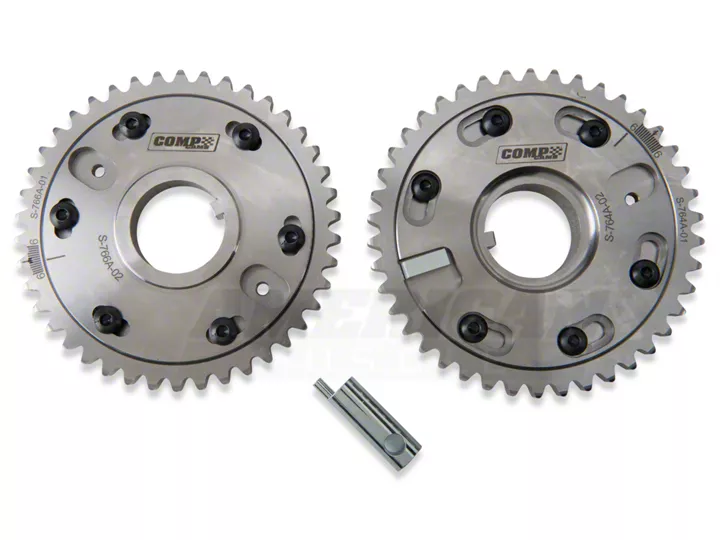
How to Install Comp Cams Adjustable Cam Gears - 4.6L on your 1996-2004 Mustang

Shop Parts in this Guide
Installation
Note: If your vehicle has a camshaft position sensor mounted to the back of the factory camshaft gear, it must be removed and attached to the corresponding gear in your new COMP Cams® camshaft gear set. Installation is identical to the Ford factory procedure with the following exceptions:
1. Installation– Rotate the crankshaft until the timing mark is facing the 6 o’clock position, and the keyway is in the 11 o’clock position, making sure that the timing marks on the camshaft gears are pointing above the cylinder head. This will put the #1 piston at Top Dead Center (TDC). Remove the factory camshaft gears, and replace them with your new COMP Cams® Adjustable Gear Set.Be sure to verify that the adjusters are set to 0º before reinstalling the timing chains.To install the timing chains, line up the colored links on the chains with the timing marks on the crank and cam gears, and then install and release the timing chain tensioners. COMP Cams® strongly recommends that you degree the left and right cams in order to verify that the chains are installed correctly before proceeding with any further adjustments. Refer to a factory engine manual for torque specs and assembly/disassembly procedures.Note: the right hand (passenger side) gear uses the smaller keyway. The left hand (driver side) gear uses the larger keyway.
2. Making adjustments –Using a wrench to prevent the camshaft from turning, loosen the six (6) adjustment bolts to allow the center hub of the gear to rotate – note that continuing to hold the cam with a wrench will prevent it from turning once the adjuster bolts are loose
– this will help to prevent valve train damage. Use the wrench to rotate the cam to the desired setting (the gears have a 0º - 12º range of adjustment for either advance or retard), and tighten the adjusting bolts on both camshafts.Remember that it is absolutely necessary to adjustbothcamshafts when changing your cam timing – for example, if you adjust the left camshaft to 8° advanced, you must also adjust the right camshaft to 8° advanced! Failure to do so will result in severe engine damage.
Rotating the camshaft clockwise will advance the cam timing, and rotating it counterclockwise will retard the cam timing. Be sure to degree the cams whenever you make an adjustment in order to verify that your camshafts have been set as intended.Caution! – when adjusting your camshaft timing, be sure to verify that you have adequate valve to valve and piston to valve clearance – severe engine damage will result from inadequate clearance.
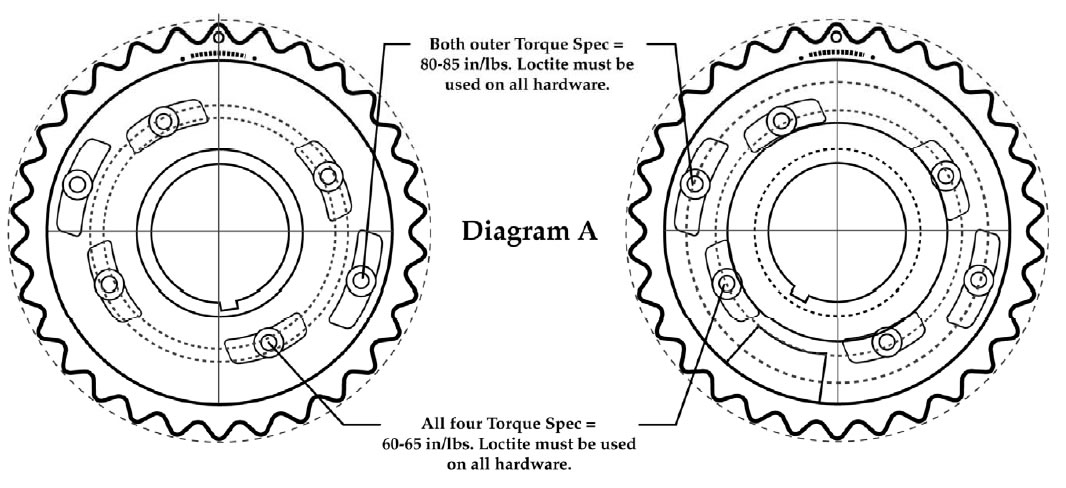
3. Final assembly –Once both cams have been properly adjusted, remove each adjusting bolt one at a time, and verify that each one has a lock washer and flat washer installed. Apply a small amount of thread lock to each attaching screw, and torque to specs below (also see diagram on next page).
The two outer screws must be torqued to: 80-85 in/lbs
The two inner screws must be torqued to: 60-65 in/lbs
Loctite must be used on all hardware!
Note: the adjusting bolts are made extra long in order to facilitate ease of adjustment– it is critical that you verify that you have adequate running clearance for the bolts – if not, youmustgrind the bolts for clearancebeforestarting your engine, or severe engine damage may result.

Limited Warranty
Competition Cams, Inc. warrants that all of its products are free from defects in material and workmanship, and against excessive wear for a period of (1) one year from the date of purchase. Thislimited warrantyshall cover the original purchaser.
Competition Cams, Inc.’s obligation under this warranty is limited to the repair or replacement of its product.To make a warranty claim, the part must be returned within (1) one year of purchase to the address listed below, freight prepaid. Items covered under warranty will be returned to you freight collect.
It is the responsibility of the installer to ensure that all of the components are correct before installation. We assume no liability for any errors made in tolerances, component selection, or installation.
There is absolutely no warranty on the following: A) Any parts used in racing applications;
B) Any product that has been physically altered, improperly installed or maintained;
C) Any product used in improper applications, abused, or not used in conjunction with the proper parts.
There are no implied warranties of merchantability or fitness for a particular purpose. There are no warranties, which extend beyond the description of the face hereof. Competition Cams, Inc. will not be responsible for incidental and consequential damages, property damage or personal injury damages to the extent permitted by law. Where required by law, implied warranties or merchantability and fitness are limited for a term of (1) one year from the date of original purchase.
This warranty gives you specific legal rights and you may also have other legal rights, which vary from state to state.


