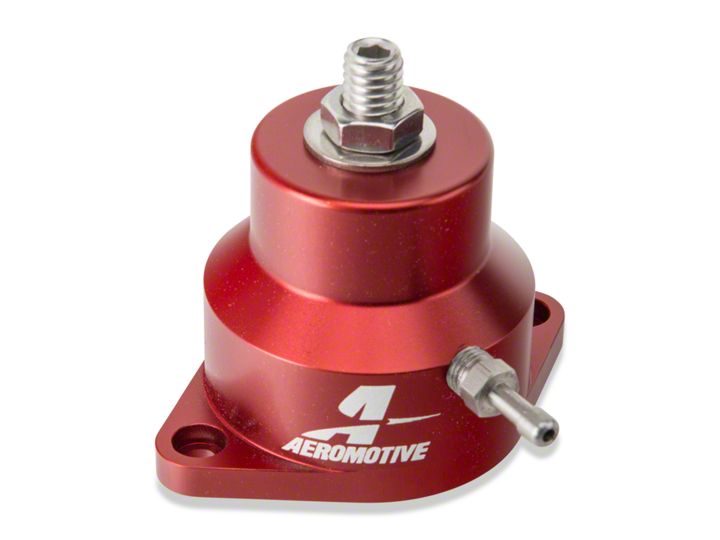
How to Install Aeromotive Adjustable Fuel Pressure Regulator (94-97 GT; 94-98 Cobra) on your Ford Mustang

Shop Parts in this Guide
CAUTION:
Installation of this product requires detailed knowledge of automotive systems and repair procedures. We recommend that this installation be carried out by a qualified automotive technician.
Installation of this product requires detailed knowledge of automotive systems and repair procedures. We recommend that this installation be carried out by a qualified automotive technician.
When installing this product, wear eye goggles and other safety apparel as needed to protect yourself from debris and sprayed gasoline.
WARNING!
The fuel system is under pressure. Do not open the fuel system until the pressure has been relieved. Refer to the appropriate vehicle service manual for the procedure and precautions for relieving the fuel system pressure.
NOTE: Testing the enclosed regulator by applying air pressure or vacuum to the vacuum port with a handheld pump will yield poor results, due to the slight air leakage through the adjustment screw threads. This minute leakage, which is typical of all adjustable fuel pressure regulators, does not, in any way, affect the performance of the regulator.
Aeromotive system components are not legal for sale or use on emission controlled motor vehicles.
The following steps are typical of most installations:
1. Once the engine has been allowed to cool, disconnect the negative battery cable and relieve the fuel system pressure.
2. Remove any cosmetic covers necessary to allow access to the fuel pressure regulator. Some models require removal of the intake manifold plenum to install this product. If your vehicle requires removal of any peripherals, refer to the appropriate vehicle service manual for the procedure for doing so.
3. Remove the vacuum line from the top of the O.E. regulator.
4. Place shop towels around the regulator to catch any gasoline that is spilled during this step of the installation. Remove the regulator mounting bolts and carefully remove the regulator from the fuel rail.
5. Apply light oil to the o-rings supplied in the Aeromotive package.
6. Install the new Aeromotive regulator using the reverse of the foregoing removal procedure.
7. Once the regulator is installed, attach a suitable fuel pressure gauge to the fuel system schrader valve or the 1/8 NPT port on the fuel pressure regulator.
8. Reattach and reconnect any peripherals that were removed to gain access to the regulator.
9. Ensure that any spilled gasoline and any gasoline soaked shop towels are cleaned up and removed from the vicinity of the vehicle!
10. Reconnect the battery and turn the ignition to the ON position WITHOUT starting the car. After several seconds, check the fuel pressure. If there is no fuel pressure, turn the ignition key to the OFF position, wait one minute, return the ignition to the ON position, and recheck the fuel pressure. Repeat this ignition OFF and ON procedure until the fuel pressure gauge registers fuel pressure.
11. With the fuel pressure gauge registering fuel system pressure, check for fuel leaks from and around the Aeromotive regulator and all fuel lines and connections near the regulator! If any fuel leaks are found, turn the ignition key to the OFF position, remove any spilled fuel and repair the leak before proceeding!
12. Once the fuel pressure gauge registers fuel system pressure and there are no fuel leaks, start the engine and adjust the regulator to the desired fuel pressure. Turning the adjustment screw clockwise will increase fuel pressure. OEM regulators are typically set at approximately 43 psi, without the vacuum line attached. The fuel pressure adjustment range for this regulator is 35-75 psi and we recommend setting the static pressure (no vacuum) at 48 psi.
13. Once the desired fuel pressure is achieved, tighten the regulator adjustment jam nut and attach the vacuum line.
14. Turn off the engine and allow it to cool. If the schrader valve was utilized to check fuel system pressure, remove the fuel pressure gauge and replace the cover on the schrader valve. If the 1/8 NPT port on the Aeromotive regulator was utilized to check fuel system pressure and you do not want to keep the fuel pressure gauge on the vehicle, relieve the fuel system pressure as instructed in the appropriate vehicle service manual. Remove the fuel pressure gauge and reinstall the 1/8 NPT pipe plug into the regulator gauge port, using thread sealant.
15. Test drive the car to insure proper operation and re-check the fuel system for leaks. If any leaks are found, immediately shutoff the engine and repair the leak(s)!

