
Mustang V6 Cold Air Intake Installation Guide (1999-2003)
Installation Time
60 minutes
Tools Required
- short-handled socket wrench
- 5/16 socket
- 10mm socket
- 5/16 machine bolts from any hardware store.
- Flathead screw driver (Some mechanics find it easier to tighten the hose clamps with a screw driver rather than a socket wrench).
- Knife (for removing the rubber grommets.)
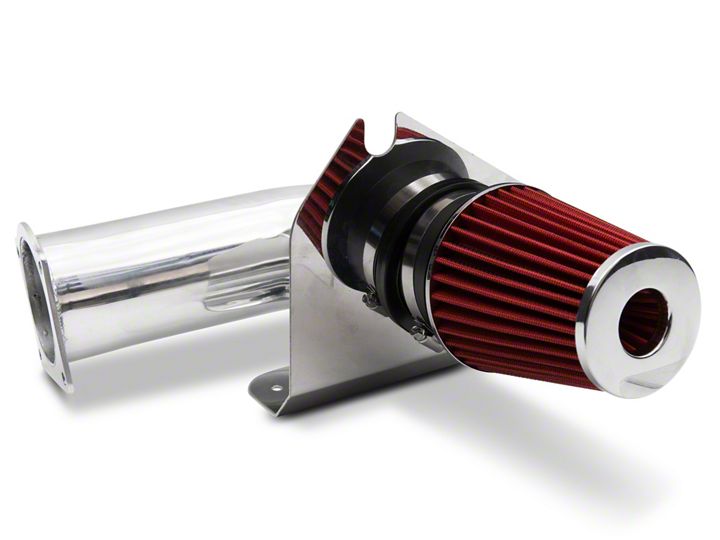
Shop Parts in this Guide
Installation
Notes:
I installed a Mustang V6 Cold Air Intake Kit (99-03) on a 2001 Mustang Convertible.
I have some mechanical skills, but this installation was very simple and there is no need to possess mechanical skills to complete this installation.
Even though this article is centered on the V6 Kit, the GT and Cobra kits are relatively similar and there should be no major differences.
Installation:
1. The first step is to open the hood by pulling on the hood latch by the kick panel
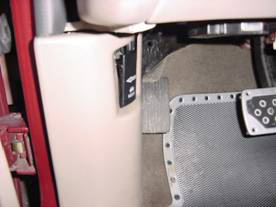
2. Next, pull up on the latch underneath the hood freeing the hood.
3. After opening the hood and securing it, the stock air intake on the mustang engine should look something like this:
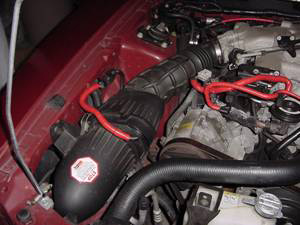
4. Begin by unhooking the Mass Air Flow Sensor cable that is connected to the Air intake. (It is the red cable farthest to the left in the above picture).
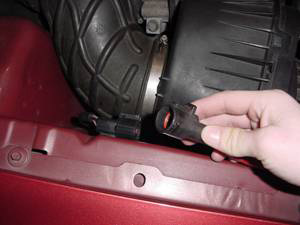
5. It is a simple latch hook that should disconnect easily.
6. Next remove the stock filter. There are two clips that hold the filter holder to the rest of the intake. Pull these clips off.
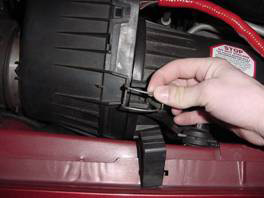
The above picture shows the first clip.
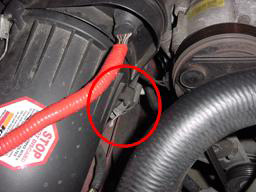
The above picture shows the second clip.
7. After the clips are removed, the upper half of the intake should come apart. (Pictured below)
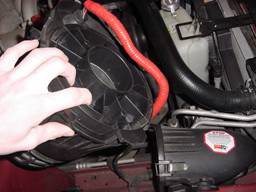
8. The next step is to remove the filter and the filter holder. On stock cars the filter holder is connected to a rubber boot that pulls air from inside the fender wall. I previously removed the rubber boot so it is not in the pictures, but it is just a simple rubber boot that is shaped almost like a traffic cone.
9. Using a 5/16 wrench, remove the single bolt securing the filter holder in place. After this bolt is removed, the filter holder should just lift out. It is important to keep the rubber grommets that are attached to the bottom of the filter holder because they will be used with the new kit.
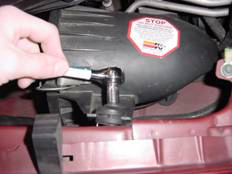
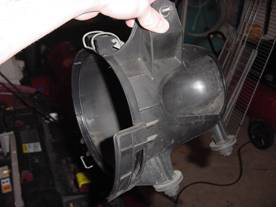
10. The image below is what the filter holder will look like after it is removed with the rubber boot removed and the filter taken out. (Notice the two rubber grommets that are attached to the bottom. These will be used later.) Also, there is a rubber grommet with the bolt through it at the top of the picture where my thumb is. This piece will also be used later when installing the Cold Air Intake mounting bracket.
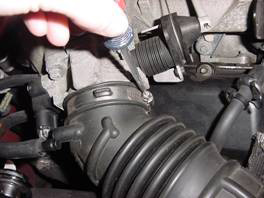
11. It is now time to move onto the upper half of the intake removal. Locate the hose clamp holding the intake onto the throttle body. Using a flathead screwdriver, loosen this clamp. Also, remove the breather hose that is attached to the intake(Pictured below in bottom left corner). This hose runs to the valve cover and acts as a breather hose.
Note:On other engine models there may be more hose attachments that need to be removed. The Cold Air Intake Kits accommodate for these extra hoses.
12. After the clamp is loosened and the breather hose is removed, the rest of the stock air intake should simply slide off. (This may take some effort if it is clamped tightly). Also, hold onto the Mass Air Flow Sensor as it will be used later. The MassAir Flow Sensor, or MAFS, is located in the box with the MAFS wire sticking out of it.
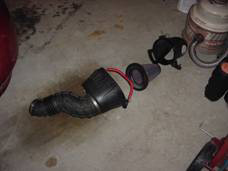
13. The picture below shows what the stock air intake looks like after it is removed. Keep in mind that this one does not have the rubber boot on the very end or the filter. Also, the part with the red wire is the MAFS.
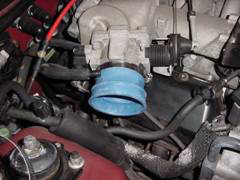
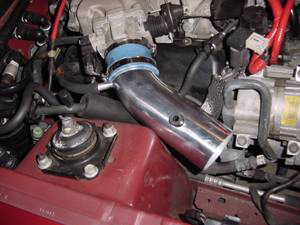
14. It is now time to start installing the Cold Air Intake Kit. First, take the smaller of the two supplied blue rubber couplers as well as two smaller hose clamps and attach them to the throttle body. The below picture illustrates this.
15. Next, install the metal pipe that has a slight bend in it to the blue rubber coupler. Do not forget to reattach the breather hose to the new place on the Cold Air Intake. This new breather hose port is slightly farther away than the stock one so it might need to be stretched. Also, there is a plastic adapter in the end of this breather hose that needs to be taken out in order to attach the hose.
16. Then tighten the hose clamps as pictured below :
17. The next step is to install the MAFS into the Cold Air Intake Kit.
18. To remove the MAFS undo the clips holding the MAFS in place as pictured below.
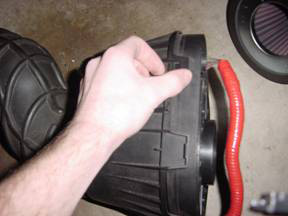
19. After undoing the clips, the MAFS should just come apart. Below is what the actual sensor looks like when it is removed.
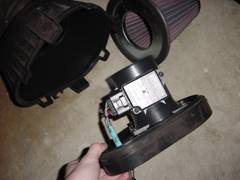
20. There are two bolts holding the MAFS sensor to the box. Remove these bolts and also use a knife or a screwdriver to remove the rubber grommet that is holding the wire into the MAFS holder.
21. Below is a picture of what the MAFS will look like once it is fully removed from its holder. (Notice the rubber grommet that is still attached to the MAFS wires).
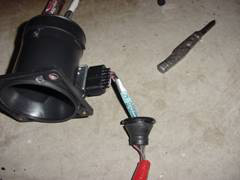
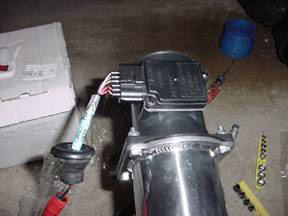
22. Next, attach the MAFS to the supplied pipe that has the square end using a 10mm socket wrench. Also, place the gasket in between the MAFS and the metal pipe when connecting. Use the supplied bolts, nuts, and washers to attach the MAFS. There should be four bolts when the MAFS is attached and it will look like the picture below.
Note:The next few steps are where the installation may get a little complicated and possibly frustrating. Please read carefully and take your time.
23. The air filter supplied with the kit is smaller than the stock air filter but I am told that it does not fit through the hole in the fender wall in some Mustang models. Thus, it needs to be installed from underneath the car. I am unsure of other models, but I do know that the air filter can be installed all within the engine compartment on the V6 models. The filter in my kit does in fact, fit through the hole in the engine compartment. It is however, completely possible to install the filter from underneath the car as well.
24. For these next few steps, I will show you what worked best for me during the installation of the Cold Air Intake Kit. On other kits you may need to play around a little bit before completely putting the kit together.
25. Begin by placing the mounting bracket onto the 90 degree angle piece of piping with the MAFS already attached.
26. Next, take the filter and final hose clamp and tightly clamp the filter onto the end of the pipe.
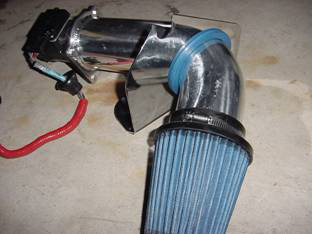
27. After completing the above steps, the bottom half of the Cold Air Intake Kit should look like this.
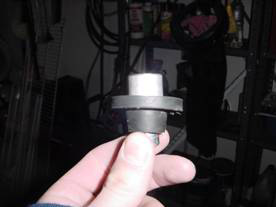
28. At this time, take the metal pieces that were provided in the kit that are shown below and insert them into the existing grommets to stabilize the Cold Air Intake mounting bracket.
29. Place these grommets into the existing holes in the car frame.
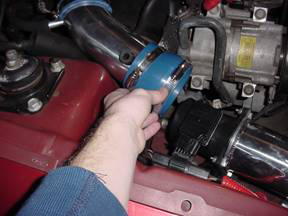
30. Next, slide back the blue rubber grommet on the upper part of the Cold Air Intake. This will allow you to insert the second half of the Cold Air Intake into place.
31. After this step is completed, start placing the Cold Air Intake into the car. Start with the air filter end and slide it into place.
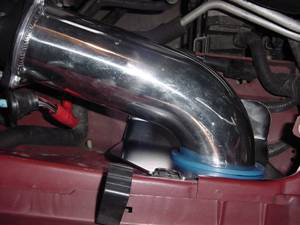
32. Now take the larger blue rubber coupler and slide it onto larger end of the MAFS. The larger end will be very loose, but the larger hose clamp is used to tighten this and accommodate for the MAFS.
33. With a little finesse the second half of the Cold Air Intake should join with the first half.
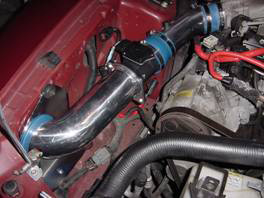
34. Now slide the blue rubber coupler over the MAFS and tighten the hose clamps.
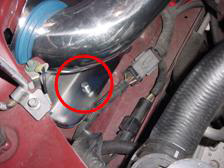
35. Next, replace the bolt with the rubber grommet onto the Cold Air Intake mounting bracket and tighten with a 5/16 socket.
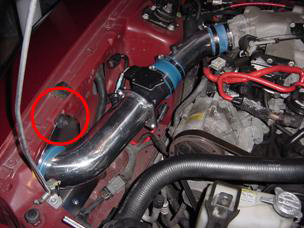
36. Finally, take a standard 5/16 machine screw that can be found at any hardware store and tighten them into the metal piece of the rubber grommet underneath the Cold Air Intake mounting bracket. This is only for good measure so that the bottom of the Cold Air Intake Kit does not vibrate.
37. After everything is installed and tightened, give the Cold Air Intake Kit a little tug to make sure everything is tight.
MAKE SURE THAT YOU RE-CONNECT THE MAFS WIRE!
FAILURE TO DO SO WILL TURN THE CHECK ENGINE LIGHT ON WHEN THE ENGINE IS STARTED!
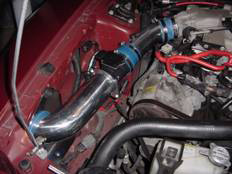
The finished installation should look like the above image
38. Lower the hood and start the car. You will notice a different sound and even a very slight whistle. This is normal and for some owners, this sound is desired. When the car is in reverse it seems to make a louder sound than when it is in drive. Thesis all normal. The horsepower gains vary based on engine size and modifications but to a relatively stock engine, I feel as though I gained about 8 horsepower.
39. Celebrate! You installed a great piece of hardware and gained some more ponies for your pony! Now go take it for a ride!
Installation instructions provided by AmericanMuscle customer by William Rimmler

