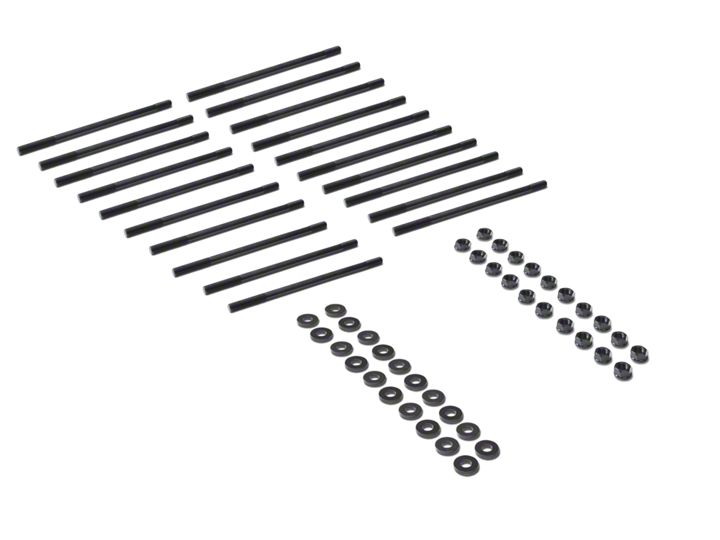
How to Install ARP Head Stud Kit - Hex (96-04 4.6L) on your Ford Mustang

Shop Parts in this Guide
1. Inspect all hardware prior to installation. Look for obvious defects or shipping damages. Please call 800- 826-3045 with any questions or issues.
2. To ensure proper thread engagement and accurate torque readings, clean all threads in the block. Chase if necessary with ARP Thread Chaser, part number 912-0013 (M11 X 1.5)
3. Clean the spot faces on the cylinder head where the washer seats, use of solvent or brake/carb cleaner is recommended.
4. Install the head gasket and cylinder head.
5. Screw the studs into the block hand tight, do not apply torque. The hex broach in the end of the stud is designed to assist with installing/removing the studs from the block, not for applying torque.
6. Then, using a clean, dry rag remove all oil from both sides of each washer. The cylinder head and washer mating surfaces must be free of oil/grease/lubricant. Failure to keep these surfaces dry may result in inconsistent preloads.
7. Place the washers over the studs and on to the dry, clean spot faces of the cylinder head.
8. Lubricate the stud threads and bottom of the nuts with ARP Ultra-Torque Fastener Assembly Lubricant. Then install the nuts onto the studs and tighten hand tight.
TORQUE PROCEDURE
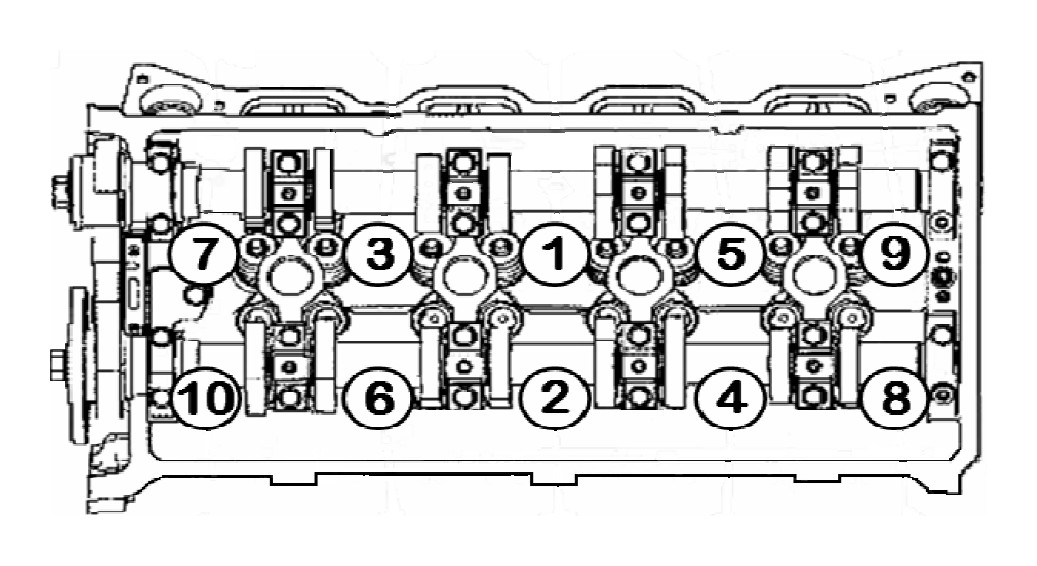
9. Following the manufacturers recommended torque sequence, shown below, torque the nuts per steps 1-3
1- Tighten nuts 1 through 10 (11mm) to 25 ft-lbs
2- Tighten nuts 1 through 10 (11mm) to 50 ft-lbs
3- Tighten nuts 1 through 10 (11mm) to 70 ft-lbs
Bolt Torque Sequence


