Top Sellers in Mustang
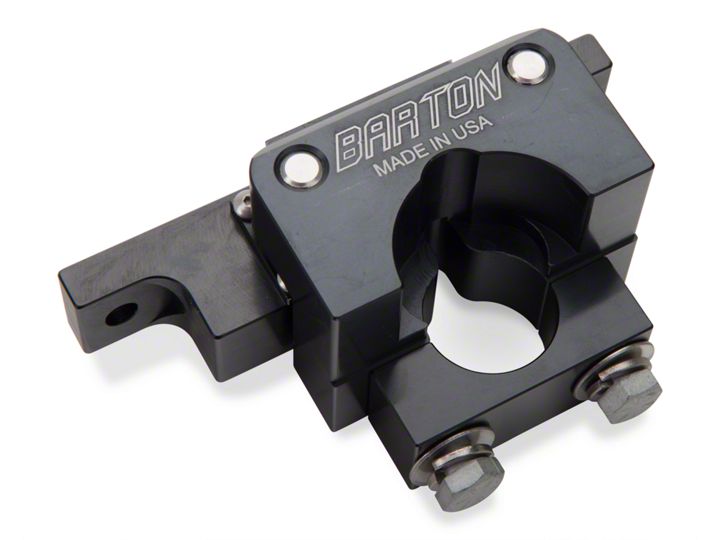
How to Install a Barton Industries Two-Post Shifter Bracket - MT-82 on your 2011-2014 Mustang

Shop Parts in this Guide
2011-2013 BARTON 2 Post Shifter Bracket Installation Instructions
BEFORE BEGINNING ANY WORK, MAKE SURE VEHICLE IS PROPERLLY LIFTED AND EMERGENCY BRAKE IS SET.
BARTON Industries will NOT be held accountable for any damages occurring before, during, or after the installation process.
Step 1: Remove the factory shifter bracket nuts using a 10mm deep-well socket and 12" extension. These nuts will be re-used.
Step 2: Use a pry-bar or flat head screw driver to lower the retaining clip on the passenger side stud, lower the bracket off of the stud mounts, and remove the bracket from the factory shifter box. Some soapy water may aid in this process.
Step 3: Remove the cap and two 5/16 bolts and washers from the Barton assembly.
Step 4: Place the whole Barton bracket assembly on to the studs and bring up the two nuts that were removed in step 1. Apply Blue loc-tite to the studs. DO NOT TIGHTEN THESE NUTS YET, LEAVE THEM FINGER TIGHT. The two posts on the bracket should be facing the front of the car, while the BARTON logo faces the rear of the car. The small button head screws in the upper portion of the bracket should be facing towards the rear of the car.
Step 5: lift the shifter box up into the bracket, and install the clamp, bolts, and washers that you removed in step 3. Apply blue loc-tite to the 5/16 bolts and thread them into the bracket EVENLY only using FINGER PRESSURE. Once the bolts are up and ONLY snug, slide the bracket towards the rear of the vehicle until it stops on the rear lip of the factory box.
Step 6: Finish tightening the two nuts from step 4. DO NOT OVER TIGHTEN, ONLY WRIST PRESSURE. Using a 1/2" ratchet wrench, finish tightening the two 5/16 bolts. Tighten each bolt evenly, only going about a 1/4 turn on each bolt until they are fully tight.


