Talk to a Mustang Sales Tech
1-877-887-1105
M-F 8:30A-11P, Sat-Sun 8:30A-9P
How to Install BBK Ceramic Long Tube Headers - 1-3/4 in. on your Mustang
Shop Parts in this Guide
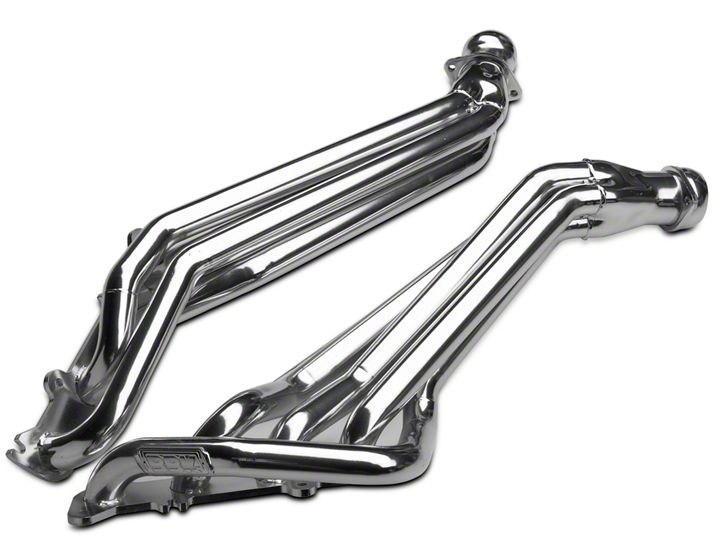
You will be reusing most of the stock manifold studs for the header installation. Five required bolts are supplied.
Follow these instructions carefully to ensure correct fitment and operation.
STEP 1
- Disconnect the negative battery terminal.
STEP 2
- Remove the air filter box. Remove the first and second nuts on the top row of studs on the stock header on the driver side. On the passenger side, remove the first top nut that is behind the AC hose. Use long extensions and socket to remove the outside converter pipe nut at the collector of the stock header on the passenger side. You won’t be able to access it when your under the car. Loosen the motor mount nuts on the studs that face up but don’t remove yet.
STEP 3
- Lift the vehicle as high as possible. Unplug all 4 oxygen sensors.
STEP 4
- Loosen the clamps at front of the stock H-Pipe and then loosen the barrel style clamps at the rear. These rear clamps will be re-used with the BBK X-Pipe assembly. Remove the stock HPipe. Remove the nuts on the converters at the header collectors and remove.
STEP 5
- Remove the four nuts on the round tube support brace under the oil pan and remove the brace. Loosen the 3 small bolts on the plastic cover that covers the area around and forward of the rack and pinion. Let plastic cover hang. This will give access to the front header nuts.
STEP 6
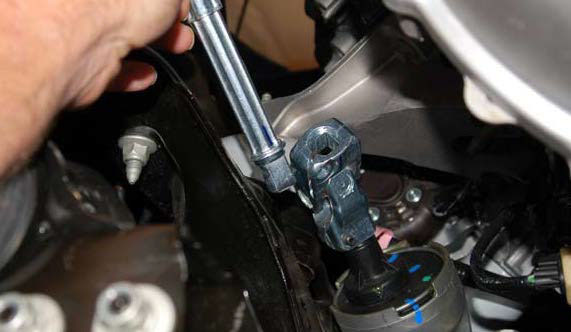
- Remove the 2 bolts from the steering U joint at the rack and pinion, remove the U-joint so the shaft can hang out of the way.
STEP 7
- Remove the starter.
STEP 8
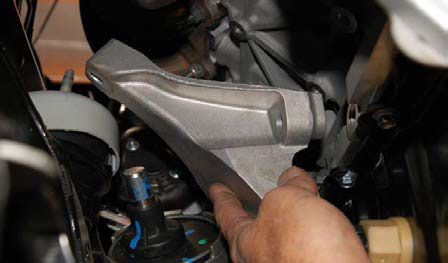
- With a jacking device in place under the bell housing and a block of wood, remove the motor mount nut on the driver side, jack up the engine and remove the 4 bolts that secure the aluminum mount to the engine block and remove.
STEP 9
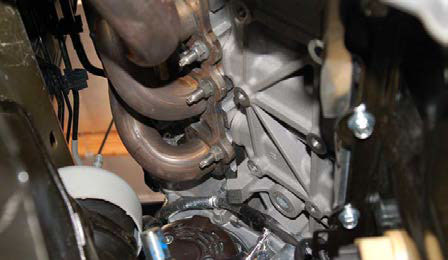
- Remove all the exhaust manifold nuts and remove along with the gasket.
STEP 10
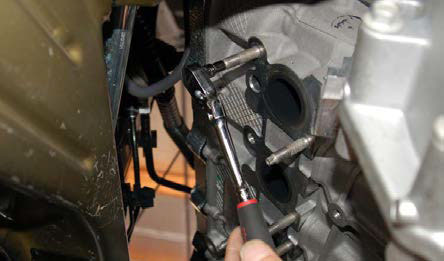
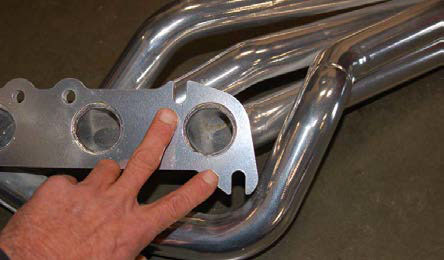
- Remove the studs that correspond to the notches in the BBK Header flange. You will install supplied bolts in these spots. NOTES!!! There are 2 thread pitches supplied. Because the manufacturer changed the thread pitch used after 2011 you will have to compare the supplied bolt to the factory stud to confirm which thread pitch to use.
STEP 11
- Install the supplied gasket and BBK Header on the remaining studs and install the nuts and supplied bolts then tighten. You might have to raise the engine a bit more to get the header into place.
STEP 12
- Re-install the motor mount and lower the engine back down. Re-install the nut onto the mount stud.
STEP 13
- Repeat steps 8-12 for the passenger side installation.
- NOTE!!! The entire motor mount assembly needs to be removed.
- NOTE!!! The first notch on the passenger side header will re-use the factory stud and the remaining notches will use supplied bolts. (2)
STEP 14
- Make sure both motor mounts are fully tightened. Re-install the starter, steering U-joint and shaft, and the round tube lower brace. Reinstall front plastic cover.
STEP 15
- Install the supplied front and rear oxygen sensor extensions. Install the supplied studs into the collector flanges.
STEP 16
- Slide the stock barrel style clamps onto the front of the stock exhaust system about halfway. Install the BBK X-Pipe section into the barrel clamps and then connect the front of the X-Pipe to the collectors of the BBK Headers. Use the supplied hardware.
STEP 17
- Level out the X-Pipe and tighten the collector nuts, then tighten the barrel clamps.
STEP 18
- Install the 2 front oxygen sensors into the BBK Header collectors and the 2 rear oxygen sensors into the BBK X-Pipe and connect the oxygen sensor extensions. NOTE!!! Be sure to add a small amount of anti-seize to the top thread of each oxygen sensor using the supplied anti-seize packet. As you thread the oxygen sensor back into the part the antiseize will spread evenly throughout the threads.
STEP 19
- From the engine compartment, make sure to tighten any header nuts or bolts that you couldn’t reach from underneath the car. The front ones are usually easier to tighten from above. Make sure you tighten the motor mount nuts on the studs that face up. They are easier to get from the engine compartment looking down on them.
STEP 20
- Re-install the air box cleaner. Reconnect the negative battery terminal. Start the engine and check for any exhaust leaks. Header bolts and nuts should be rechecked after 500 miles or so.
Attention
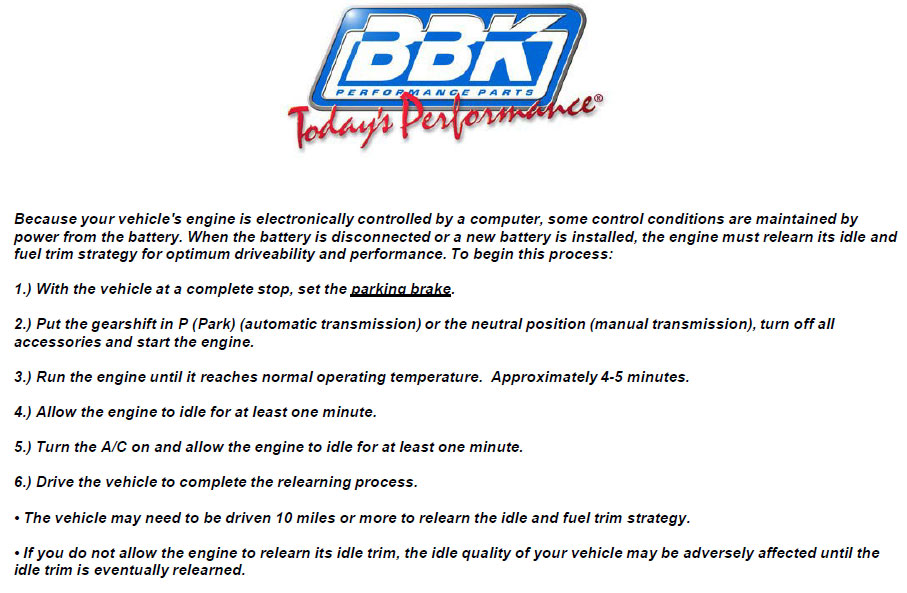
Please follow the ECU Relearn procedure before driving on the road.
