Guaranteed Free Delivery by 12/24! available on most items - Details
Chrome Mustang Billet Interior Door Handles ('05-'09) - Installation Instructions
Installation Time
2 hours
Tools Required
- Small Jeweler's Size Flathead
- Medium Jeweler's Size Flathead
- Small Socket and Wrench Set
- T30 Torx Screwdriver
- Shop Cloth (Optional)
- Droplight (Optional)
- Hook (Optional)

Shop Parts in this Guide
Installation
1. Remove the small panel behind the stock handle and remove the T30 Torx screw behind it.
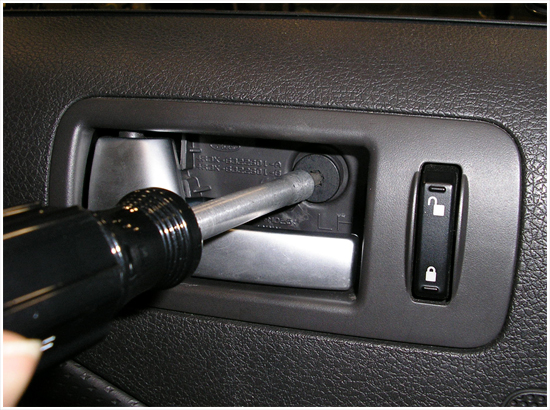
2. Remove the cover from the door pull/armrest area. You may need to use a small jeweler's flathead to pry it forward and away from the main door panel to release it. Remove the T30 Torx screw from behind it.
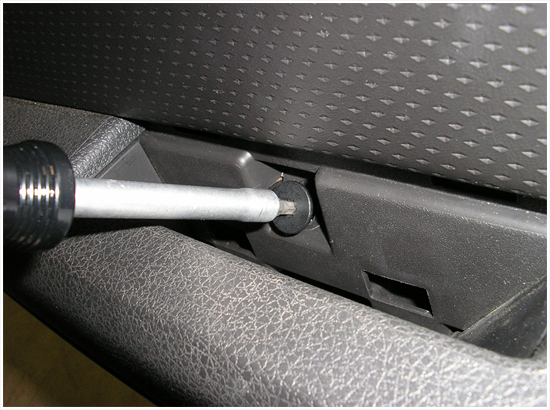
3. Remove the window control and door lock assembly by pulling straight out, horizontally.
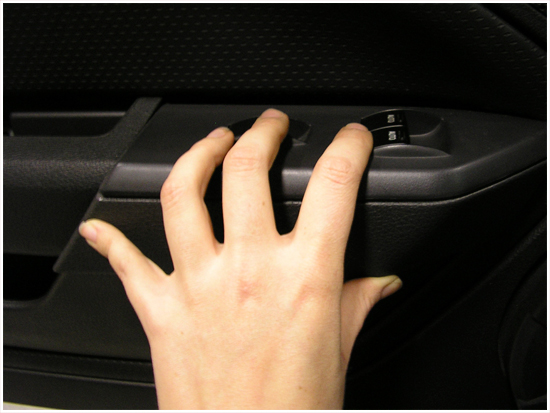
4. Remove the 2 plugs from the switches.
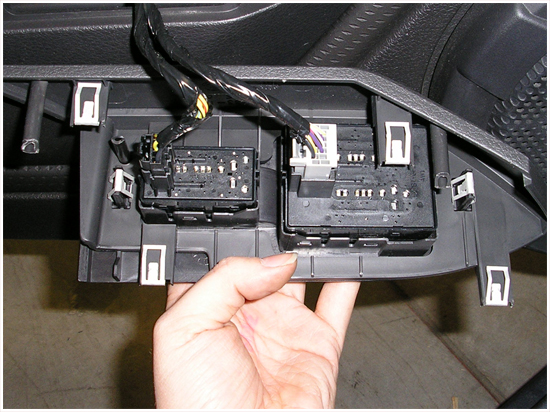
5. Remove the door lock bezel by wrapping your small jeweler's flathead in a shop towel and prying upwards.
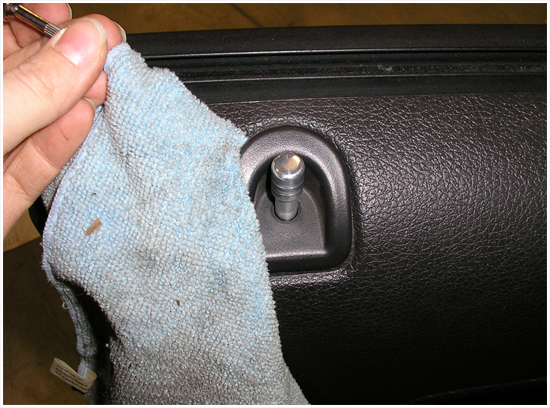
6. If required) Remove speaker bezel. This should come off with gentle but firm hand pressure.
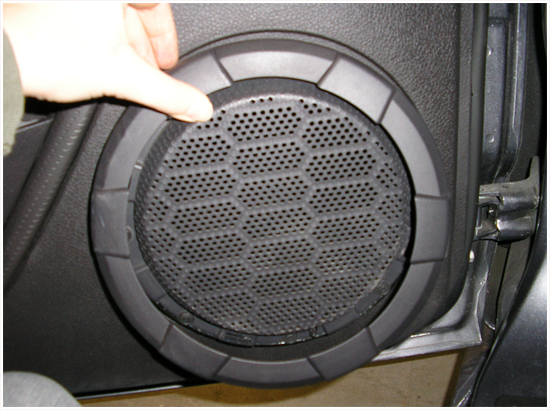
7. Using a socket and wrench, remove the 9 screws on the periphery of the door and the one in the window switch area.
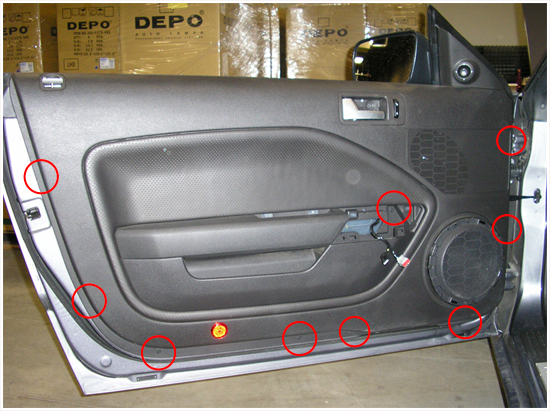
8. Remove the plastic cover next to the side mirror. You may be able to pop this off using hand pressure, otherwise use your jeweler's flathead. To avoid making the panel, wrap it in a shop towel.
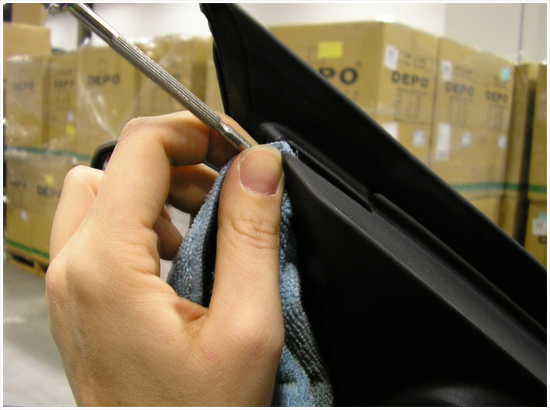
9. Disconnect the power mirror connector.
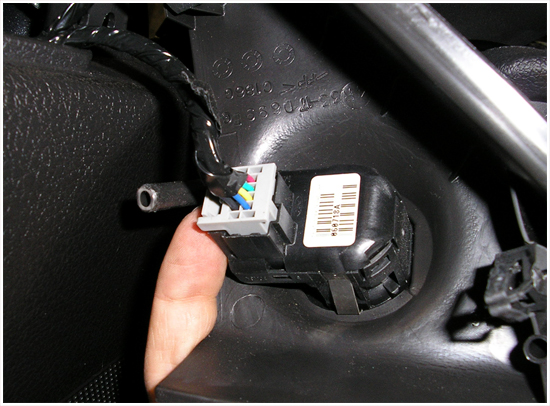
10. Remove the interior panel by lifting up on the handle. Remove any electrical connections.
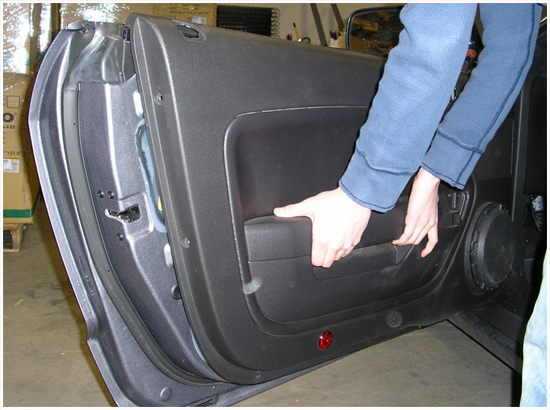
11. In order to remove the door release cable, you will need to remove the door handle assembly. To do this, use a small flathead screwdriver wrapped in a shop towel to pry away the faceplate and/or push from the back of the assembly. There are two clips on the bottom. You will need to use a significant amount of force.
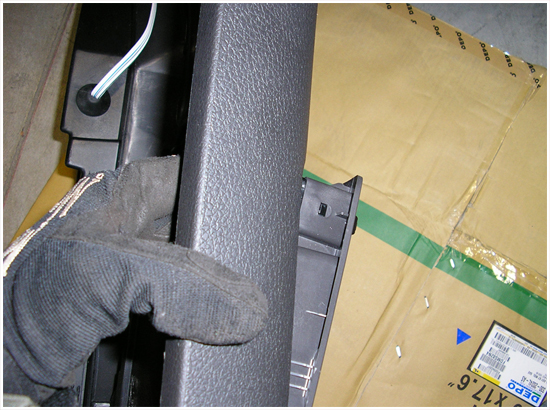
12. Rotate the door handle assembly and slide it out the back of the door.
13. To remove the door handle release cable, use a small amount of pressure with your flathead or a needlenose pliers to move the door cable off the door handle. BE VERY GENTLE - IF YOU STRETCH THE CABLE, THERE IS NO ADJUSTMENT, IT WILL HAVE TO BEREPLACED!
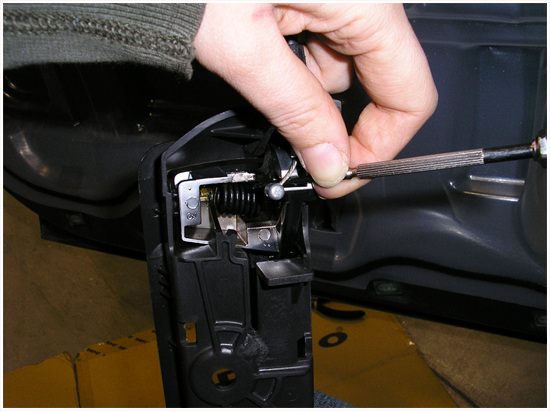
14. Remove the stock handle from the cup. The easiest way to do this is to first remove the spring with a jeweler's screwdriver. Use the screwdriver to pry out the center of the spring then lift its long "leg" out of the recess where it sits. Use caution and wear eye protection as the spring will jump abruptly out of the cup once released. Be very careful not to damage the spring as it will be reused.
15. To release the handle from the cup, use two jeweler's flathead screwdrivers. From the back, hold the tab that prevents the handle from rotating into the fully open position open with a wedged screwdriver. From the front, use the other screwdriver to pry the stock handle off of the tab. Be very careful not to crack anything. You may want to wrap your tools in shop towels to prevent marks.
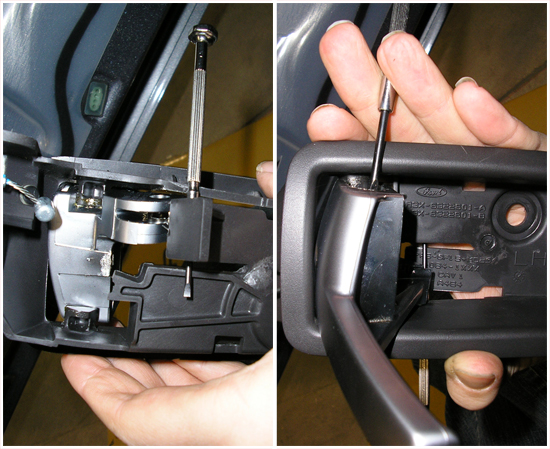
16. To install your billet handle, pop it into place. To assist in this, you may want to leave the rear jeweler's flathead hold the tab up.
17. Reinstall the stock spring using your needlenose pliers, making sure it is all the way in the pocket with the bottom leg against the recess at the back of the cup. Test operation of the handle, insuring that it opens and closes properly. Note the orientation of the spring - it is very important that this mechanism functions properly, otherwise the door could open while the vehicle is moving. Lubricate with a quality grease. Attach the door release cable to your new handle using your needlenose pliers.
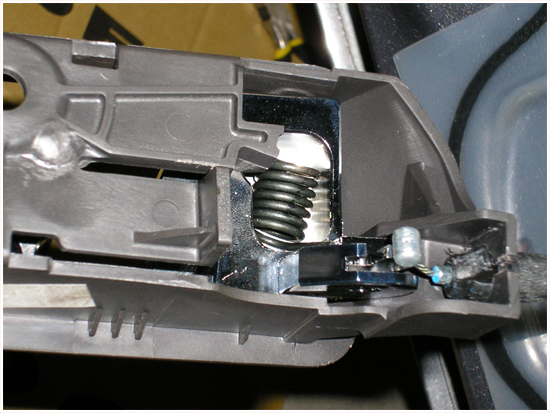
18. Reinstall the door handle cup into the door panel, then reinstall the door panel on the car, remembering to feed the window switches through the appropriate opening. Also remember to re-attach any connection. Reassemble the door.
19. Using the same process, do the passenger's side door
20. Reconnect the negative battery terminal.
21. Congratulations! Enjoy your new billet aluminum door handles.
Installation instructions provided by Manufacturer.


