How to Install BMR 8.8 in. Differential Bearing Kit (79-04 All) on your Ford Mustang
Tools Required
- Jack and jack stands
- Sockets and wrenches – 18mm
- 2.25” wrench, large Channel-Locks, or BMR stubby wrench #SW009
- Large dead blow hammer or hammer and block of wood
- Pry-bar
- Blue Loctite

Shop Parts in this Guide
INSTALLATION:
1. Lift the rear of the vehicle and support with jack stands under the frame rails.
2. If you want to, removing the wheels/tires will allow more light and more access to the work area.
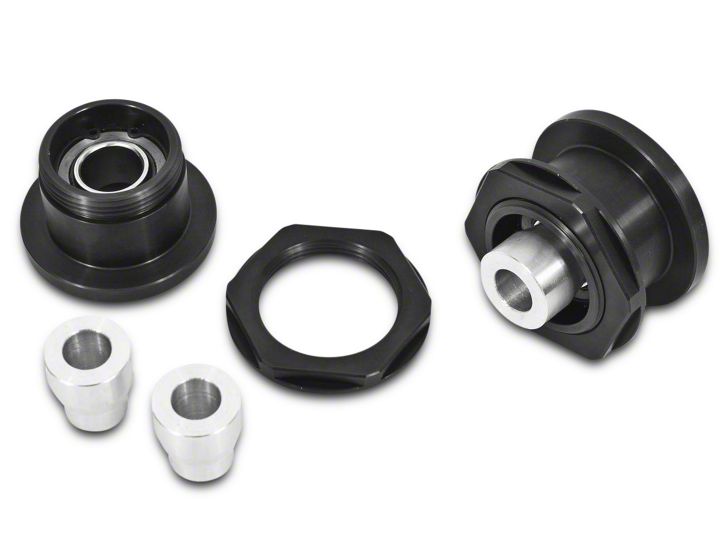
3. Using a 18mm wrench and socket, remove the bolts for one of the upper control arms as seen in IMAGE 1. Remove the control arm. NOTE: Do not remove both sides at the same time.
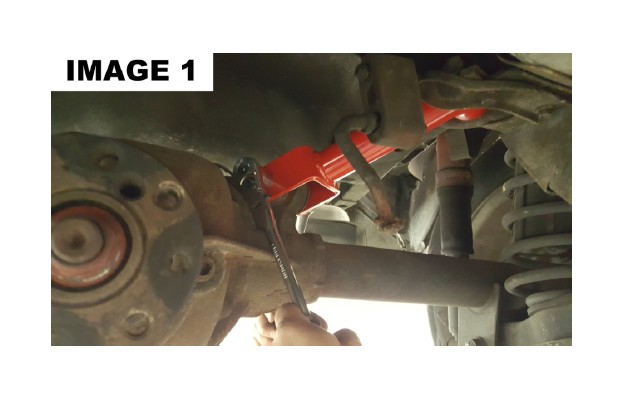
4. Removing the factory upper bushings can be difficult. An air hammer is probably the easiest way. Other options are drilling out the rubber until the center of the bushing falls out then knocking out the outer sleeve with a hammer. IMAGE 2 shows using an air hammer to get the job done.
5. Once the old bushing is out, sand or file the inside of the bushing mount on the rear end to make a smooth bore for your new aluminum bearing cups.


6. Lightly oil the inside of the bore.
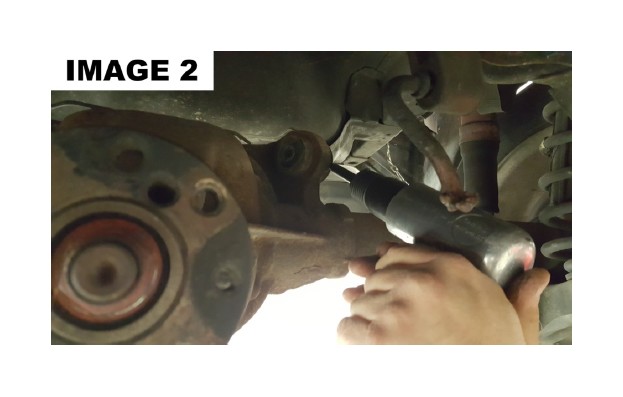
7. Drive the BMR aluminum bearing into the bore using a large dead blow hammer as shown in IMAGE 3 on the next page.
8. Once the bearing is seated, apply Loctite to the threads of the retaining nut. Thread the nut onto the housing then tighten it with a 2.25” wrench. NOTE: BMR sells a low cost stubby 2.25” wrench for this application. Also you can use a large set of Channel-locks, although it will mar the aluminum.
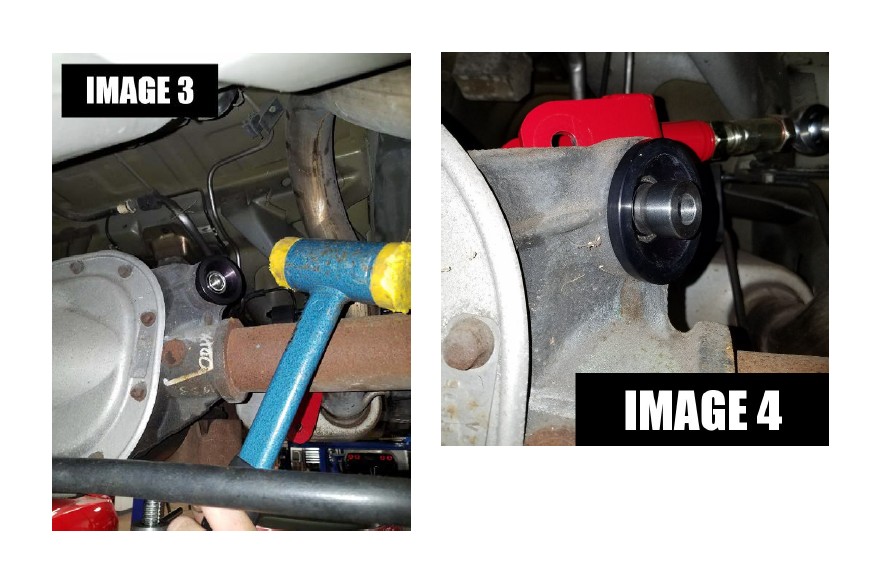
9. Insert the bearing spacers as shown in IMAGE 4 then replace the upper control arm.
10. Repeat this process for the other control arm.
11. Re-install the wheels/tires if removed then lower the vehicle.


