Best Sellers
How to install BMR Rear Lower Control Arm Relocation Brackets on your 2005-2012 Mustang
Installation Time
2 hours
Tools Required
- Wrenches: 15mm, 18mm, 22mm
- Sockets: 18mm, 22mm
- Jack and Jack Stands
- Pry-bar, Hammer
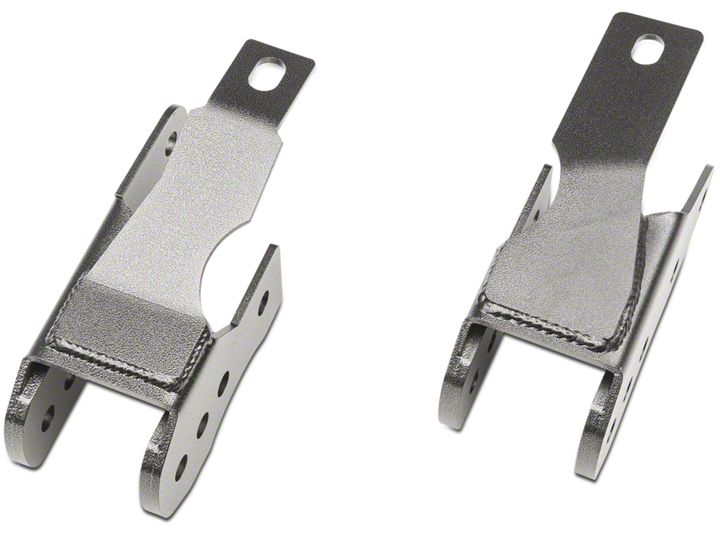
Shop Parts in this Guide
Installation
1. Lift rear of vehicle and place stands under the rear axle.
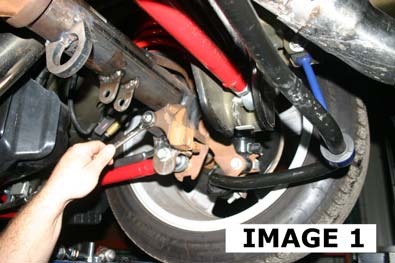
2. Begin with the passenger side. Using a 15mm wrench, loosen the axle damper weight mounting bolt and remove the damper as shown in IMAGE 1. NOTE: please disregard this step if your vehicle did not come with these weights.
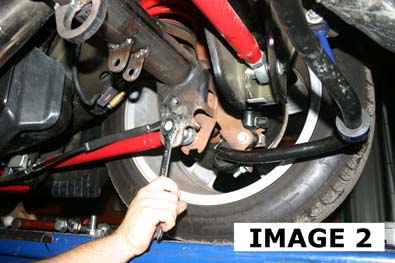
3. Using an 18mm socket or wrench, remove the lower control arm bolt as shown in IMAGE 2. Lower control arm to gain access to mount area.
4. Slide the passenger side BMR Relocation Bracket over the OE mount and align the holes.
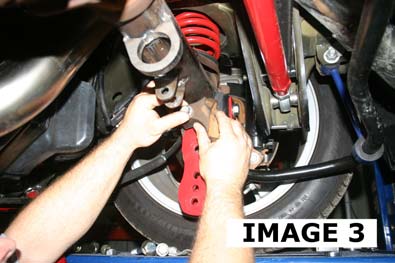
Re-install the axle damper weight but do not tighten the bolt yet (IMAGE 3) NOTE: if your vehicle did not come with damper weights installed, use the provided 12mm x 30mm bolts for this mounting position.
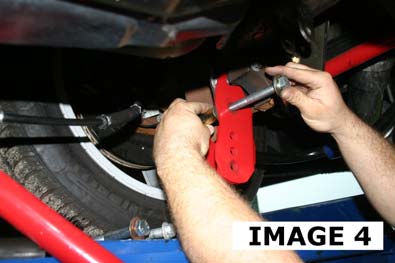
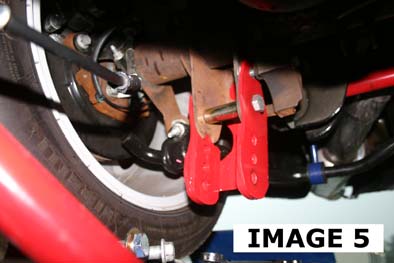
5. Locate the gold colored bolt spacer and a 14nun x 1 OOmm bolt from the provided hardware pack and install it into the OE mounting hole as shown in IMAGE 4. Do not tighten yet. When installed, it should look like IMAGE 5.
CONTROL ARM RELOCATION BRACKETS (Cont.)
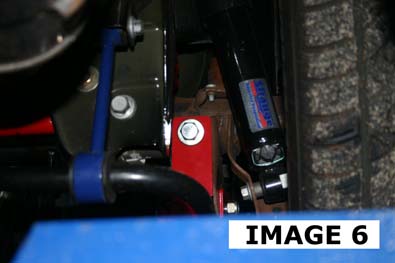
6. Locate the short 14mm bolt and nut in the hardware packet and insert it into the upper mount of the relocation bracket as shown in IMAGE 6.
7. Slide a 22mm wrench up into the control arm mount and onto the nut. Tighten the bolt to 129 ft/1bs. using a 22mm socket.
8. Tighten the sleeve and cross-bolt to 129 [tilbs. then tighten the upper damper bolt to 45ft/lbs using a 22mm socket and wrench
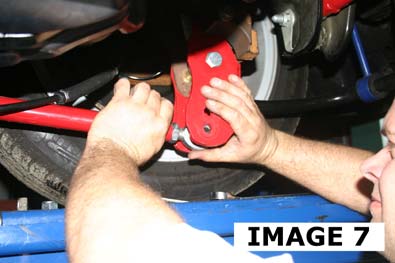
9. Position the control arm into the desired hole as shown in IMAGE 7 and insert a new 14mm x 1 OOmm bolt and nut. Tighten the bolt to 129 ft/lbs.
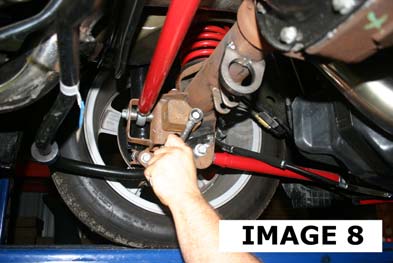
10. Move to the drivers' side next and remove the axle damper weight using a 15rnrn wrench as shown in IMAGE 8. NOTE: please disregard this step if your vehicle did not come with these weights.
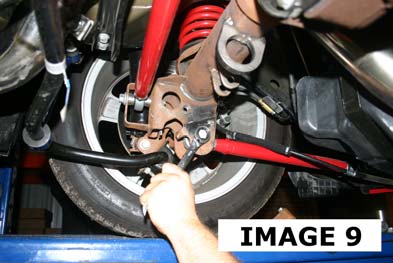
11. Using the 18mm wrench, loosen the control arm mounting bolt and lower the control arm out of the See IMAGE 9.
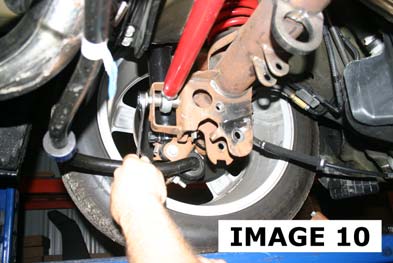
12. Using an 18nun wrench, remove the Panhardrod bolt as shown in IMAGE 10.
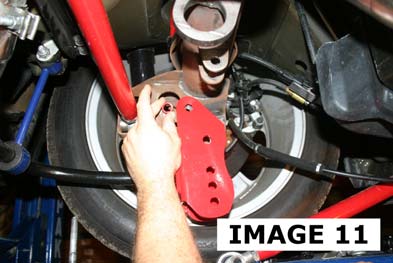
13. Slide the BMR Drivers' side relocation bracket up onto the mount. The rear leg of the mount should fit up into the OE bracket of the rearend on the backside of the Panhard rod mount. Insert the provided spacer behind the upper hole as shown in IMAGE 11.
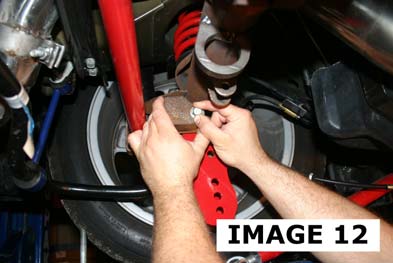
14. Once properly positioned, re-install the damper weight and leave the bolt loose. See IMAGE 12. NOTE: if your vehicle did not come with damper weights installed, use the provided 12mm x 30mm bolts for this mounting position.
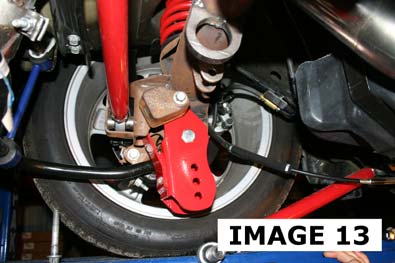
15. As in step #5, install the gold spacer and 14rnrn x 1 OOnun bolt and nut into the OE control arm mounting hole and leave the bolt loose. See IMAGE 13.
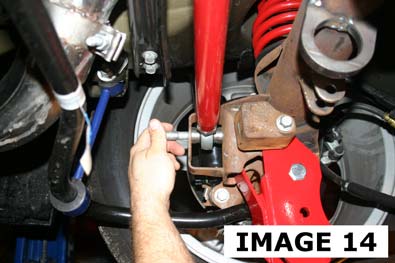
16. Re-install the Panhard rod mounting bolt and tighten to 100 ft/lbs. using an 18mm wrench or socket. See IMAGE 14.
17. Tighten the main 14mm bolt and nutto 129 ft/lbs. using a 22mm wrench and socket.
18. Tighten the damper weight bolt to 45 ft/lbs using a 15mm wrench.
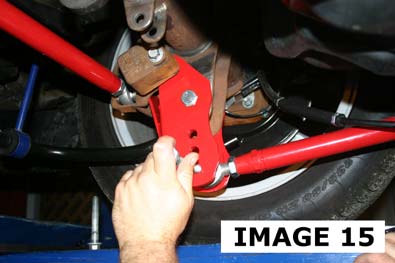
19. Install the control ann into the desired mounting hole and insert the provided 14mm x 100mm bolt and nut as shown in IMAGE 15. Tighten to 129 ft/lbs.
20. Lower vehicle
