How to install a BMR Rear Sway Bar on your 2005-2010 Mustang

Shop Parts in this Guide
Installation

Rear Installation:
1. Lift the rear of the car by its axle and support. It is easiest to remove and install the swaybar with stands under the axle and wheels removed.
2. Remove the four outer swaybar bolts (two on each side) using a 15mm socket. Remove the bushing saddles.
3. Using the same socket, remove the two (one on each side) swaybar link bolts located on the frame and then remove the swaybar.
4. Install the bushing end of the BMR supplied endlinks into the frame mounts and install the factory bolts.
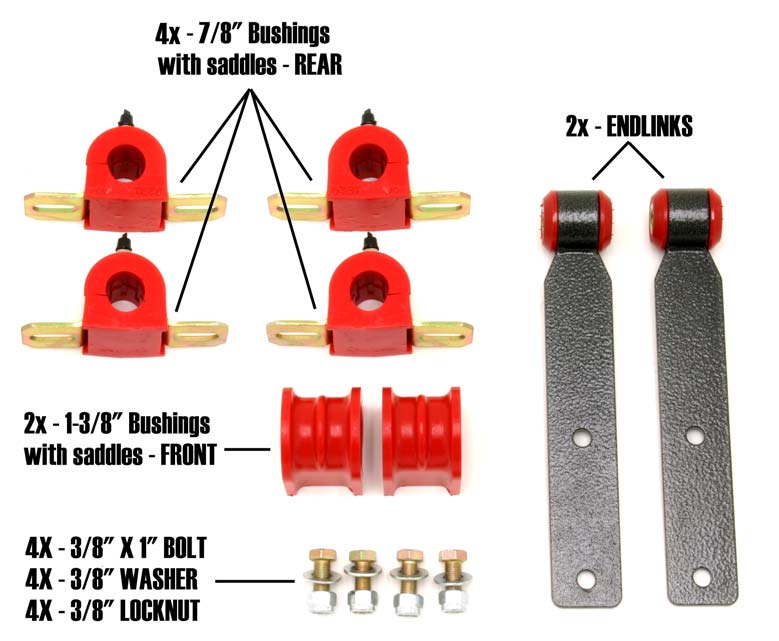
5. Install the 7/8” saddle bushings over the swaybar at the endlink position. Insert the supplied 3/8” bolts, nuts, and washers onto the hanging endlinks to support the swaybar. Leave these bolts finger tight.
6. Install the remaining 7/8” bushings on the ends of the swaybar and then pivot the bar up into position on the rearend. Insert OE bolts and tighten.
7. Tighten all endlink bolts. Grease bushings. Re-install wheels and tires and lower vehicle.
Front Installation:
1. Lift nose of vehicle and support with stands.
2. Remove the outer swaybar endlink bolts using a 18mm socket. Leave endlinks attached to struts.
3. Using a 15mm socket, remove all 4 bushing saddle bolts (two per side) and then remove the swaybar.
4. Lube the inside of the 1-3/8” bushings and install them onto the new swaybar.
5. Position the factory saddles over the new bushings and mount the swaybar in place using the OE hardware. Tighten.
6. Pivot the swaybar up into position and insert the endlinks into the swaybar. Tighten.
7. Lower vehicle.
