How to Install Canton Drag Pro Rear Sump Oil Pan - Steel (79-93 5.0L) on your Ford Mustang
Shop Parts in this Guide
We would like to thank you for your purchase. To ensure the best results, we recommend the following:
1) Please refer to the Canton oil pan installation instructions included with these instructions for general installation and sealing procedures, and refer to the additional instructions listed here for steps specific to your Canton Racing Power Series Oil Pan.
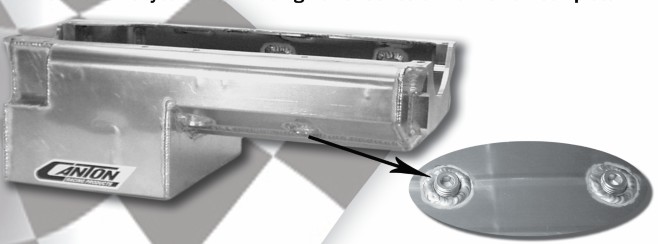
2) Remove the 1/2" NPT plugs along the pan rail. Inspect the threads and apply Teflon Tape to the threads. Refer to image below for plug location.
3) Apply a thin bead of silicone to the entire pan rail and set gasket onto the pan rail. Apply a thin bead onto the block side of the gasket and set pan onto the block.
4) Install the pan bolts or studs along the pan rail. For the mounting holes corresponding to the plugs, use a long 3/8" drive extension. DO NOT torque the pan at this time. Allow the silicone to cure.
5) Once the silicone is cured, torque the pan down according to the specs on the oil pan installation instructions.
6) Re-install the 1/2" NPT plugs back into the pan. (NOTE: DO NOT over tighten the plugs. These plugs are NPT thread which means they are designed with a taper and will only thread in so far. Over tightening can result in damage to the threads as well as leaking from the plug.)
Installation of you Canton Racing Power Series Oil Pan is now complete.


