Best Sellers
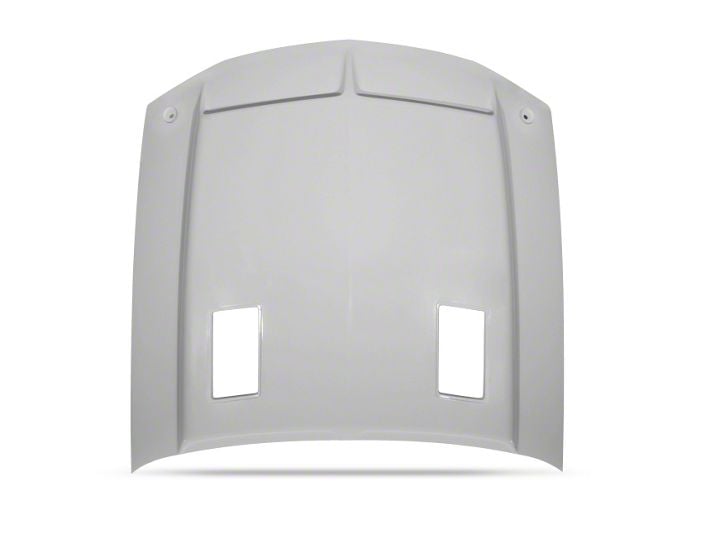
How to Install Cervini's Type IV Ram Air Hood - Unpainted (07-09 GT500) on your Ford Mustang
Shop Parts in this Guide
Notice: Pre fi t Before Painting! Painted or Altered Parts are Non-Refundable! The surface that is in contact with the 3M double sided tape must be cleaned with Isopropyl alcohol & the temperature must be no less than 75 degrees F, before applying!
STEP 1: Remove the striker bar from the factory hood. (It will be re-used on your new hood.)
STEP 2: Install the hood and adjust it until proper alignment with matching panels is achieved.
STEP 3: Remove the front bumper and head lights.
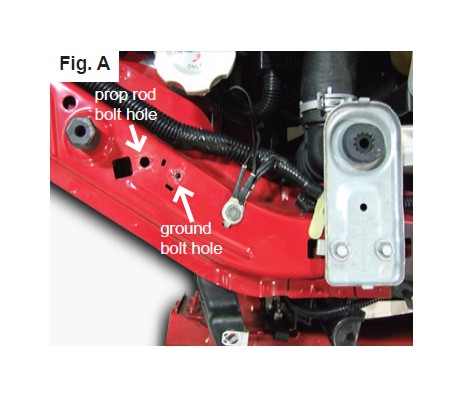
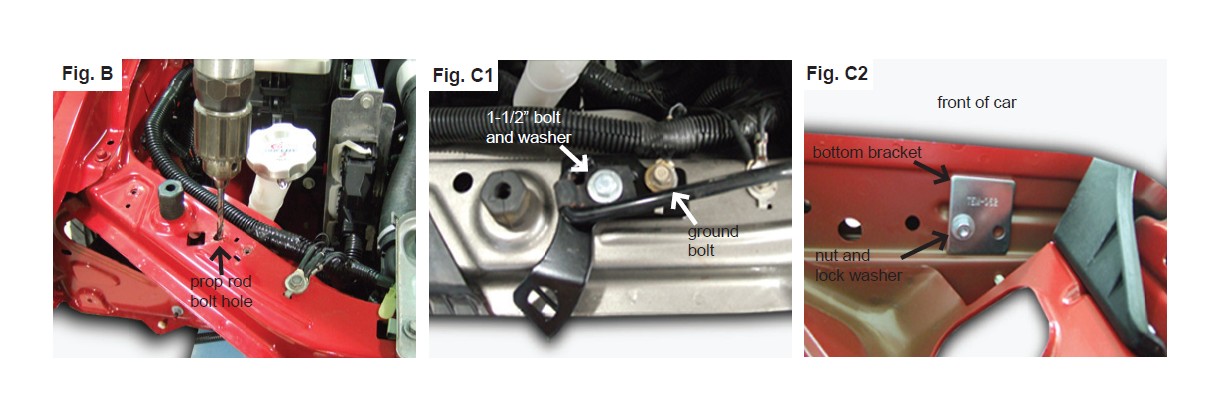
STEP 4: Remove the prop rod bolt. Remove the ground bolt from the raditor support and install the ground wires to the ground bolt next to it as shown in fi g.A. Next, carefully drill a 5/16” hole straight through the radiator support where the prop rod gets bolted as shown in fi g.B. Set the twist lock bracket on the radiator support and reinstall the ground bolt. Install the provided 1-1/2” bolt with a washer through the prop rod. Install the bottom bracket with the supplied nut and lock washer as shown in fi g. C1 and fi g.C2. (Do not tighten at this time.)
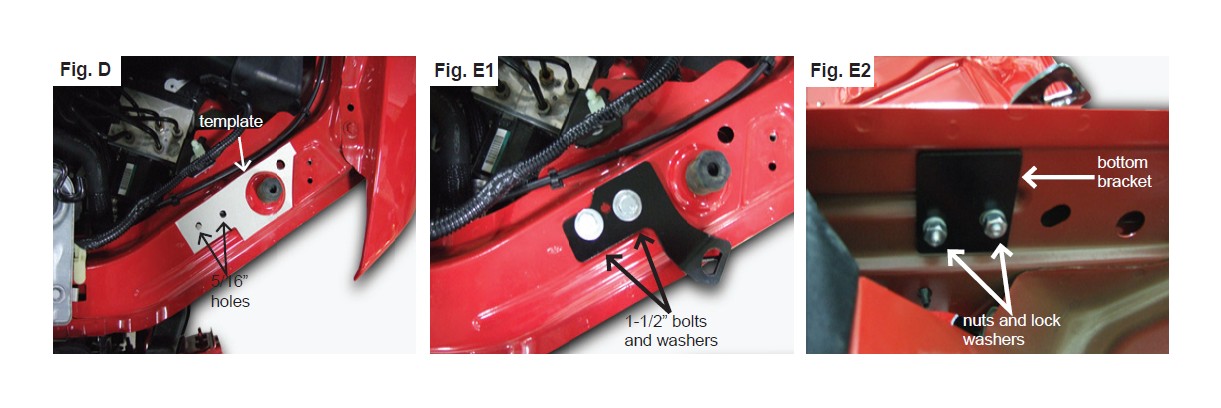
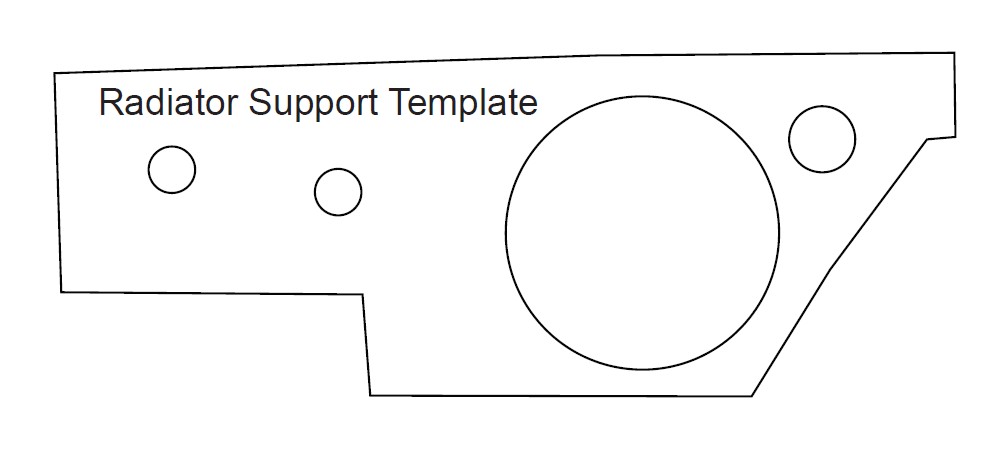
STEP 5: Cut out the supplied paper template and tape it to the radiator support as shown in fi g.D. Center punch the marked locations on the template and drill two 5/16” holes in the radiator support. Set the hood lock bracket on the radiator support and install the provided 1-1/2” bolts and washers through the pre-drilled holes in the radiator support as shown in fi g.E1. Install the bottom bracket with the supplied nuts and lock washers as shown in fi g.E2. (Do not tighten at this time.)
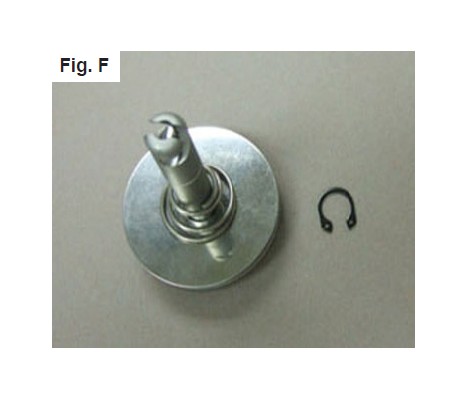
STEP 6: Remove the snap ring and spring from the hood locks as shown in fi g.F. Close the hood and install the hood lock through the top of the hood making sure that the pin goes through the hole in the bracket. Then, turn the hood lock on and off until it twist easily. (The hood lock has such a tight tolerance around the pin in the bracket that it takes multiple turns to properly mate the pin to the hood lock.) Once the hood lock is sitting fl at with the hood and evenly centered in the hole tighten the hood lock bracket to the radiator support. Repeat on the opposite side of the hood. Once the hood locks are aligned properly and the brackets tight, close the hood and make sure the twist locks are working properly and keep the hood from lifting up.
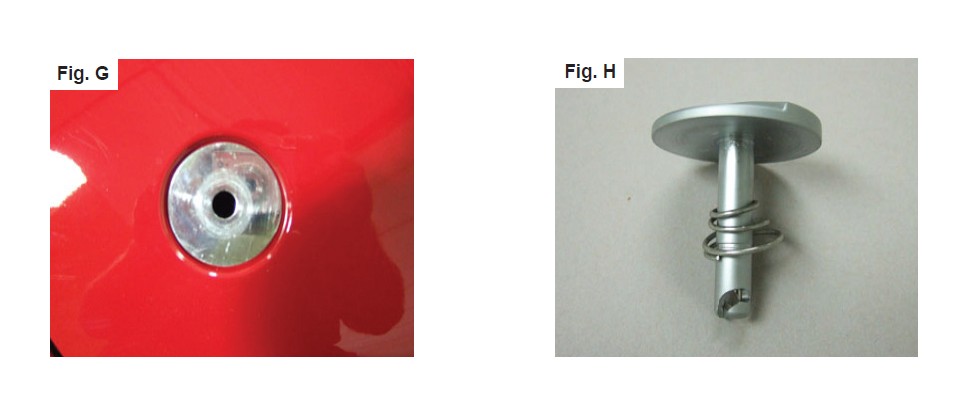
STEP 7: Remove the metal washer from the hood lock and install it to the hood 3m tape side down as shown in fi g.G. (Clean the area fi rst with the supplied Isopropyl alcohol. Then, carefully center the washer perfectly in the hole. If not the hood lock will rub the paint off the hood and not sit correctly.) Install the hood lock in the hood with big end of the spring facing down as shown fi g.H. Then reinstall the snap ring. Repeat to the other side.
STEP 8: Install the factory striker bar with blue locktite. Adjust primary latch until the striker bar fi ts into the latch. Make sure when the hood is closed you can hear the striker bar “click” into the latch.
STEP 9: After you here it click, test it to be sure it’s working properly by grabbing the front edge of the hood and slowly pulling upward with a steady even pressure. If the hood opens it’s not adjusted properly; repeat STEP 8 until hood cannot be pulled open after it’s closed.
WARNING: MAKE SURE THE SAFETY CATCH IS WORKING PROPERLY!
STEP 10: To ensure the safety catch is working properly, close the hood, pull the hood release from inside the car and the hood will partially open. Slowly pull upward on the hood and jiggle it at the same time. If it opens without pulling the safety catch lever then the latch needs to be readjusted. The safety catch prevents the hood from opening in the event the primary latch fails.
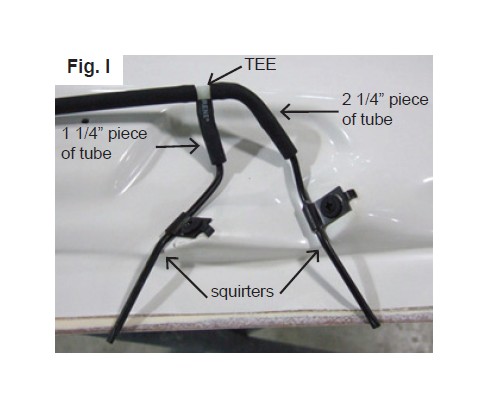
STEP 11: Locate the hood stoppers located on the radiator support. Adjust upward until they apply a small amount of pressure to the underside of the hood when it is closed. This will prevent the hood from shaking or rocking. Install the squirters as shown in Fig.I. (You may need to bend the squirters into position.)
STEP 12: After all adjustments have been made, reinstall the weather striping on the rear of the hood. You will need to cut it so that it does not cross over top of the squirters. Then, run the squierter hose thorough the weather striping.
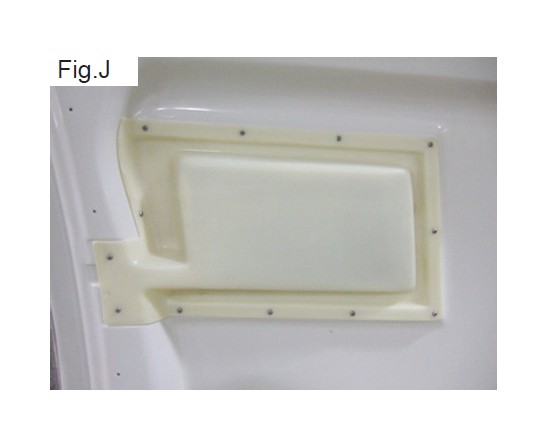
STEP 13: The inside of the drip pans are visiable through the billet insert and need to be painted fl at or semi gloss black. After the hood and drip pans have been painted, align the drip pan with the heat extractor opening in the hood. Use the supplied small silver philips screws to screw the drip pan to the under side of the hood through the pre-drilled holes in the drip pans as shown in fi g.J. The small silver screws will tap themselves into the hood. (Tighten the screws with a screw driver only. Using a powered screw driver will cause the holes to strip.)
STEP 14: Included in the hardware packet is a roll of 3M double sided tape. After the trim rings have been painted, install the 3m double sided tape along the inside edge of the trim rings as shown in fi g.K. After the hood has been painted remove the double sided tape backing from the trim rings and place them in the opening located in the rear of the hood as shown in fi g.L. The back of the trim rings are marked L for left side and R for right side. Be sure to center the trim rings in the opening. Firmly press on the edges of the trim ring to secure it to the hood.

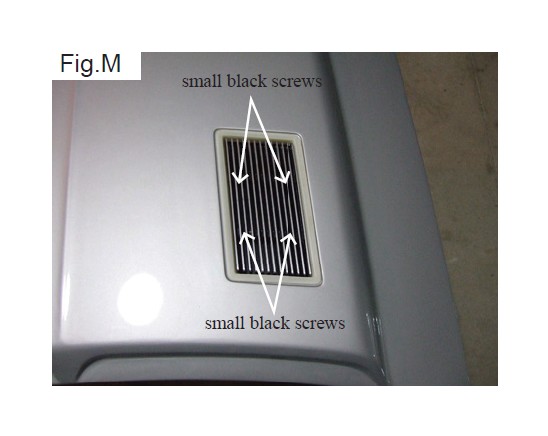
STEP 15: Lay the billet inserts in the tirm rings. Align the predrilled holes in the billet insert with the pre-drilled holes in the trim rings. Use the supplied small black screws to secure the billet grill to the trim ring through the pre-drilled holes as shown in Fig.M.
URETHANE PAINTING INSTRUCTIONS
VERY IMPORTANT: The following painting procedures MUST be followed EXACTLY for PROPER ADHESION and to prevent fish eyes.
1. To remove any mold release contaminants, clean the back of the part fi rst. Using 2 new clean rags, saturate the fi rst rag with plastic prep cleaner* and begin cleaning. Then use the second rag to remove the prep cleaner. Continuously fold both rags to their clean sides during the process. Use 3 sets of new rags throughout the process. This prevents mold release contaminants from transferring to the painted surface.
2. Repeat step one on the front of the part.
3. Rinse the part with water. Apply a generous amount of Ajax® or sand fi x* to a red scuff pad* (3M Scotch Brite Brand) and scrub the surface to be painted THOROUGHLY (especially where the 2-sided tape is installed, on the back side of the part, and all the hard to reach areas). Then rinse with water and dry. The scrubbed surface should be dull. If any shiny spots show, repeat the process on those areas.
4. Using another set of clean new rags, again clean the surface to be painted with plastic prep cleaner.
5. Spray the surface to be painted with adhesion promoter* including the areas where the 2-sided tape is installed (follow the instructions on the can for application and drying time).
6. Apply 3 to 4 coats of urethane primer* with fl ex additive* (follow the instructions on the can for application and drying time).
7. Wet sand primer with 600 grit sandpaper. Be careful not to sand through the primer. If you do, you MUST clean those areas with plastic prep cleaner, apply adhesion promoter and prime. Once the primer has dried, wet sand the areas that were touched up. Your surface is now ready for paint.
Note: Make sure you PRIME and PAINT the areas where the 2-sided tape is used as you would if it was the fi nished sided of the part. The tape adheres best when it is applyed to a painted surface.


