Guaranteed 12/24 Delivery Still Available see item page for details! available on most items - Details
How to install a Classic Design Concepts Convertible Lightbar on your Mustang
Installation Time
4 hours
Tools Required
- ¼" Drive Ratchet Pop Rivet Tool
- ¼" Drive 3" Extension Drill Motor
- ¼" Drive 10mm Socket** Drill Bits 1/8", 19/64"*, 13/32"*
- ¼" Drive 7mm Socket ¾" Hole Saw
- T-25 Torx Bit* 1" Hole Saw
- 3/8" Drive Ratchet 1 ¾" Hole Saw
- 3/8" Drive 3" Extension Door Trim Tool (Fork Tool)
- T-50 Torx Bit Center Punch
- ¼" Allen Wrench Hammer
- Wire Crimper Putty Knife
- 3/8" Drive 18mm Socket***
- *99-04 Models seatbelt loop modification
- ** 94- 02 Models rear seat removal
- *** 03-04 Models rear seat removal

Shop Parts in this Guide
Installation
Note: Read installation instructions before starting.
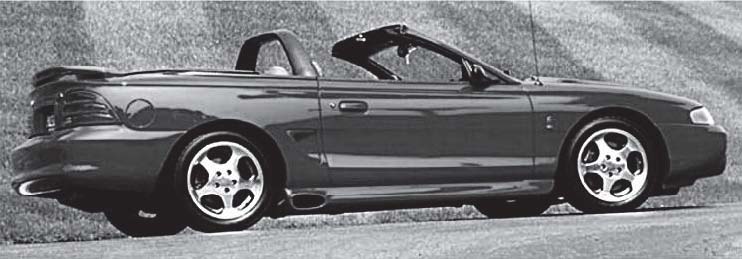
Component List:
- 1 – Light Bar
- 4 – Poly Plugs
- 4 – Light Bar Bolts
- 4 – Light Bar Washers
- 2 – Light Bar Rivets
- 2 – Light Blue Connectors
- 2 – Dark Blue Connectors
- 1 – Left Light Bar Brackets
- 1 – Right Light Bar Brackets
The Classic Light Bar is NOT intended to protect in the event of a rollover.
Classic Light Bar Patented: All rights reserved by Classic Design Concepts
Light Bar Installation Instructions for 1994 - 2004
1. Remove Back Seat:
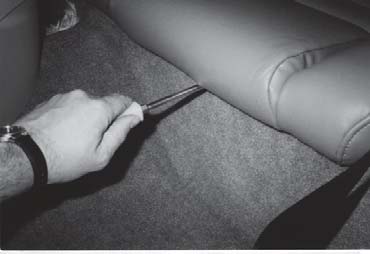
- A spring-loaded retainer holds the lower seat cushion. The cushion is released by locating the retainer that is approximately 10 inches from the edge of the cushion either side. Take a flat screwdriver and push in retainer release button. The seat should pop up and be released.
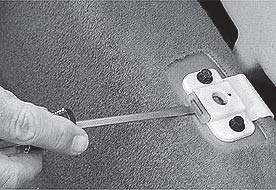
NOTE: ’03/‘04 Models have Child Restraint Bracket which require the use of 18mm socket.
B. Two 10mm screws hold the back seat cushion, located on each lower corner. Lift seat upward releasing cushion from bracket at the top.
2. Remove Side Quarter Trim Panels:
A. Remove Upper Speaker Grille (or dummy cover) and “T” trim between speaker opening and shoulder belt opening.
B. Remove retaining pushpin at convertible top well at the back edge of the trim panel.
C. Remove the two- (2) small pins holding rubber seal to front upper edge of trim panel.
D. Remove rocker sill covers starting at the front pulling upward working to rear.
E. Remove the two- (2) pushpins aligned vertically behind seat back, in the trim panel.
F. For 94-98 Models – Firmly grasp quarter trim panel and pull forward to dislodge the two (2) retaining clips along front inside wall of the trim panel. With panel loose lean panels to access the “torx” head bolt that retains the seat belt retractor and remove bolt.
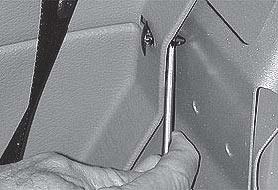
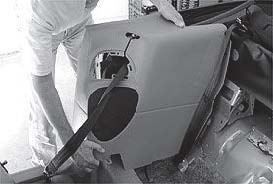
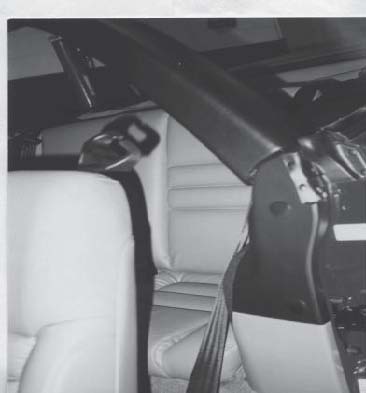
G. For 99 - 04 Models – Remove “torx” head bolt holding end of seat belt to vehicle. Slide seat belt end or retractor through panel and remove trim panels from vehicle (as pictured below).
3. Removal of Speakers:
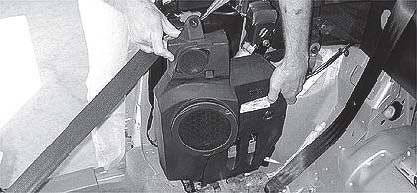
A. Remove two 7mm screws from speaker mounts (one in the door jam and one at the top.) Lay speakers out of the way
4. Loosen Inner Quarter Covers:
A. Pull plastic quarter covers loose from vehicle by prying with a putty knife – two (2) pins and body sealer/caulk hold them on.
5. Locate and Mount Light Bar Brackets:
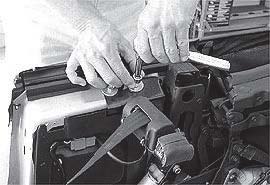
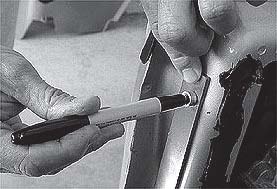
A. Use the right side bracket (marked with an “R”) to mark the left side of vehicle and the left side bracket (marked with an “L”) to mark the right side of vehicle. Place the bracket against the sheet metal of vehicle to the inside of body seam with crimp nut facing to front of car, line up the small 1/8” hole with the small hole on the car. (The hole in vehicle is not used on a car with Mach 460 Stereo systems, but is used with the standard stereo for mounting speaker bracket). Use the 1/8” rivet supplied in kit, for aligning the bracket with the hole in the vehicle, then line the brackets to run parallel with the edge of the “B” pillar hold in place and center punch through nuts on bracket. (See figure 5)
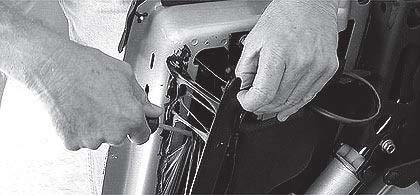
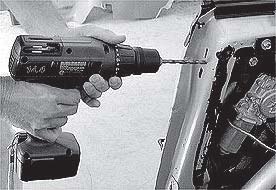
B. Next, drill center punched marks with a small 1/8” drill bit, then enlarge to ¾”.
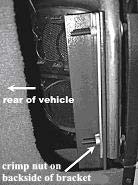
C. Mount your brackets behind “B” pillar by reaching bracket through quarter opening, align small hole through “B” pillar into hole in bracket with pop rivet provided. Then rivet into place. The holes you drilled should line up with the nuts of the bracket.
NOTE: The Crimp nuts on brackets MUST face rear of vehicle for proper assembly…bar will not tighten correctly if reversed.
D. Re-stick quarter cover into place and remount speakers, cars with standard stereo will need to trim or bend speaker mount bracket due to light bar bracket mount rivet.
6. Laying out holes in Trim Panel:
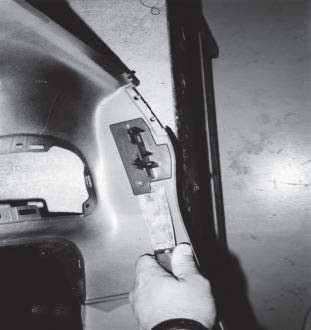
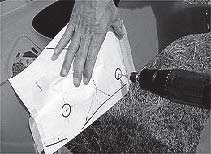
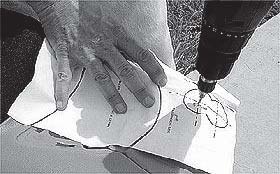
A. With a putty knife, remove the upper mounting clip. Using the template provided, carefully layout template and tape in place. Then with the 1/8” drill bit, drill center of holes, marked on template. Repeat for other side.
7. Drill Trim Panel Holes:
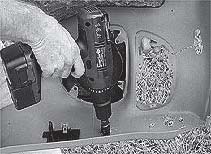
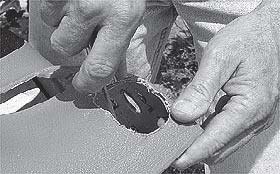
A. With a 1 ¾” hole-saw, drill the 1/8” hole on the topside of the trim panel, the two holes will intersect. After drilling, file the center making the hole a long oval.
B. Now with a 1” hole-saw drill, from the backside, the two 1/8” holes in front of the trim panel.
8. Reinstall Trim Panels:
A. Reinstall both trim panels by reversing step 2:
9. Placement of Classic Light Bar:
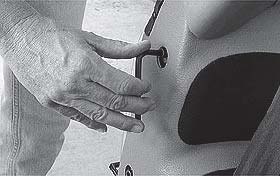
A. Line up Classic light bar with top holes in trim panel. Guide your brake light wire through trim panel. Evenly lower classic light bar into holes. You may have to ask for assistance to push the bar inward while lowering.
10. Bolting the Classic Light Bar:
A. Using the bolts provided, line up the classic light bar with the nuts on bracket, you may have to push or pull the bar to align holes. Leave the bolts loose until all four bolts are installed, then push the bar down so the base of the bar sits against the trim panel. Tighten bolts.
11. Bolt Covers:
A. There are four caps provided, push them into holes on trim panel, covering bolts.
12. Connecting the Brake Light
Now that the bar is in the car and bolted down, you will need to connect the wires for the brake light. You will find the main wiring harness on the driver-side rear seat area; it is a long rectangular box. After cutting away the black tape, pull out the wires from the box. You will need to find the Red wire with a Green stripe for 94-98 models OR Solid Green for 99-04 models and a solid black wire. Using the 2 dark blue connectors, tap into each wire. Then crimp the light blue connectors to the wires form the light bar. Plug connectors together. Test the brake light by depressing brake pedal. If light does not work, reverse your connections as the LED is polarized.
13. Reinstall your back seat:
Reinstall by reversing step 1.
Once the light bar is installed, check the seat belt clearance on the driver seat and passenger seat in the full upright position and each consecutive position back. If the seat belt retainer is hitting the bar, gently bend retainer down. Failure to do so could result in the damage to the Light Bars vinyl finish. CDC will not be responsible for any damage that may occur if this step was not taken.
14. Checking Belt Clearance after Light Bar is installed:
1999 & 2004 Mustang Bulletin
Due to the larger size of the seat belt shoulder loop on the 1999 & 04 Mustang, modifications of this loop is necessary or the purchase of new loop is recommended PART # (Left) – F4ZZ 76610C07 A (Right) – F4ZZ 76610C06 A
Modification Instructions:
1. Lift headrest and headrest support bars trim all the way up.
2. Insert tongue depressor (or slim jim) down the front side of the headrest bar. Push depressor down as far as possible. When the depressor is beneath the headrest trim piece, push headrest all of the way down.
3. Lift headrest to remove.
4. Bend seat belt shoulder strap loop down so that the leg that attaches under headrest is flat.
5. Remove seatbelt loop fasteners with torx bit.
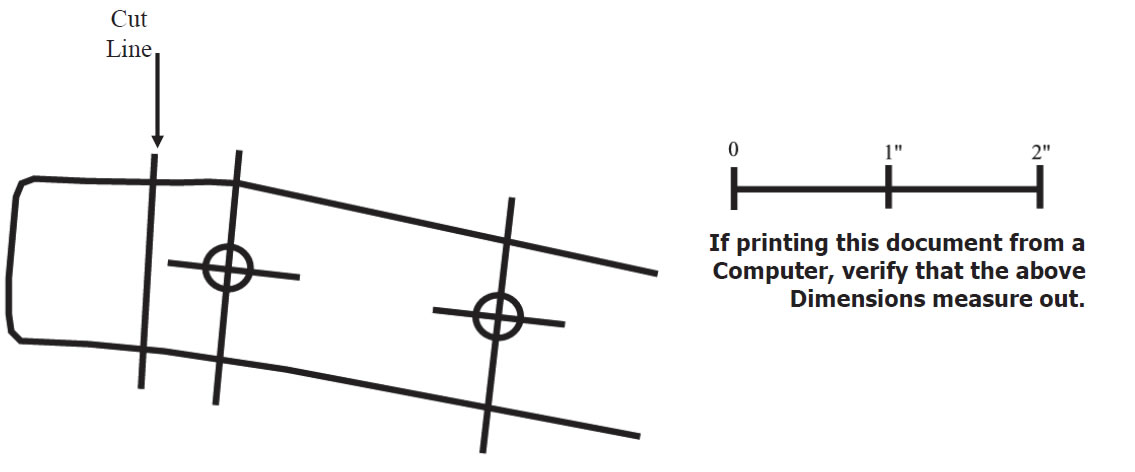
6. With template shown below, center punch for new holes and mark for cut off.
7. Drill 1/8” Pilot holes.
8. Drill 13/32” hole in plastic only (on topside only)
9. Drill 19/64” hole through remaining material.
10. Cut off end on along cut off line.
11. Clean off any burs and re-install.
Thank you for choosing Classic Design Concepts for your restyling needs. If you have any questions or concerns regarding installation please contact [email protected] or call 866-624-7997.
