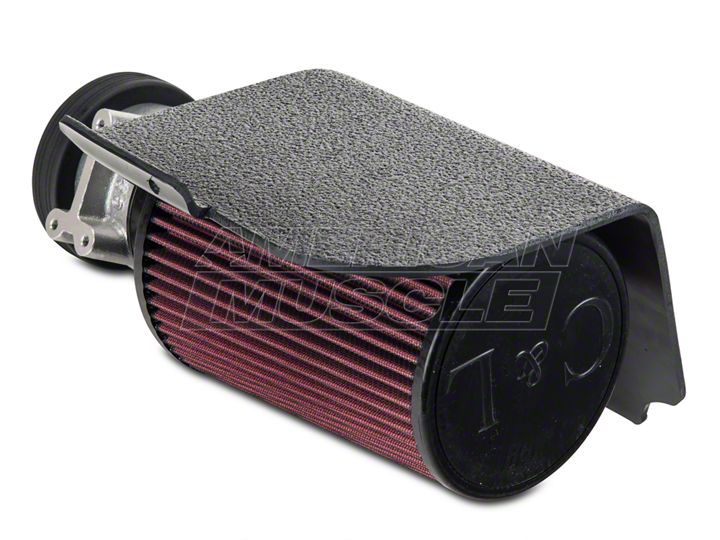
How to Install C&L Cold Air Intake w/ 73mm MAF on your Ford Mustang

Shop Parts in this Guide
Mass Air Flow System
1994-1995 Mustang 5.0L and
1994-2004 V6 Mustang 3.8L
(P/N 115, 115A, 115B, 118, 118A, 118B, 117, 117A)
C.A.R.B. EO# D-640
The following instructions detail the removal and replacement of the factory mass airflow assembly with the new high performance C&L Mass airflow system. Installation should take no more than 30 minutes to complete. You will need a flat head screwdriver and a 5/16” socket wrench.
Removal of the mass air and air filter box
1) You must remove the entire air meter and filter assembly by loosening the hose clamp located at the back of the plastic assembly where he factory intake hose hooks to the MAF box.
2) Disconnect the small wiring harness connector that goes to the mass air flow unit inside the box, and disconnect the other end from the air temperature sensor in the intake hose just after the MAF assembly.
3) Remove the bolt that is holding the air filter assembly to the passenger side fender. Set this bolt aside, because it will be re-used to secure the new mass airflow assembly to the fender.
4) Once these items have been disconnected, undo the two spring clamps that connect the air filter assembly to the MAF box. Now you may remove the entire assembly from the vehicle by first lifting the MAF box out, followed by the air filter box. (The stock rubber air horn which protrudes into the fender may need to be wiggled to release it from the fender well.)
Removal of the MAF Electronics from the stock housing
1) Pry up the snaps that surround the front of the plastic MAF box assembly. Once this is done, the stock MAF housing will become visible.
2) Disconnect the 4-wire harness connector from the MAF electronics by squeezing the connector at the bottom with your fingertips and sliding it away from the unit. Then press the harness through the rubber grommet it is inserted through. You will need to pull the small (outside) connectors through the hole to accomplish this.
Installation of C&L Mass air flow system
1) Transfer the factory electronics over to the new C&L housing, as described on the back of the page.
2) Install the supplied filter on the front of the C&L MAF.
3) Lower the entire assembly into the vehicle (filter first) and slide the back of the MAF unit (with the rubber spacer) into the large mouth of the intake hose. Tighten the clamp and check the entire diameter of the hose to ensure a proper seal.
4) Re-connect the 4-wire connector to the MAF electronics.
5) The shield will go over the air filter assembly and bolt to the fender using the stock bolt that you removed previously. The front of the shield will tuck just under the corner of the engine compartment and the side of it will slip just inside the frame rail. This ensures a “cold air” intake and protects the filter from the engine compartment heat. Installation is now complete. You may now start your vehicle.
MASS AIR INSTALLATION INSTRUCTIONS
1. Disconnect the battery to reset the computer.
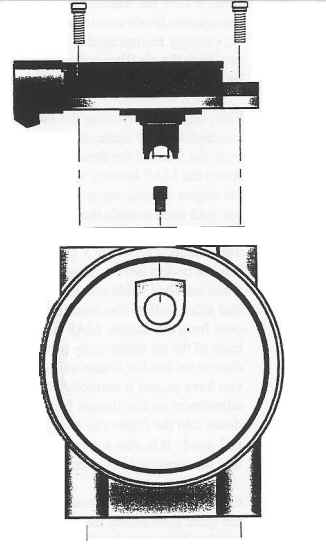
2. Disconnect the mass air flow (MAF) harness from the stock mass air, and remove the sensor from the stock MAF by removing the two fasteners on top. (A T -20 torx bit is supplied for your convenience.) Carefully lift the sensor and O-ring out of the stock MAF and set aside. Be careful not to damage the prongs or wires on the sensor.

3. Place the sensor with the o-ring into the C&L MAF unit and secure using the existing screws. The sensor should fall into place without any force, and you should feel the o-ring make contact with the housing for a good seal.
4. Remove the MAF bracket mounting bolts from the shock tower. Loosen the clamp at the back of the stock MAF, and release the four clips on the factory air filter housing cover.
5. Remove the stock MAF from the mounting bracket, and air filter housing cover. Secure the C&L MAF to the mounting bracket with the stock bolts, and attach the air filter housing cover to the C&L MAF. Reinstall the MAF bracket assembly in the vehicle. Clamp the air intake hose over the rear of the C&L MAF, and secure the factory air filter assembly. (If you are running the 8Omm C&L MAF then you will not reinstall the factory air box assembly. Use K&N filter RE-O870).
6. Refit the MAF harness connector to the C&L meter and reconnect the battery.
NOTE:
C&L Performance Inc is not responsible or liable for any damages to the factory sensor or computer due to improper handling during installation. Read the instructions thoroughly prior to installation.
Attn: Included with your C&L kit is a label with an ARB E.O. number. Make sure your ARB E.O. label is placed in plain view inside the engine compartment. The ARB E.O. label is required for passing the California Smog Check inspection.

