Guaranteed 12/24 Delivery Still Available see item page for details! available on most items - Details
How to Install a C&L Intake Manifold Spacer on Your 2015-2016 EcoBoost Mustang
Installation Time
2 hours
Tools Required
- Panel Removal Tool
- Ratchet
- Socket Set
- Flat Blade Screwdriver

Shop Parts in this Guide
Step 1:
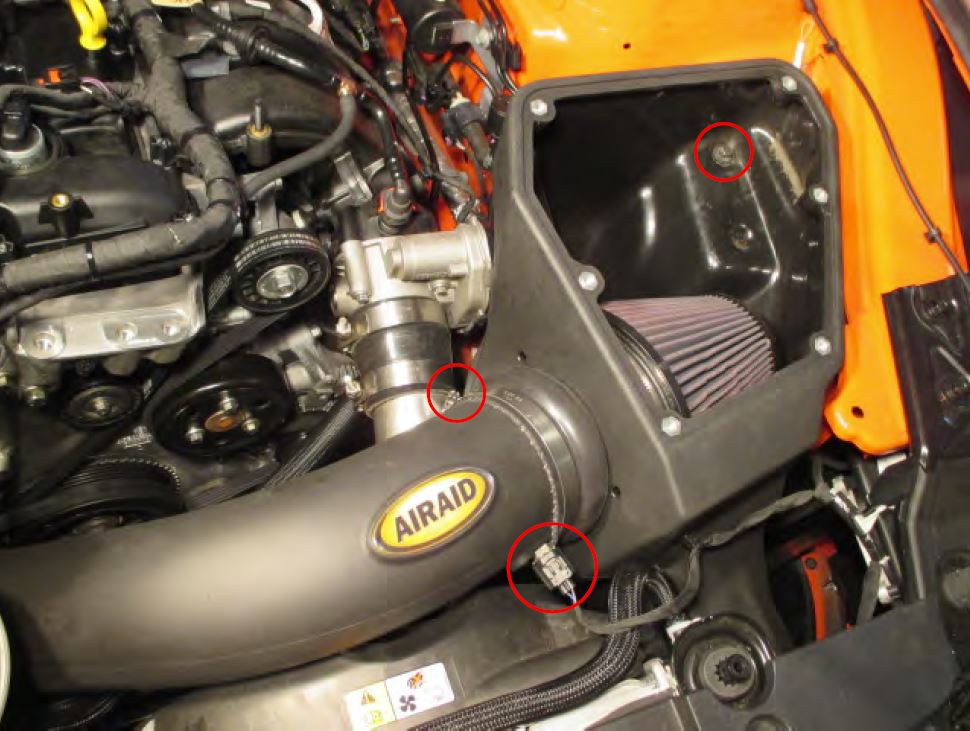
Begin with removing the air box. There is a 10mm bolt that holds the air box to the fender. Unclip the intake air temp sensor, and loosen the clamp that holds the intake pipe to the air box. This will just give you more space to work. It is not entirely necessary.
Step 2:
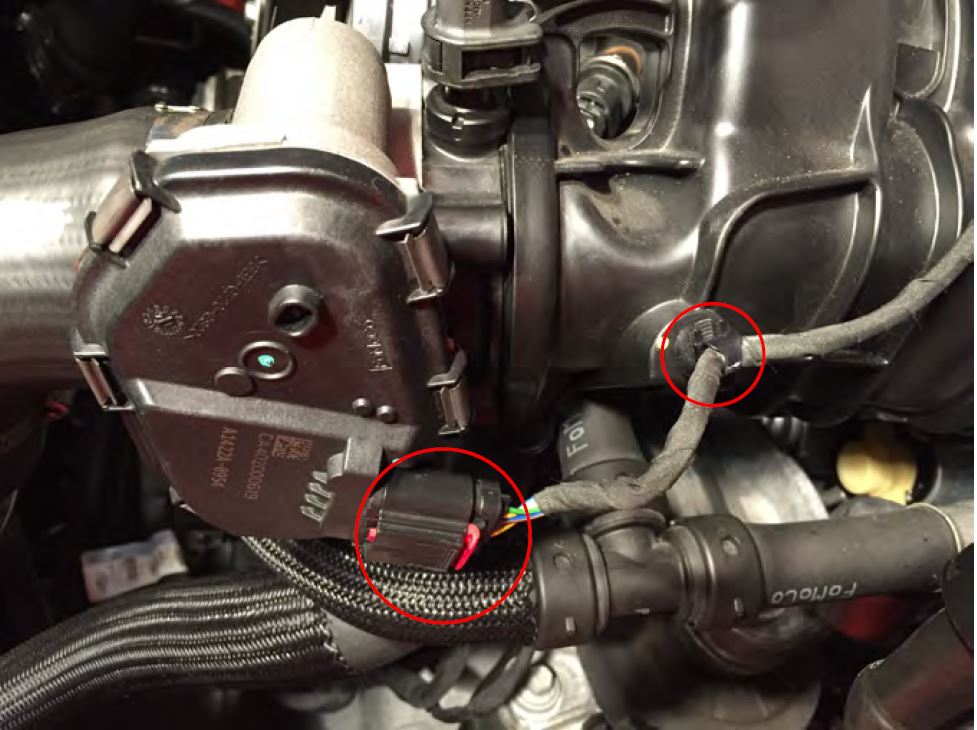
Unclip the throttle position sensor located on the side of the throttle body. Then using a panel removal tool, remove the retaining clip holding the wiring harness to the intake manifold.
**Note: For all Plugs, the red retainer clip slides back before you are able to depress the plugs clip.
Step 3:
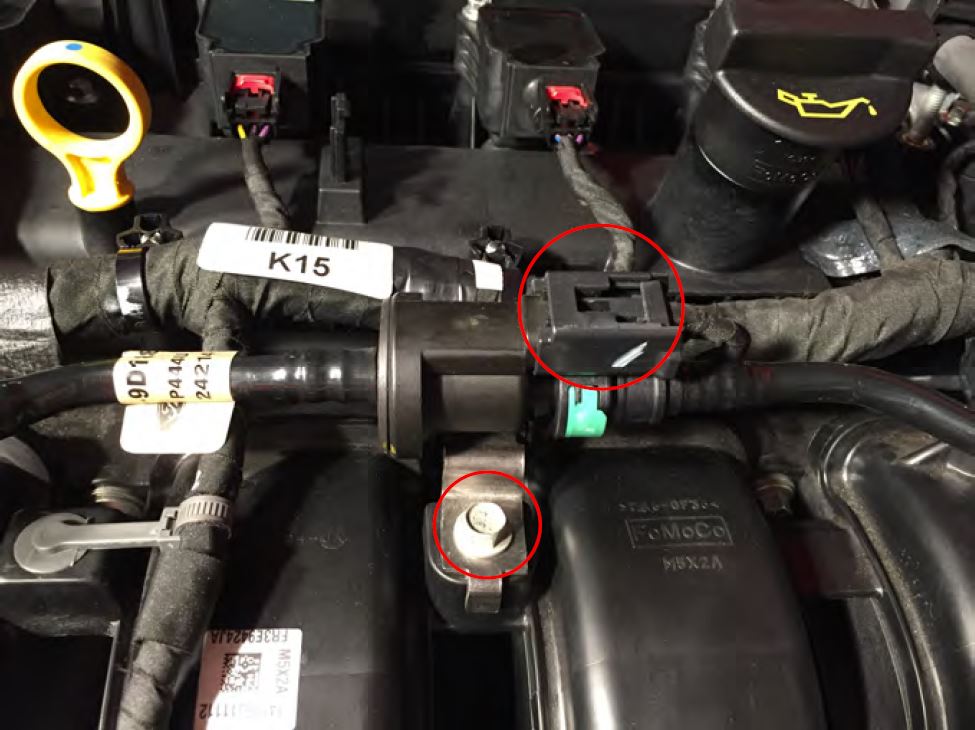
Unplug the sensor and remove the 10mm bolt holding down the emissions component on the top of the intake manifold.
Step 4:
Apply pressure on the vacuum connector retainer to remove from the intake manifold.
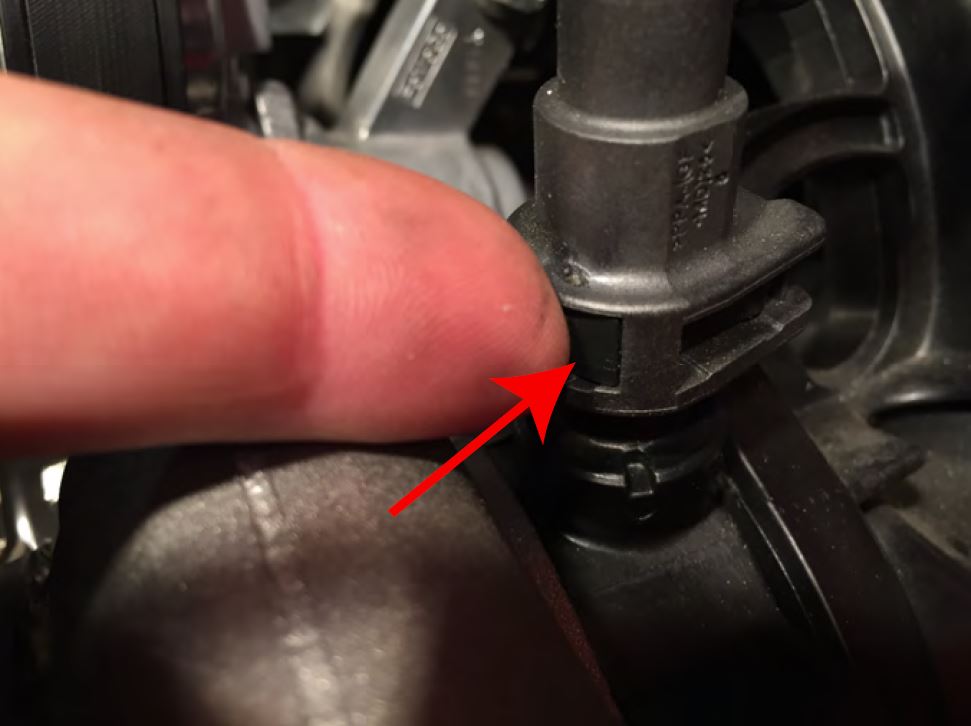
Step 5:
Unclip the MAP sensor on the lower portion of the intake manifold.
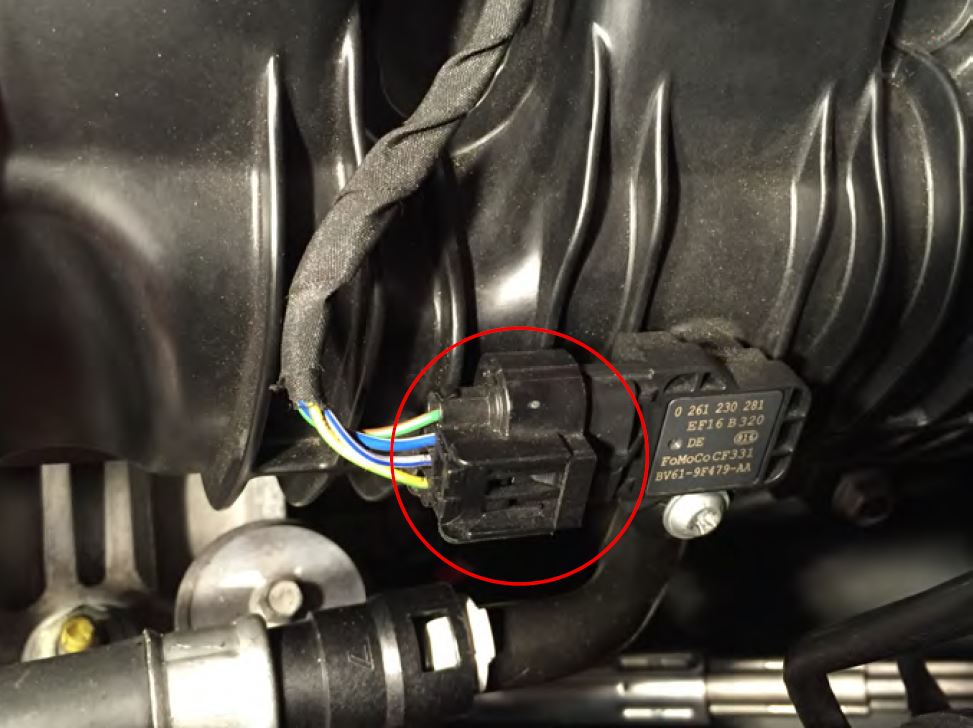
Step 6:
Using a panel removal tool or screw driver, gently pry the wiring harness from the intake manifold clips.
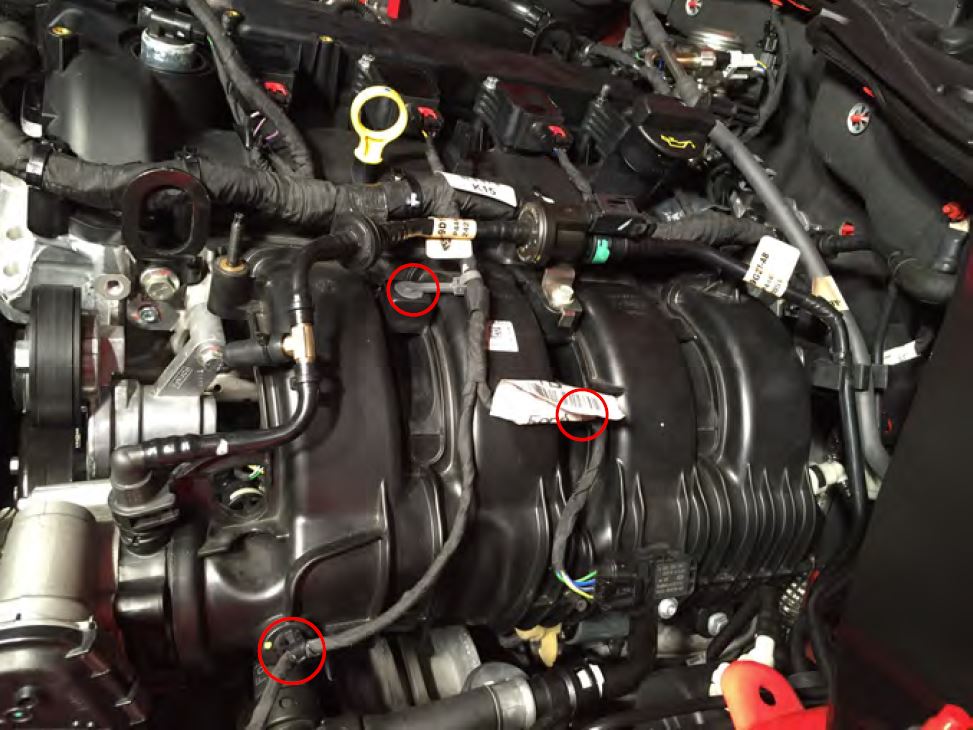
Step 7:
Raise the wiring harness off the threaded studs, fold the wiring harness and vacuum lines out of the way to give yourself more space to work.
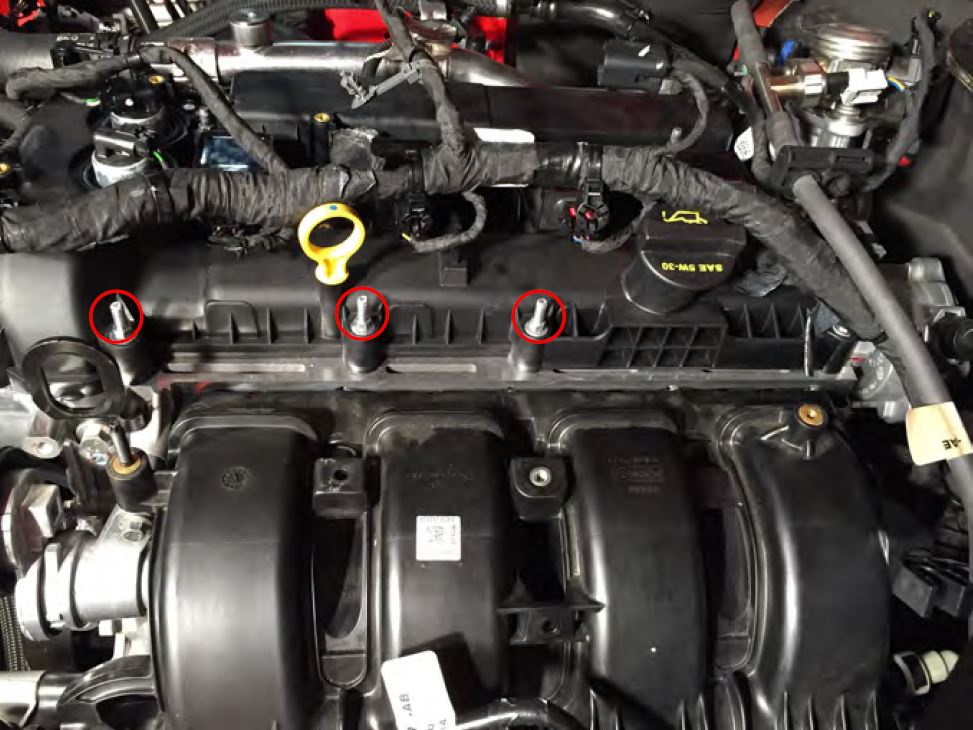
Step 8:
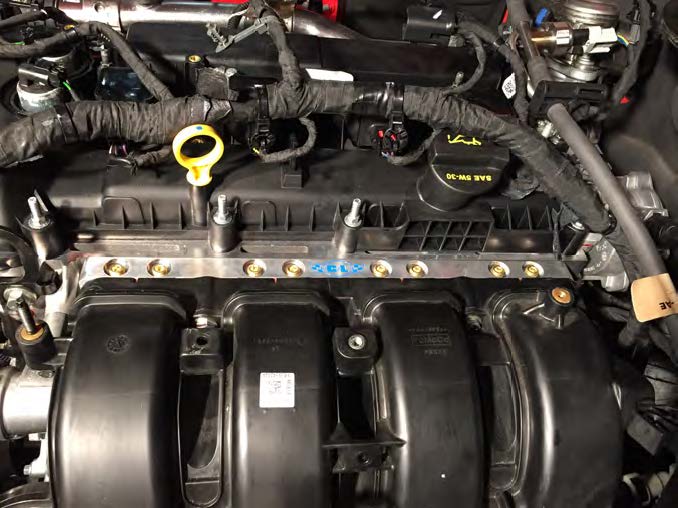
Remove the (5) factory bolts holding the intake manifold to the cylinder head.
**Note: These are all accessible from the top of the car.
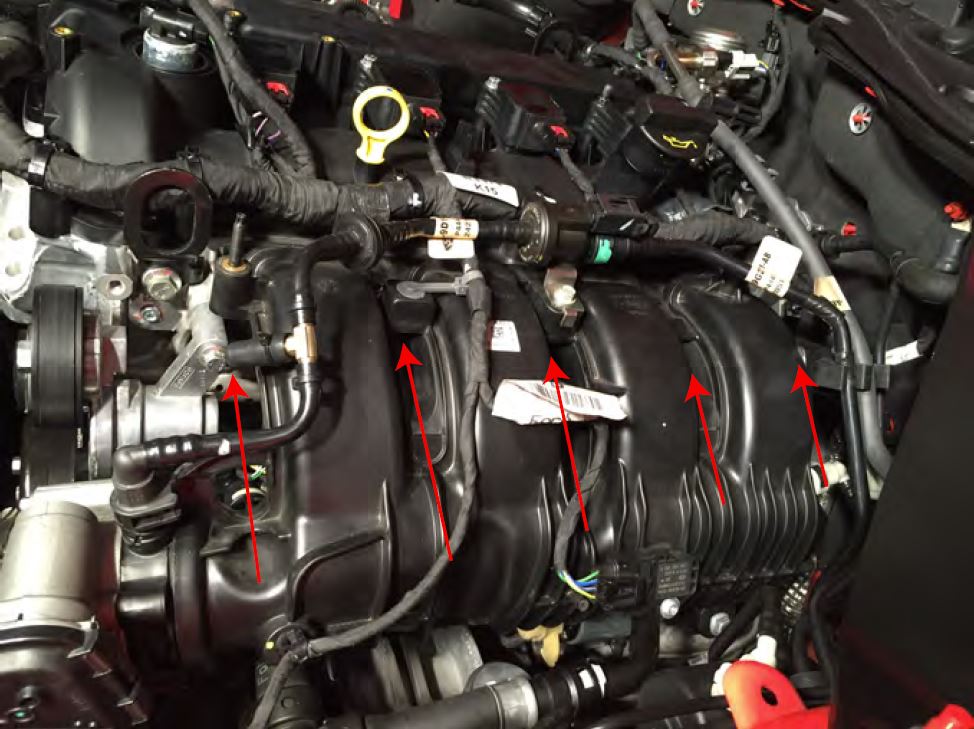
Step 9:
Once the bolts have been removed, pull the intake manifold off the cylinder head enough to slide the intake manifold spacer in to place. There is a locating pin on the spacer to ensure proper installation. Using the supplied hardware, loosely tighten the bolts by hand to avoid the possibility of cross threading. Tighten the bolts down evenly starting from the center then moving outward.
