
How to Install Covercraft LeBra Hood Protector on your Mustang
Shop Parts in this Guide
Step One
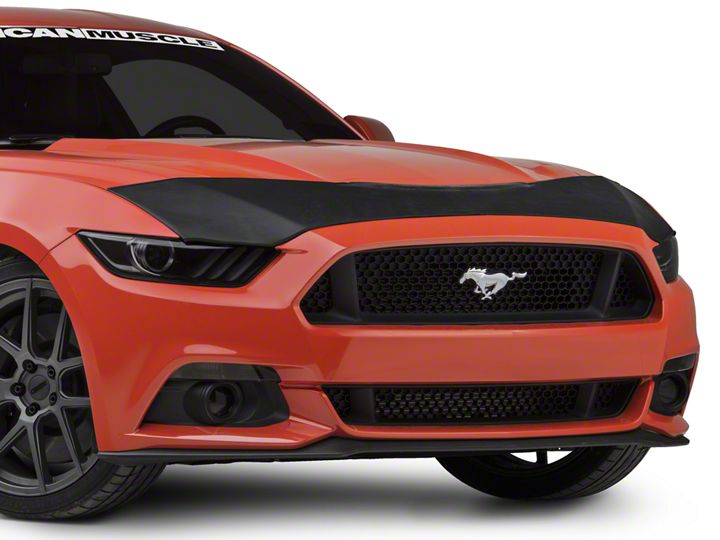
Open the hood and slip the Custom Hood Protector over the front edge of the hood. Make sure that the corners of the hood fit snugly into the corners of the Custom Hood Protector. When the Custom Hood Protector fits snugly, stretch the fabric at straps to remove major wrinkles.
Step Two
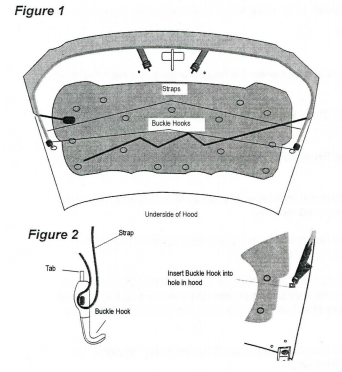
Pull one of the straps sewn to the Custom Hood Protector to the hole at the rear of the hood's underside, as shown in Figure 1. Adjust the Buckle Hook so that it is about 1/2" away from the hole. Now pull the strap down and slip the Buckle Hook into the hole. To release the tension on the webbing for adjustment of the strap, simply pull out on the tab on the Buckle Hook (see Figure 2).
The Strap should be as tight as possible without tearing. Tie off excess to keep free of the engine compartment. Repeat this process for the other side.
Note: Check all straps periodically to insure tension. Adjust tightness if necessary
Step 3-IMPORTANT
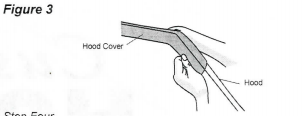
With the Hood Cover in place, pull the fabric on the sides of the hood around to the underside of the hood on both sides. This will insure maximum tightness of the Hood Cover (see Figure 3). Note: Check all straps periodically to insure tension. Adjust tightness if necessary.
Figure 3
Step Four
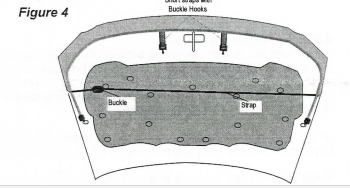
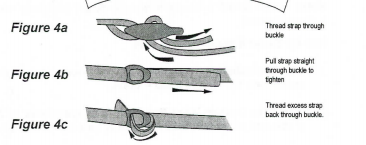
The remaining strap provides better tension and stability for the cover (see Figure 4). Stretch the remaining strap across the underside of the hood (if applicable strap must go behind prop rod) and thread it through the buckle on the opposite side (see Figure 4a). Do not twist the strap. Pull the strap to remove slack, DO NOT OVERTIGHTEN (see Figure 4b). Loop the excess strap back through the buckle to keep it out of the engine compartment (see Figure 4c). Again, make sure the strap is taut.
Step 5
Locate the shorter straps with buckle hooks sewn t the center of the cover (see Figure 4). Using the same operation as described for the the straps in Step Two, attach the buckle hooks into the holes as shown.

