Last Day! Guaranteed Free Delivery 12/24. Order by 3pm EST available on most items - Details
How to Install a Screamin Demon Coil on Your 2005-2010 Mustang V6
Installation Time
1 hours
Tools Required
- Clean rag / Fender Guard
- 5/16th socket / wrench
- 9/32nd socket

Shop Parts in this Guide
Installation
Step 1: Disconnecting the Battery
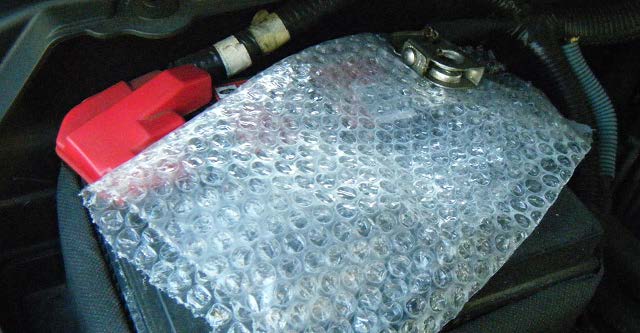
As you are working on the electrical system you should disconnect the battery using the 5/16th socket to remove the negative connection and ensure it is isolated so that it cannot short.
Step 2: Positioning
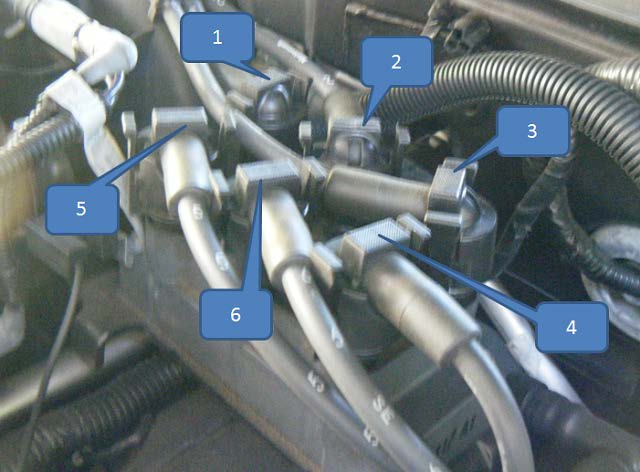
Examine the existing ignition coil and make careful note of which terminal is connected to which spark plug. If you are unsure about the order, you can disconnect the leads (see step 3) and attach them in order to the new unit before removing the old but that makes for a more cramped work space.
Step 3: Removal
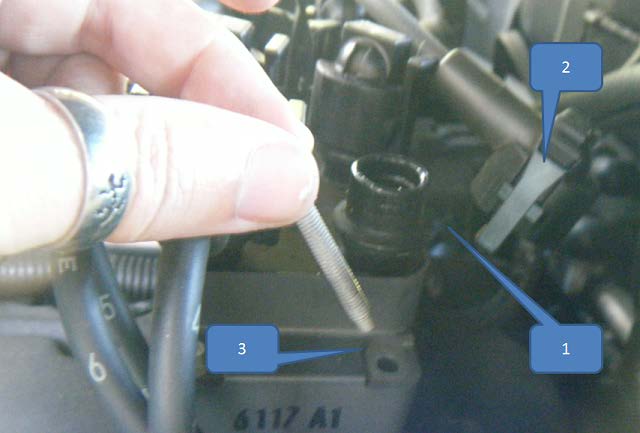
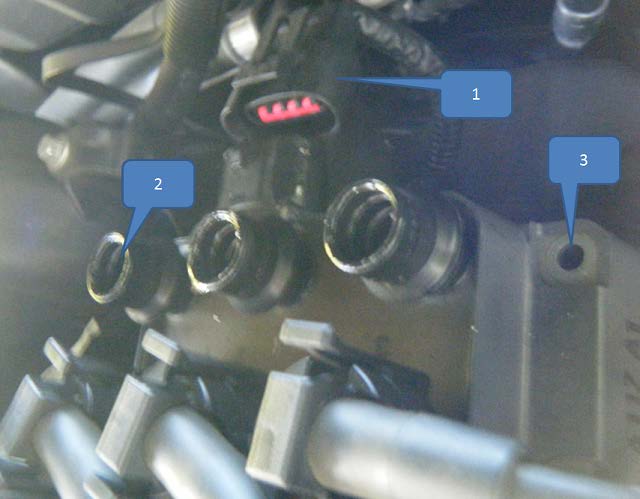
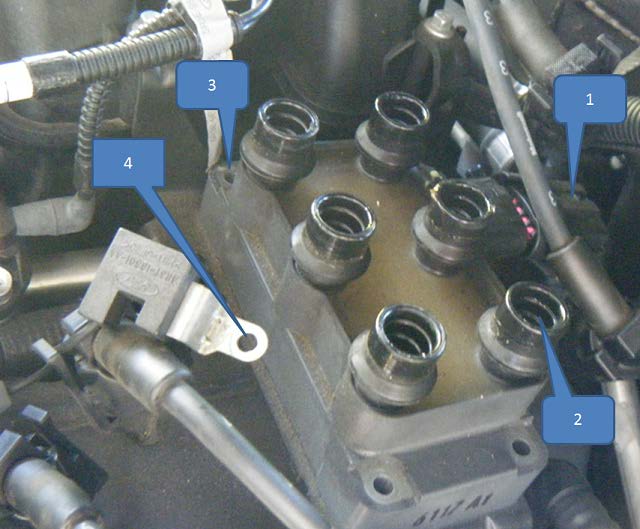
1. Disconnect the main connection to the ignition coil (on the side of the coil next to lead #2)
2. Disconnect the 6 spark plug leads.
3. Using the 9/32nd socket, remove the (4) bolts (one from each corner). They do not have nuts so you don’t have to worry about catching anything.
4. Note that the bolt nearest to lead #5 also is used to earth another connector – be sure to remove that carefully.
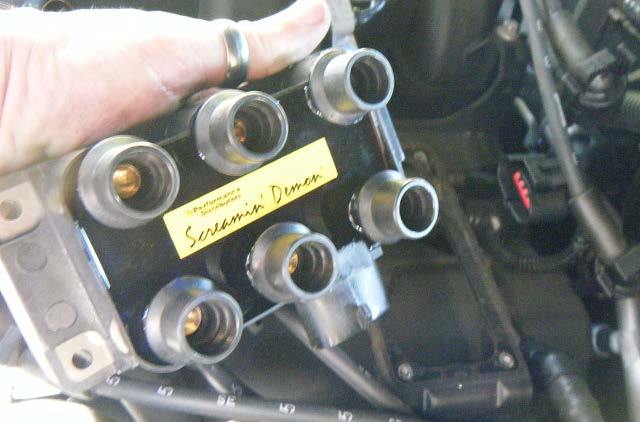
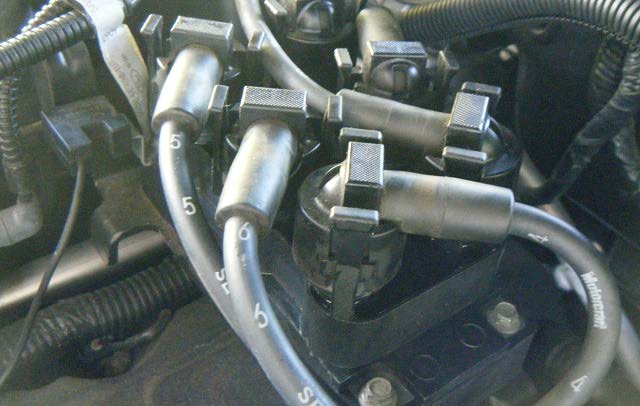
NOTE -- Please view the following (3) images showing the numbered steps above. They will show different views and stages of the removal process. The third image will show all steps clearly.
Step 4: Installing Screamin Demon Upgrade
- Carefully remove the Screamin Demon Ignition Coil from its wrapping and position the new unit in the cradle. Make sure it fits snugly into the recess and that the main connector is facing towards the rear of the car.
- Using the 9/32nd socket, reattach the (4) corner bolts. Do not forget the earth lead needs to be added to the correct bolt -- the one closest to spark plug lead #5. The unit mounts best if you leave all (4) bolts a little loose and try to wiggle the coil slightly before tightening them down snug.
- Once the bolts are in place, you can attach the spark plug leads.
- Start with the leads furthest away from where you are standing and work towards you to make the job easier (ie #1, #5, #2, #6, #3, #4 in this example) and make sure they lie flat.
- If you are planning to replace the spark leads and/or spark plugs, now would be a good time to do so. You may want to test the installation with the original equipment before moving onto the next stage.
Step 5: Enjoy!
Once you have reconnected the spark plug leads, you can reconnect the battery and fire the engine up.
You will notice a smoother start and idle and once behind the wheel, a more responsive throttle. Even with standard leads and spark plugs, you should notice improved MPG as well as the other gains though to get the most out of this upgrade new spark plugs with a wider gap (0.62”) and higher rated spark plug leads complete the package.
Installation Instructions written by AmericanMuscle customer Jeremy Cath 9.6.11
Related Guides
-
-
Installation
-
