Top Sellers in Mustang
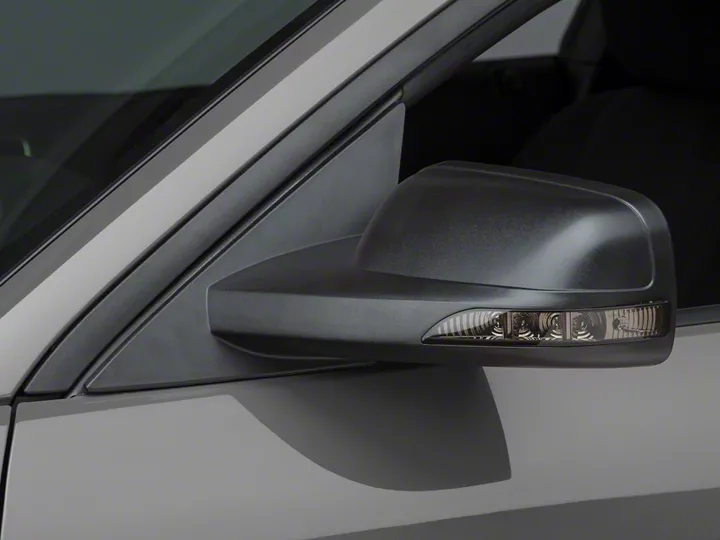
How to Install Directional Sideview Mirrors on your 2005-2009 Mustang
Installation Time
2 hours
Tools Required
- 7/16" Combination Wrench or Socket
- 6mm Socket
- 7mm Socket
- 8mm Socket
- T-30 Torx Driver
- Panel Removal Tools or small and wide flathead Screwdriver
- 4 foot length of flexible fishing material, I used 14awg solid copper wiring
- Wire Stripper
- Wire Crimper
- Soldering GunAdditional Supplies Required:Zip ties
- 22 avg wiring – approximately 5 ft
- Solder
- Heat Shrink Tubing

Shop Parts in this Guide
Installation
Installation Instructions: These instructions only illustrate the driver side installation because it is the more complex due to mirror controls and a structural panel in the foot well. The passenger side is essentially the same but slightly easier due to the lack of these complications. You need to be working in an area where you can fully open the door you are working on, as the space between the door and car body is very tight to begin with. Read these steps and consider. Begin by removing the driver side sail panel. Gently pull straight back on the panel and it will simply pop off. Directional-Sideview-Mirrors-(05-09 All)-Install-94327-1 Depress the retaining tab on the wiring harness to disconnect it from the mirror and do the same for the harness connecting the sail panel mirror controls. Directional-Sideview-Mirrors-(05-09 All)-Install-94327-2 Directional-Sideview-Mirrors-(05-09 All)-Install-94327-3 Remove the three 7/16” retaining nuts holding the mirror body to the door. I found it easiest to use a box wrench here. After removing the nuts the mirror should pull straight off from the exterior of the door. Install the new mirror by passing the wires through the hole and securing the three 7/16” nuts. Wiring the directional mirrors You must remove the door panel in order to get proper access to run the new wires required to make your directional mirrors functional. There is a cover panel inside the door handle recess that you need to remove, it just pops out. A small but wide flathead screwdriver might work (but be careful, it’s more likely to mark the plastic) if you do not have a panel Directional-Sideview-Mirrors-(05-09 All)-Install-94327-4 Behind the panel is a T-30 torx bolt that you need to remove. Directional-Sideview-Mirrors-(05-09 All)-Install-94327-5 Next you need to remove the armrest and window controls. Pull the portion of the armrest containing the window controls straight away from the door. Directional-Sideview-Mirrors-(05-09 All)-Install-94327-6 Once removed disconnect the window control wiring harness by depressing the retention tab. Directional-Sideview-Mirrors-(05-09 All)-Install-94327-7 Using a 7mm socket remove the screw behind the window controls you just removed. Directional-Sideview-Mirrors-(05-09 All)-Install-94327-8 There is a friction fit cover in the interior door handle recess that you need to remove. Once again a small but wide flathead screwdriver will work if you do not have panel removal tools. Directional-Sideview-Mirrors-(05-09 All)-Install-94327-9 Behind the panel is another T-30 torx bolt you need to remove. Directional-Sideview-Mirrors-(05-09 All)-Install-94327-10 Around the perimeter of the door trim are eight 7mm screws that must be removed. There are two on each side of the door and four on the bottom of the door. Directional-Sideview-Mirrors-(05-09 All)-Install-94327-11 Directional-Sideview-Mirrors-(05-09 All)-Install-94327-12 Directional-Sideview-Mirrors-(05-09 All)-Install-94327-13 Pull up on the door panel and slightly away from the Mustang. Inside are several wiring harnesses that you need to disconnect by depressing the retention tabs. Directional-Sideview-Mirrors-(05-09 All)-Install-94327-14 There is also a cable for the door latch release handle. Do NOT disconnect the cable, it is not necessary. You can lay the door panel down on a towel or other cushioned material without disconnecting the cable. Directional-Sideview-Mirrors-(05-09 All)-Install-94327-15 Remove the speaker pod by using a 6mm socket on the 3 screws and pull the pod away from the door (there are clips holding it at the screw holes) but don’t pull too hard because there is a wiring harness. You do not need to disconnect the wires from the speaker pod. Directional-Sideview-Mirrors-(05-09 All)-Install-94327-16 This step is optional, especially for the passenger side, but there is a door tension/spring lever that you can disconnect to provide slightly better access to the door jamb area. If you do disconnect this note that you should use locktite on the bolts when you re-install and make sure you tighten these bolts very well. These are 8mm bolts. Directional-Sideview-Mirrors-(05-09 All)-Install-94327-17 Route the new wiring connection for the mirror along the existing wiring bundle that is secured to the door moisture barrier. There is a spot where a portion of this bundle routes underneath the moisture barrier, you should pass the new wiring through that slot and continue following the existing wiring until it goes through a hole into the interior of the door. I used zip ties to secure the new wiring to the existing bundle. Directional-Sideview-Mirrors-(05-09 All)-Install-94327-18 Routing through the door jamb boot Now the hardest and most time consuming part begins. You need to route the new wire through the door jamb wiring boot and into the interior of the car. Tape the new wire to one end of your fishing material securely. I don’t recommend using electrical tape but instead masking or painters tape as it will leave less of a mess for you to deal with as you will probably need to remove the new wire from the fishing wire a couple of times and electrical tape leaves a sticky residue behind. Pull the boot away from the mounting plate in the car body. The boot wraps around a grey plastic plate secured to the car body. The boot seals behind the metal plate for keeping water and dust out of your car. You can pull the boot away from this mounting plate by simply pulling at it, though I found it easier to work it off with a panel removal tool to get it started. I found it easiest to fish through the door jamb boot by pulling the boot inside of the car door cavity through the speaker hole so that the boot was mostly straight. Tape the new wiring to your fishing material for pushing (ends line up together). Push the new wiring through the boot using your fishing material. Remove the new wire from your fishing material. Directional-Sideview-Mirrors-(05-09 All)-Install-94327-19 Using a long handled screwdriver you can release the mounting plate (partially) from the car body to give yourself some room to work your fishing wire through one of the holes in the mounting plate. There are retaining tabs at the top and the bottom of the mounting plate, depressing the top one should allow you to pull the plate out of the mounting hole slightly. Don’t be tempted to disconnect the wiring harness behind the plate. Work your fishing wire through the gap between the wiring harness and the mounting plate (from the car body side of the plate). Tape the wire to the fishing material for pulling (end-to-end with some overlap) and pull it back through the mounting plate. Directional-Sideview-Mirrors-(05-09 All)-Install-94327-20 If you are skilled with wire fishing and very patient, it should be possible to fish the new wire into the vehicle through the same route that the existing wiring harness uses. This is complicated by the fact that there is a thick structural plate secured against the driver side foot well that doesn’t exist on the passenger side. I tried this for about 45 minutes before I gave up and instead fished the wire through a different route that required me to drill a hole in the foot well. If you remove the door sill trim you will find a small slot for one of the retention clips of the door trim. I fished the wire to that location (temporarily, don’t leave the wire there as it will get pinched and probably eventually cut when you re-install the trim). Near there I drilled a small hole that I could insert a grommet into to protect the wiring and then fished the wire through that new hole. If you decide to drill into your car you are doing so at your own risk and need to make sure you aren’t drilling where there are any existing wires or other material you can damage. a) On the passenger side it’s much easier to get your fishing material through from the exterior of the car in the existing hole for the existing wiring harness. The whole is at an off angle from the mounting plate hole but you should be able to get your fishing wire through and locate it on the interior to pull the passenger side wiring through without drilling Once the wiring it inside the car you need to put the door jamb boot back onto the mounting plate. It’s easier to do this with the mounting plate still partially out. Try to start at the far side of the plate and work the boot over the lip of the plate, I found the use of a small (1/4 “ wide) flathead screwdriver helped. The mounting boot should seat around the outer edge of the grey mounting plate. This was probably the single most frustrating thing about this installation and made me wish it was practical to remove the doors from the car. Once the boot is properly seated, push the plate back into its mounting hole. Make sure the door side of the jamb boot is properly seated as well Now that you have the wiring inside the car, you should now reassemble the driver’s side door by reversing these steps and repeat steps 1-24 for the passenger side before completing the wiring inside the car. Connecting New Wiring The wiring for the driver’s side is too short to reach the SJB (Smart Junction Box). I soldered on a length of 22awg speaker wire and covered the solder joints with heat shrink tubing in order to extend the wires. You will need to extend the wiring The SJB is the fuse panel with multiple wiring connections in the passenger foot well. Route the wiring from the driver’s side of your car to the foot well area on the passenger’s side. There is a wiring bundle underneath the driver’s side dash area that I zip tied the new wire along to secure it. There are similar wiring bundles on the passenger side that you can secure against. You need to remove the passenger side foot well trim by pulling it towards you. Remove the connectors from the front of the exposed SJB There is a bolt at the top of the SJB that holds it into place. Remove this bolt and push upwards on the SJB to free it On the back of the SJB are several additional connectors. From the top of the SJB (Left in this picture) remove the 4th connector that is slightly offset, this is the connector with the wires that need to be tapped to operate the mirrors. Directional-Sideview-Mirrors-(05-09 All)-Install-94327-21 Route the new wires from the mirrors into the SJB area, making sure that you know which the driver side wire is and which the passenger side wire is. Since you had to extend the driver side wires this should be easy to keep track of as that wire will likely be different than the passenger side wiring. The red/positive wire from each mirror will need to be tapped into the appropriate wire of the SJB, the black/negative wires will need to be grounded to a nearby grounding point. There are several in the passenger foot well area that you can use. Split each new mirror wire so that the positive and negative wires are separated, as they will be going to different locations and need to be different lengths. Locate a suitable grounding location then trim the black wires to length and crimp on a spade or ring connector to the black wires of each mirror (You can put both in the same connector). Connect the black wires to the grounding location you have chosen. We will connect the passenger side mirror first. Locate the dark blue wire with orange stripe coming out of the connector that you have removed from the SJB. This is the wire that you need to tap for the passenger side mirror. The mirror should have included a blue tap press-fit connector. Try to tap at least 1-2 inches away from the connector. Because the mirror wire is such a small gauge wire, you want need to strip at least a half-inch of wire and fold it back over the unstrapped wire to give the tap connector a better chance to grip after trimming it to the appropriate length. Place the passenger mirror wire all the way into the split connector on the non pass-thru side, place the tap connector over the dark blue with orange stripe wire and firmly close the press-fit connection. I recommend using a pair of pliers to ensure the tap is fully closed on both wires. Give the passenger mirror wire a slight tug to make sure that it is properly held in place, if you are able to pull the wire out you will need to remove and redo the connection to make sure you have a good connection. Directional-Sideview-Mirrors-(05-09 All)-Install-94327-22 Next is the driver side door mirror. This time you want to tap the grey wire with a black stripe in the same manner that you tapped the passenger side wire. Directional-Sideview-Mirrors-(05-09 All)-Install-94327-23 Reconnect the connector to the back of the SJB. Reinstall the SJB into the passenger foot well but do not install the retaining bolt just yet. Reconnect the wiring connections on the front of the SJB. Turn the ignition to the accessory position and test your turn signal indicators, if either of them does not work you will need to remove and correct the SJB wiring. If the mirror signals work correctly, reinstall the SJB retention bolt and the passenger side trim. Enjoy your new turn signal mirrors Installation Instructions written by AmericanMuscle Customer Sean Settle


