
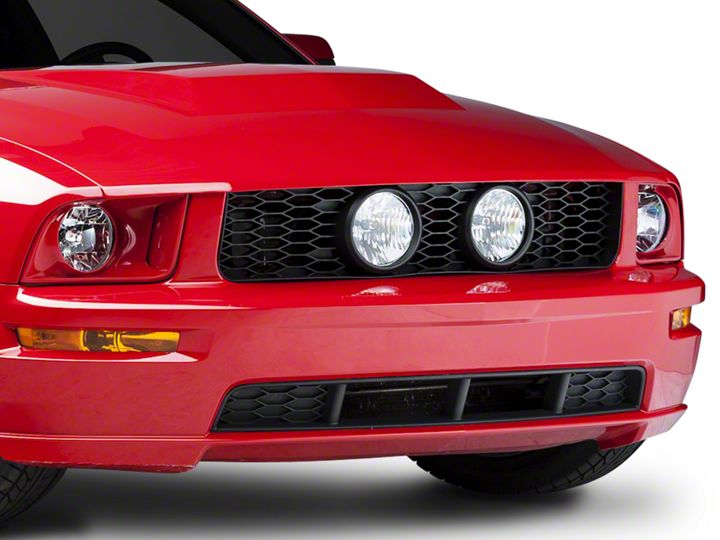
How to Install an Eleanor Style Honeycomb Grille on Your 2005-2009 Mustang GT
Installation Time
1 hours
Tools Required
- Torx screwdriver / Allen wrench set
- Flat Head Screw Driver
Shop Parts in this Guide
Installation
Installation Instructions:
1. Start by popping your hood and disconnecting the negative terminal on your battery. Always disconnect the battery when working with anything electric to prevent shocks or short outs.
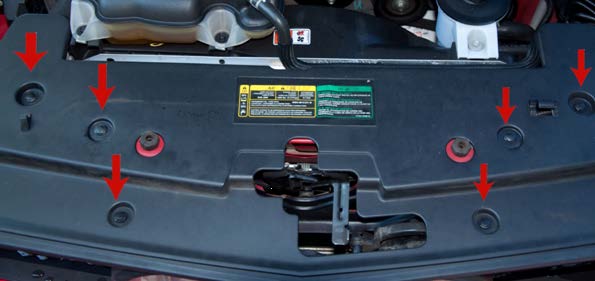
2. Move to your radiator cover. Locate and remove the (6) plastic pop bolts with a flat head screw driver. Be sure to pop the center head out half way so you can re-use them later. Please see photo below.
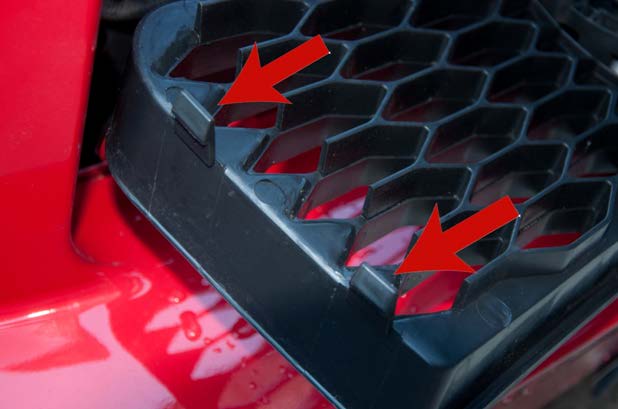
3. After removing the radiator cover, locate the (8) plastic tabs that hold in the stock grill and remove. You may need to gently bend the “female” part of the tab over the “male” portion to free the grill. Please see photo below for the respected locations of the tabs.

4. Now that the grill has been freed, remove the electrical connections on the rear housing of the fog lights. These steps may also be handy for those who simply need to change or replace a light bulb.
5. Lay the grill down. Grab your torx screwdriver or allen wrench and remove the screws that hold the fog light housings in place. Left and right sides are shown below.
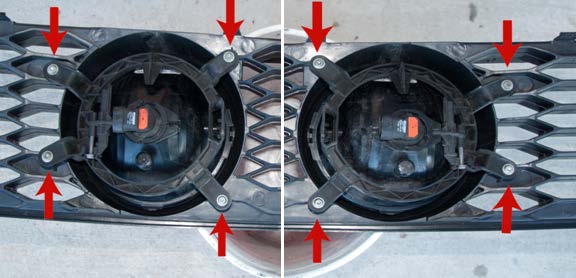
6. Screw the fog lights into your new grill and re-connect the fog lights using your wire extensions as seen in the photo below.

7. This is a good time to reconnect the negative wire to the battery and test your lights to ensure all connections are secure and functional.
8. If everything works as it should, pop the grill back into place by simply aligning the (8) plastic tabs and pushing in each one. Give the grill a tug outwards to make sure it is secure. Please see photo below for tab reference.
9. Reinstall your radiator cover using the (6) pop bolts that you removed earlier and that’s it!
Now enjoy the new aggressive styling of your Eleanor grill.
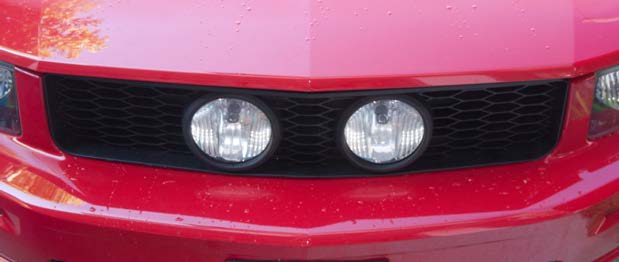
Installation Instructions written by AmericanMuscle customer Dalton Spiekermann 10.21.11
Related Guides
-
Installation
-
Installation
-
Installation

