FREE 1 to 3-Day Delivery on Orders $119+ Details
Best Sellers


How to Install Ford GT500 Rear Splash Guard - Pair on your Mustang
Installation Time
1 hours
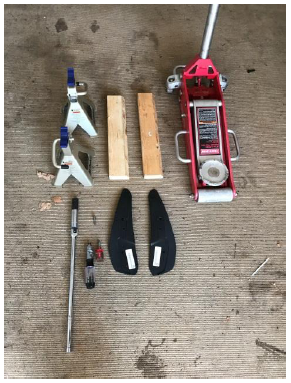
Tools Required
- Wheel Chocks
- Jack,
- Jack Stands
- Breaker bar or Impact Wrench
- Phillips Head Screwdriver
- Ford GT500 Rear Splash Guards
- Specific Lug for your lug nuts
Note: In order to complete this install, the car must be jacked up from the rear and the back tires must be removed.
1. Engage the parking break and ensure that vehicle is in gear, for automatic transmission put in park
2. Chock the front wheels
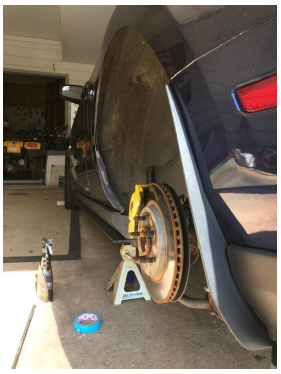
3. Jack vehicle from the rear
4. Locate the pinch welds, and place jack stands on each side of the vehicle

5. Once the car is safely lifted, using your breaker bar or impact wrench, remove your lug nuts and tires
6. Once the wheels are removed, you may start the installation process
7. Locate the three retaining screws marked by the blue tape
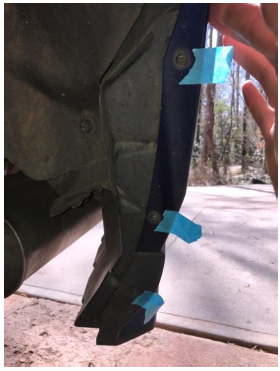
8. Using your Philips Head Screwdriver, remove the three screws. These screws will later be used to hold your splash guards in place
9. Locate your labeled driver side splash guard
10. Each splash guard has a clip, this clip will be used to help secure the splash guard to the bumper
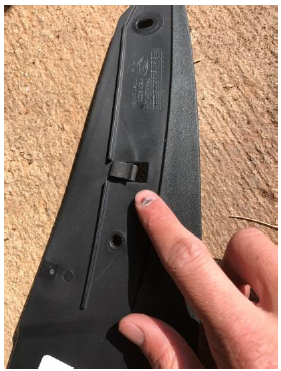
11. Once you have located the clip, slide it into the bumper
12. To avoid having to re-adjust the splash guard, ensure that you slide in the clip approximately one inch above the second screw hole
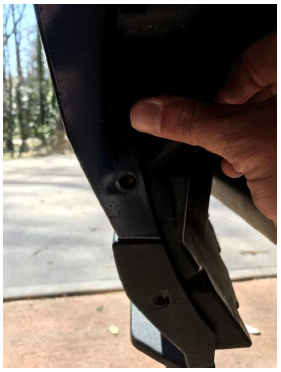
13. Once the clip is slid into place, align the splash guard holes with bumper screw holes
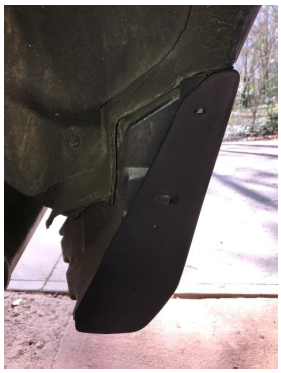
14. Once the holes are lined up, begin to put the screws back in. Make sure the screws are tight, yet avoid over tightening
15. Repeat the same steps for the passenger side splash guard
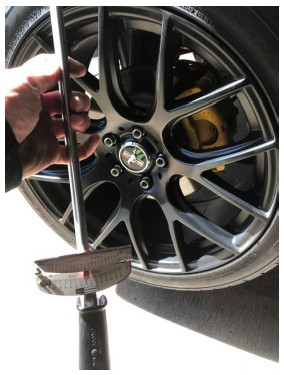
16. Re-install your wheels
17. Hand tighten your lug nuts, then torque your lug nuts to the factory recommended 100 ft-lbs using a star pattern
Enjoy..