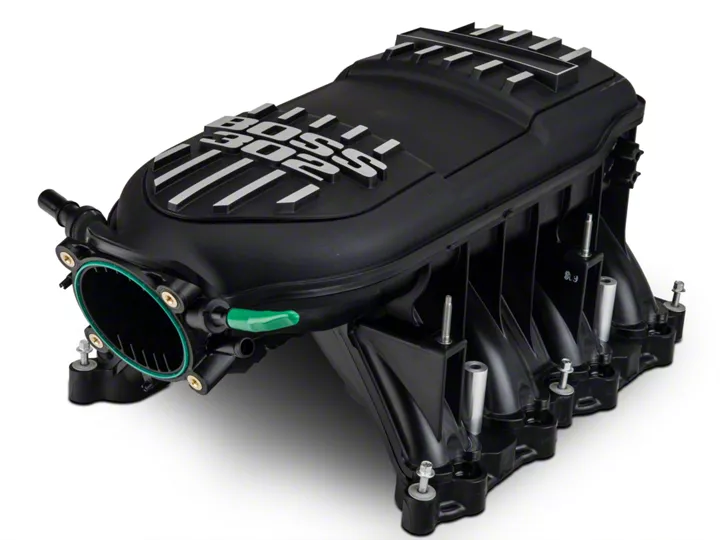
How to Install a Ford Racing BOSS Intake Manifold for a 2011-2013 Mustang GT
Shop Parts in this Guide
Installation
Removal of stock intake manifold:
1) Remove the intake cover. Pull up on the cover and unsnap it.
2) Remove the inlet tube on either your stock or aftermarket setup.
3) Remove the breather tube that runs from the passenger side valve cover to the intake manifold.
4) Remove the throttle body completely to get it out of your way.
5) Disconnect the purge valve off of the intake.
6) Remove the (2) two nuts & brackets on either side of the intake (total of 4 nuts).
7) Pull out the brake booster vacuum hose from the driver’s side of the intake once those brackets are removed.
8) Remove foam inserts from both sides of your fuel rails.
9) Removal of the fuel rail bolts comes next. You should see 4 in total.
10) Unplug all fuel injector electrical connectors.
11) Next, you need to disconnect the fuel feed line. This is done with a fuel line disconnect tool. This is a relatively inexpensive tool that can be purchased at any local parts store. Be sure to use a towel or rag when disconnecting the lines as there will still be minimal fuel remaining in the lines that needs to drain.
12) Now you can take off the fuel rails. When you do so, the injectors are attached so do so gently.
13) Untighten the bolts attaching the stock intake manifold to your heads. There should be 6 bolts in total that will remain attached to the intake once loosened. Pull up and towards you a bit to get to the (4) wiring harness attachments. These need to be pulled from the intake in order to completely remove your stock intake manifold from your mustang.
Installation of BOSS 302 Intake Manifold:
1) Start off by reinstalling your stock fuel rails with the attached injectors into the BOSS intake manifold.
2) Set your new BOSS intake manifold in the stock location as is; the gasket is already built into the manifold so there are no extra steps involved there.
3) Bolt the manifold down with the 6 aforementioned stock bolts, but do not full tighten just yet.
4) You will notice that the new manifold only has space for 2 of your wiring harness attachments that were previously removed from your stock manifold. You need only to reinstall the outer 2 harnesses.
5) Bolt the fuel rail down with the 4 stock bolts, but again do not full tighten just yet.
** You will need a Torque wrench for the next two steps. **
6) Torque the intake manifold bolts (6 in total) to 89 inch lbs starting with passenger middle, then driver middle. Next move to passenger back, then driver back; finish up with passenger front, then driver front. (Back = closer to rear of car; Front = closer to front bumper)
7) Next, torque the fuel rails (4 in total) to the same rating – 89 in lbs. Start with passenger front, then drivers front; next move to passenger back and finish with the drivers back.
8) Re-connect the fuel injector electrical connectors.
9) Re-connect the fuel feed line.
10) Re-install foam inserts on both sides of the fuel rails.
11) Next, you need to re-attach the brake booster vacuum tube to the driver’s side location.
12) Following that, the brackets and 4 nuts need to be reinstalled as well.
13) Re-install your throttle body into the factory location.
14) The brake booster hose connects to the BOSS intake manifold in a different spot than on the stock manifold. Stretch your factory brake booster hose to connects to the new location without any bends.
15) Re-attach the breather tube.
16) Plug the purge valve with a rubber end cap as it is not needed.
17) Re-install your Cold Air Intake to the mustang. Depending upon which CAI, you may need to modify the inlet tube or coupler to allow proper clearance for the fan shroud. The JLT and C&L cold air intakes will bolt up with no additional modifications. The Airaid Cold Air requires the coupler that attaches the throttle body to the inlet tube to be trimmed 1/4" off each side to allow proper clearance.
18) Your stock strut tower brace will not fit over your new intake.
19) Last but certainly not least, this new intake requires a custom tune.
20) We tested our 2011 GT with the JLT CAI installed and dyno numbers proved an increase of 61 HP & 43 ft/lbs of torque.
Related Guides
-
Installation
-
Installation
-
Installation


