
J&M Mustang Rear Lower Control Arms ('05-'11) - Installation Instructions
Installation Time
4 hours
Tools Required
- Torque Wrench (Capable of at least 130 ft/lbs)
- Socket Wrench
- 18mm Socket
- Jack
- Jack Stands
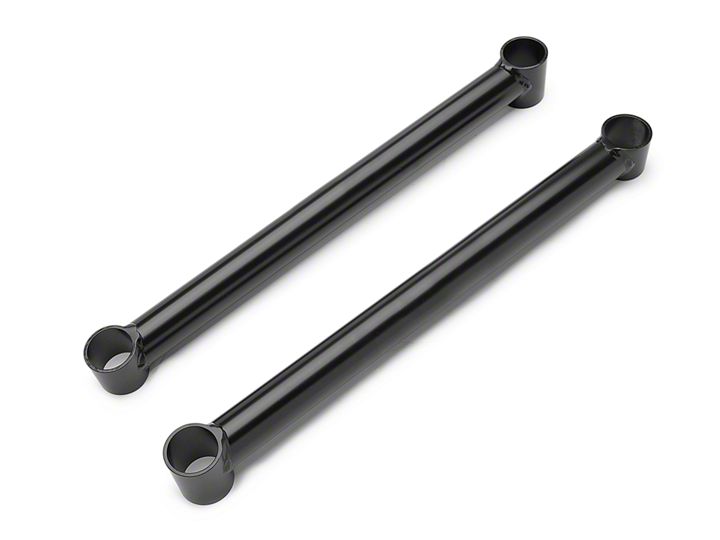
Shop Parts in this Guide
Installation
1. You’ll want to jack the car up first, and set it on jack stands. The vehicle’s suspension should “be loaded”, so place the rear jack stands under the rear axle. This loads the suspension in the same manner as when the car is resting on its wheels. With the parking brake set, and the vehicle in gear, loosen the rear lug nuts and remove the two rear tires. Then release the parking brake.
2. It’s wise to remove and replace the suspension arms one at a time. If you remove both stock lower suspension arms at the same time, the rear end could shift some. This will make reassembly more difficult, as the arm holes may not line up as well as they did when you pulled the factory parts off.
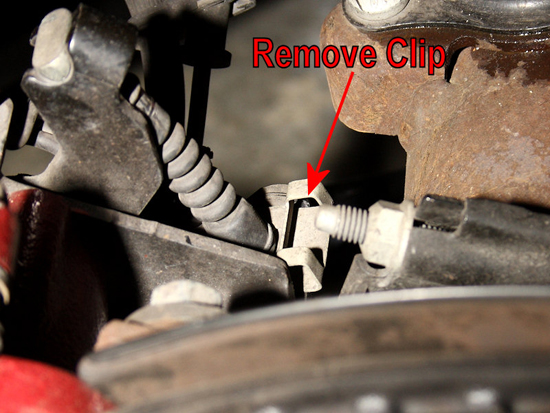
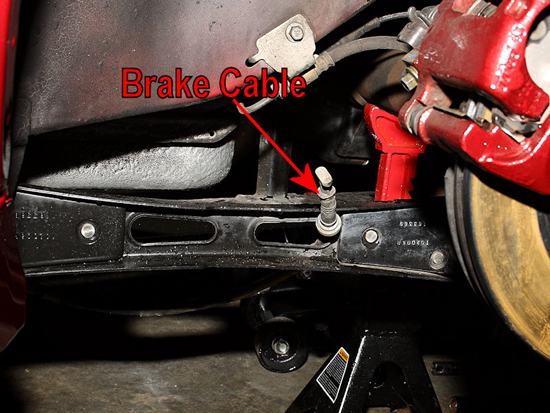
3. Begin the removal by disengaging the parking brake cable. Pull the retaining clip out of its position. No tools should be required, as you should be able to do this by hand
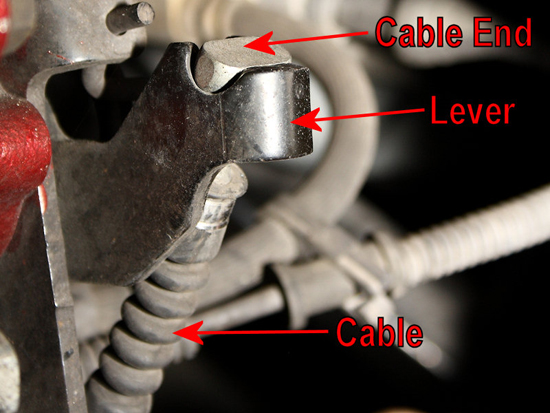
4. Now locate the cable, cable end, and brake lever, as shown in the picture below. They are just above the clip you removed.
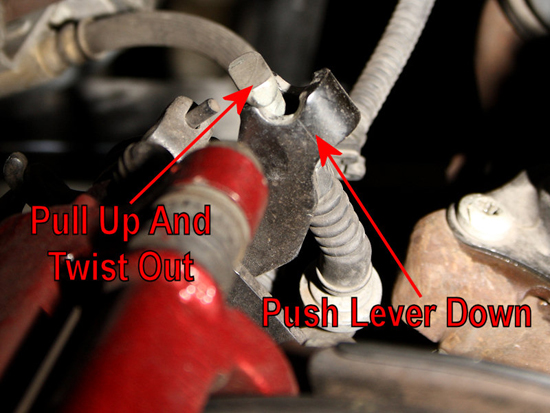
5. Push the lever down, and then twist the cable end slightly to disengage it from the lever. Once the cable end is loose, you can slide the cable away from the lever assembly entirely by pushing the cable down and towards the rear of the car and out of the lever’s bracket.
6. Pass the parking brake cable through the factory lower control arm.
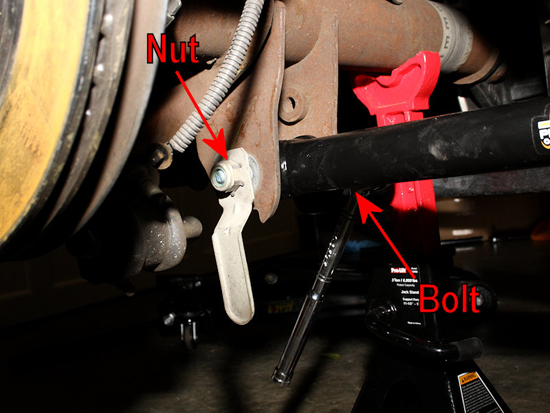
7. Once the parking brake cable is free of the lower control arm, you’re ready to begin the actual removal of the arm itself. Using an 18mm socket and socket wrench, loosen and remove the front control arm bolt. The rear nut is clipped, preventing it from turning, so there’s no need to hold it with a wrench. Make sure to keep the front and rear bolts separate and don’t mix them up, as they are different.
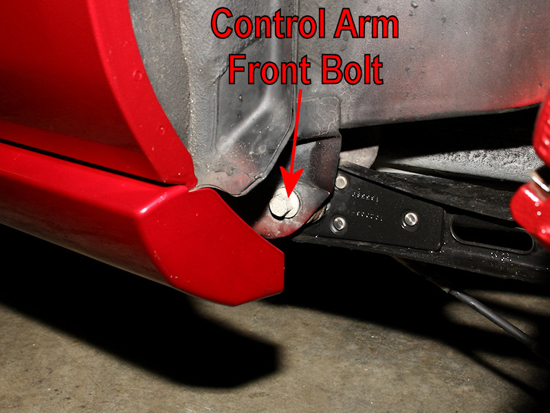
8. Once the front bolt removed, you’ll want to do the same with the rear bolt. Again, an 18mm socket and socket wrench needs to be used.
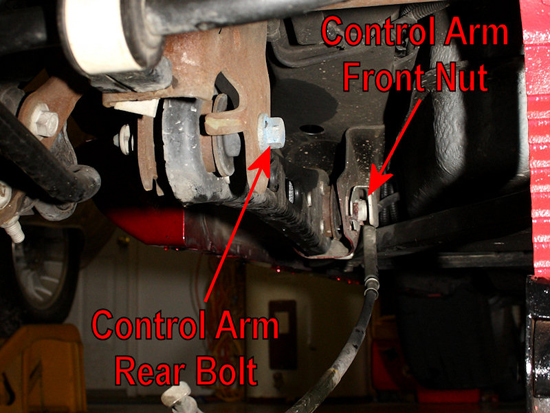
9. As with the front bolt, you don’t need to hold the rear bolt’s nut to prevent it from spinning. The nut has a tab on it that will catch on the axle, preventing it from turning as you’re removing the bolt.
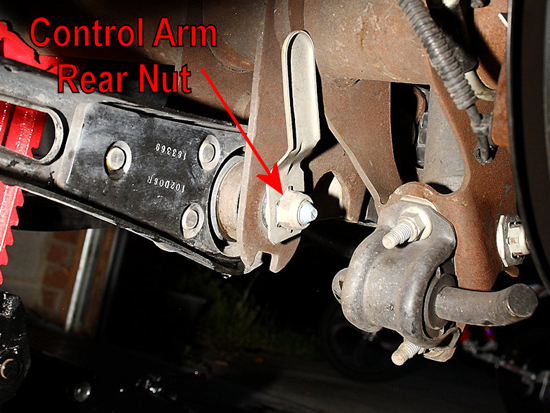
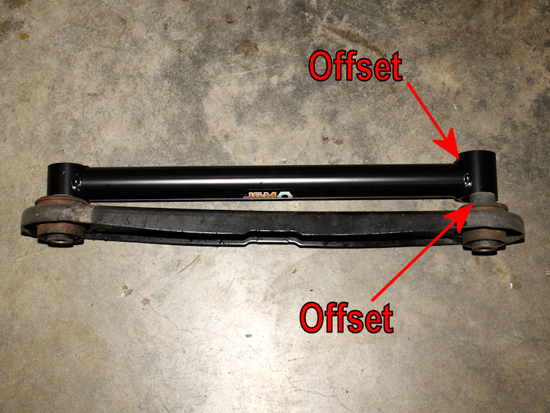
10. When removing the lower suspension arms, make sure to keep it oriented correctly, or note which end is the front and which is the back. The two ends are offset differently, and you must make sure correctly install the new suspension arm in regards to its offset. The rear of the new arm is wider, to match the larger width of the stock arm. This area is offset as well, just like the stock arm. The larger offset should face the middle of the car when it’s installed.
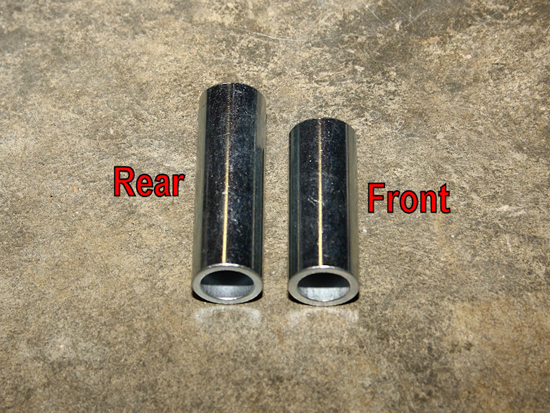
11. Now, it’s time to examine the hardware that comes with the suspension arms. There are four steel sleeves, two long ones and two shorter ones. The short ones are for the front, the longer ones for the rear.
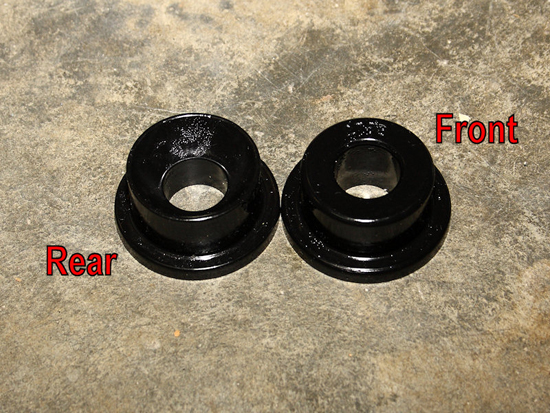
12. You’ll also find two different style bushings. Some with a concave face that curves inward, while the others utilize a flat face. The flat-faced bushings are for the front, while the curved ones fit the rear of the suspension arm.
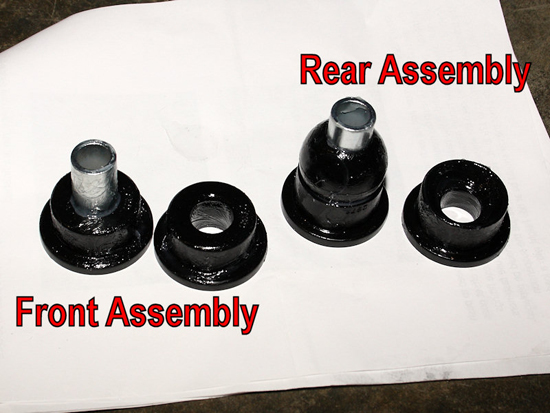
13. Get familiar with how the various parts fit together before you grease and install them. The rear of the arms will use the polyurethane bushing balls nestled between the curved rear bushings. A long sleeve passes through all of the components. The fronts of the arms use the shorter steel sleeve and the flat-faced bushings. When installed, the bushings will be pushed together, but I’ve left them separated for clarity purposes in the picture below.
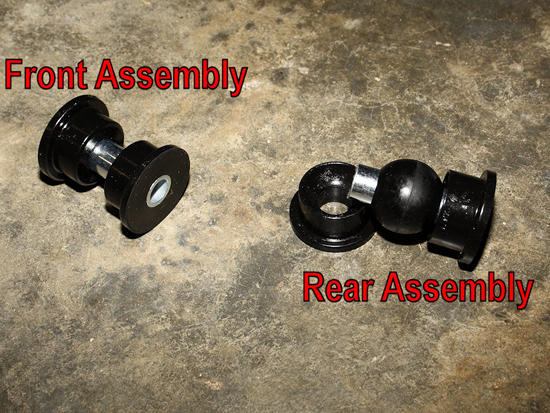
14. Once you know how to assemble the bushings, you’ll want to grease them with the supplied grease. Grease the outer portion of the sleeves, and the inner portions of the bushings. Also grease the outside of the bushings with the exception of the bottom that they’re resting on in the picture below. The bottom of the bushing will face the suspension mounts on the car, and doesn’t really need any lubrication.
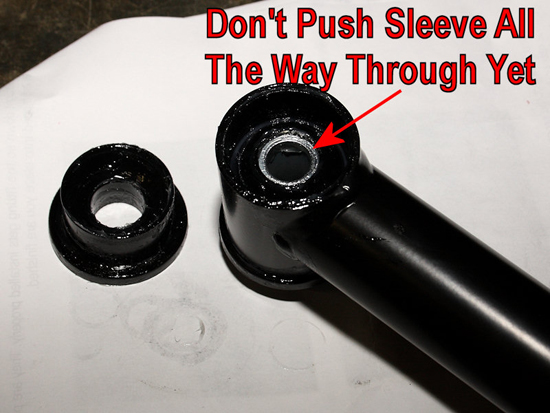
15. You’ll also want to apply some grease to the inside of the control arm. Once that’s done, press the bushing assembly into place from one side of the control arm. Before pushing the other side’s bushing into place, I found it’sbest to push the steel sleeve halfway out of the installed bushing. This helps to allow air between the bushings to escape, and helps the remaining bushing to seat easier. Once the bushing is in place, you can push the steel sleeve in fully.
16. Install the suspension arms by simply reversing the removal procedure. Hold the arm in place, and run the bolts back through. I recommend using some threadlock for extra insurance against loosened bolts, especially if you reuse the factory bolts. The tab on the rear bolt will probably turn itself back around before locking into position and preventing the nut from turning. Ensure that it doesn’t catch the parking brake cable or brake lines as it spins. Once the bolts are snugged up with the socket wrench, use a torque wrench to tighten both bolts to 129 ft/lbs.
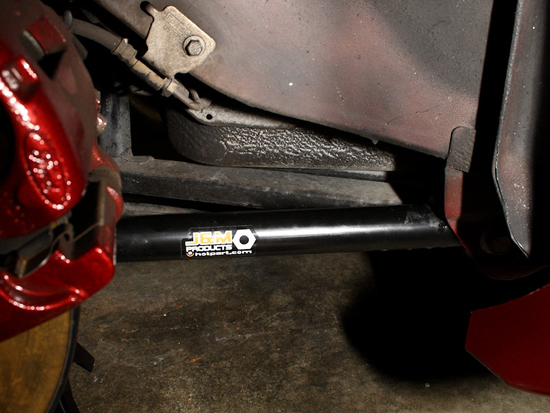
17. Once properly installed, the J&M sticker should be facing the outside of the car and not upside down.
18. The parking brake cable will simply rest on the suspension arm, once you reconnect it to the assembly. You can use a wire tie to hold it in place if you prefer, but it’s not necessary.
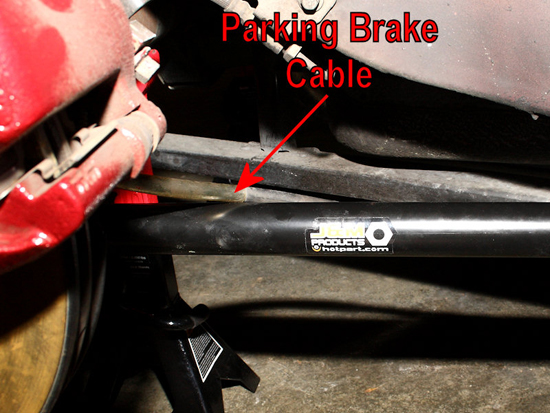
19. Once you remount the tires and wheels, you’re ready for a test drive. If you hear anything unusual, recheck the torque of your bolts. Take note that due to the polyurethane bushings, you may see a slight increase in noise transmitted through the suspension to the interior of the car. The factory rubber bushings isolate this noise better than the polyurethane does. So it’s a trade off of sorts, getting a firmer suspension in exchange for a slight increase in noise.
One Final Note
I also want to point out, that the Ford Service Manual states that the bolts and nuts that connect the suspension arms to the vehicle should not be reused. With that being said, I know many mechanics that insist that reusing the bolts is fine, providing the threads appear to be undamaged upon inspection. Personally I’m not about to enter that debate, and you can choose your own course of action when it comes to replacing the bolts. However, for those that wish to do this, I’mproviding the Ford part numbers below. This should prove useful when you arrive at the parts counter. Be prepared to pay in the neighborhood of $4 for each bolt, and around $3 for each nut. Keep in mind that you’ll need two of each item listed.
- Front Bolt:W711504-S439
- Front Nut:W710089-S440
- Rear Bolt:W704888-S900
- Rear Nut:W704991-S900
Installation instructions provided by AmericanMuscle customer Eric Hege 4.27.09
Related Guides
-
Installation
-
Installation
-
Installation
