
K&N Mustang FIPK Air Intake Kit ('05-'09 GT) - Installation Instructions
Installation Time
60 minutes
Tools Required
- Flat Blade Screwdriver
- Ratchet
- Extension
- 8mm Socket
- 10mm Socket
- 10mm Wrench
- 4mm Allen Wrench
- 2.5mm Allen Wrench
- Needle Nose Pliers
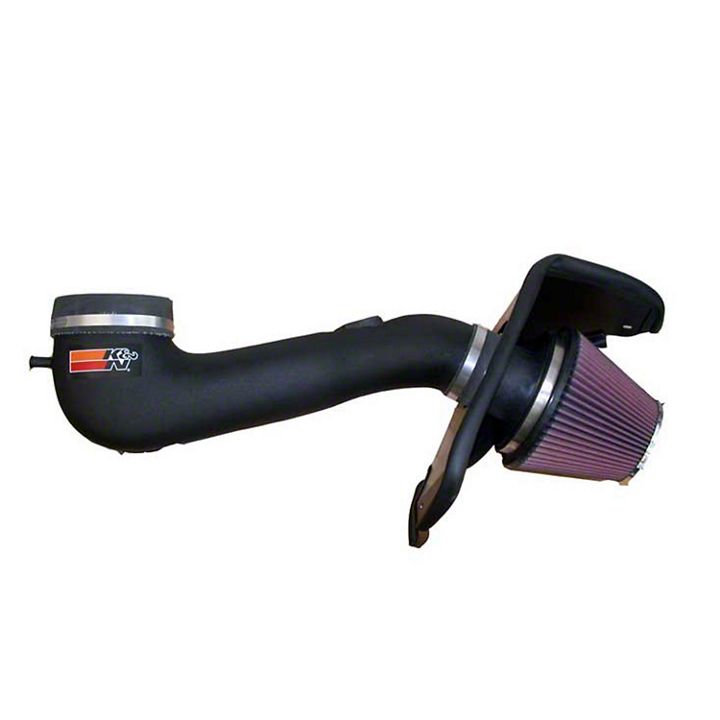
Shop Parts in this Guide
Installation
1. Turn the ignition OFF and disconnect the vehicle's negative battery cable.
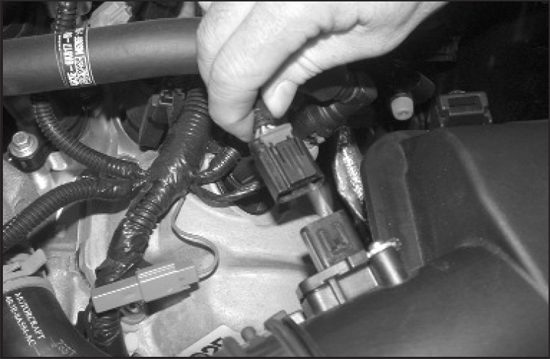
2. Release the red locking tab and then disconnect the mass air sensor electrical connection.
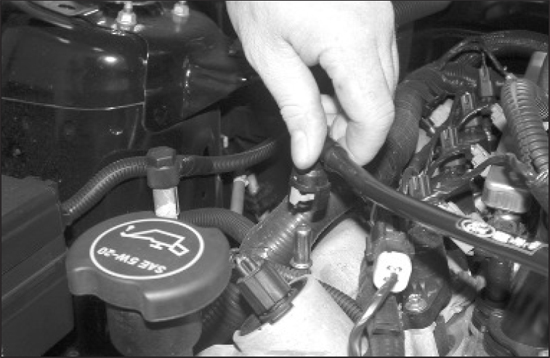
3. Rotate the green locking tab clockwise and then disconnect the crank case breather hose from the valve cover as show.
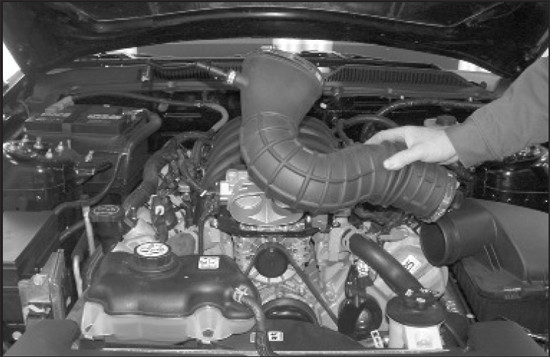
4. Loosen the hose clamps, which secure the intake tube to the throttle body and air box, then remove the intake tube as shown.
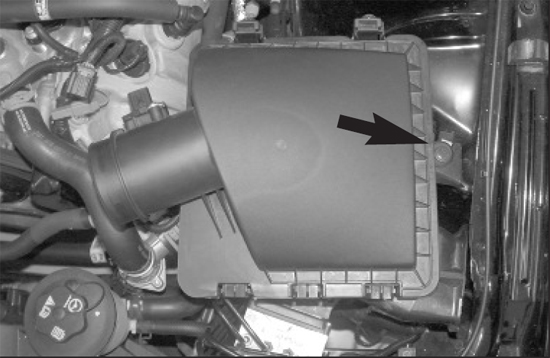
5. Remove the air box mounting bolt shown.
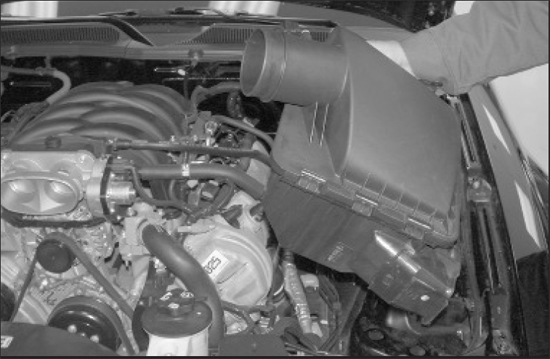
6. Remove the air box assembly as show. K&N recommends customers do not discard factory air intake.
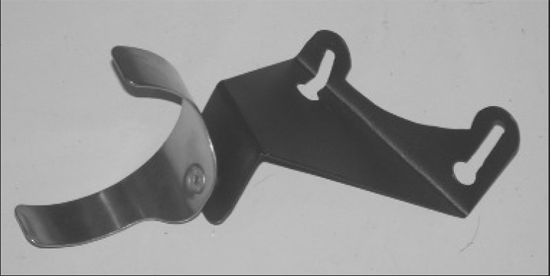
7. Install the saddle clamp onto the tube mounting bracket as shown with the provided hardware.
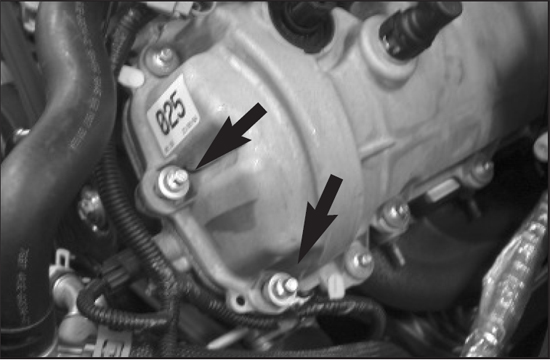
8. Remove the two valve cover bolts shown. These bolts will be reused.
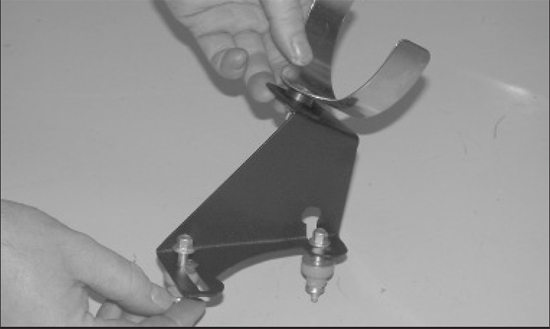
9. Install the valve cover bolts removed in step #8 into the tube mounting bracket as shown passing through the key hole portion and then slide the bolts to the end of the slots.
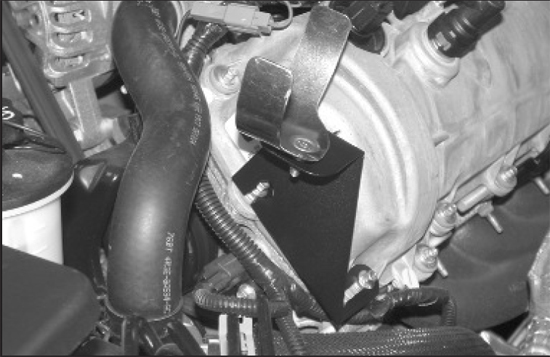
10. Install the tube-mounting bracket onto the valve cover as shown and secure with the stock hardware removed in step #8.
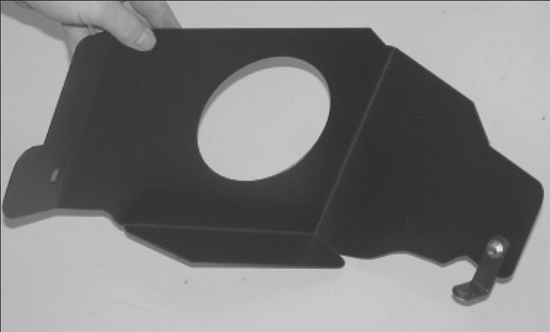
11. Install the "L" bracket onto the rear of the heat shield as shown with the provided hardware.
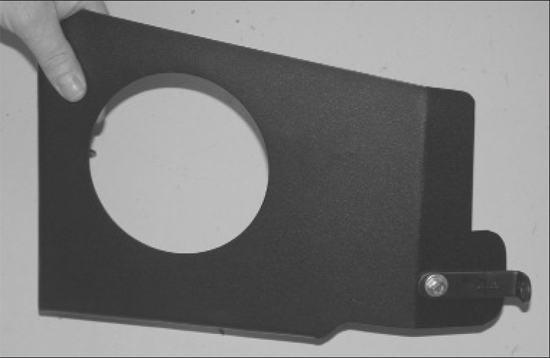
12. Install the "L" bracket onto the front of the heat shield shown with the provided hardware.
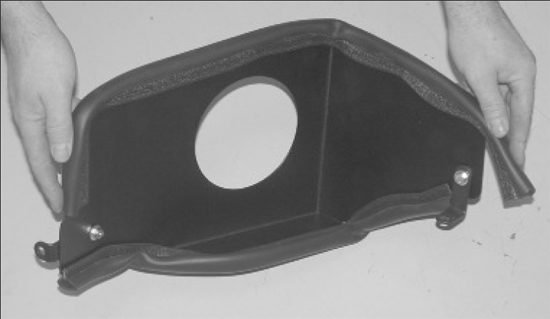
13. Install the edge trim onto the head shield as shown. Some trimming of the edge trim may be necessary for proper fit.
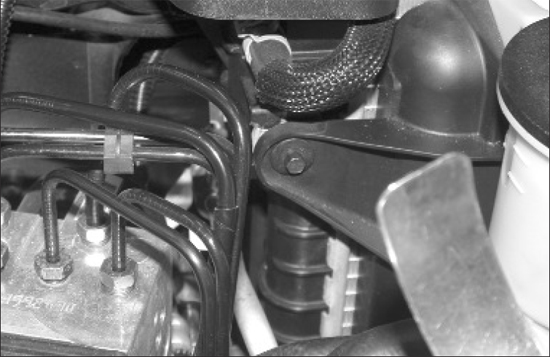
14. Remove the radiator fan shroud mounting bolt as shown.
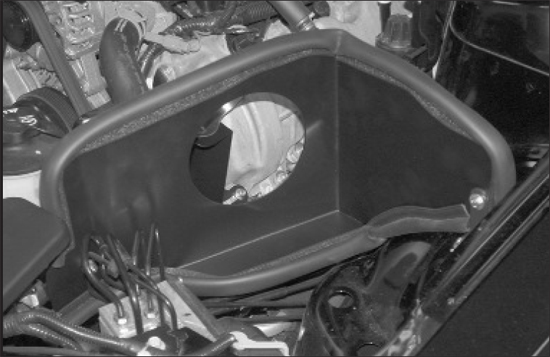
15. Install the heat shield and secure with the provided hardware as shown. The forward mounting bracket will mount to the radiator fan shroud mounting location and the rear bracket will mount to the air box mounting location.
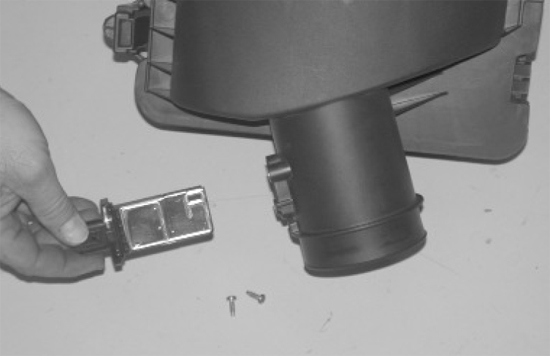
16. Remove the mass air sensor from the factory air box with the T20 "Torx" wrench provided.
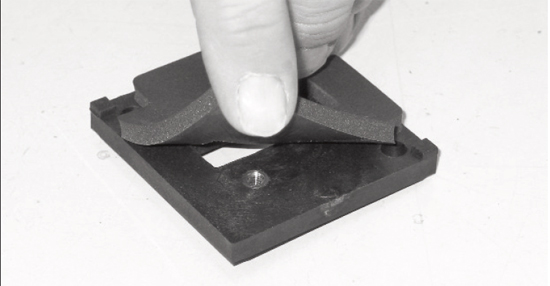
17. Install the provided gasket to the back of the K&N mass air sensor adaptor plate as shown.
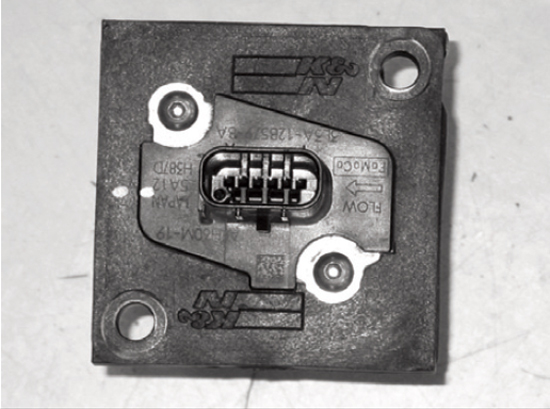
18. Install the mass air sensor into the K&N mass air sensor adaptor and secure with provided hardware.
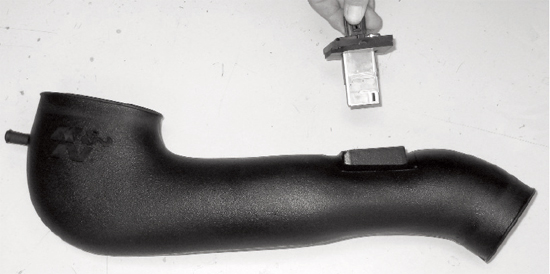
19. Install the mass air sensor assembly into the K&N intake tube and secure with the provided hardware. Be sure the opening in the mass air sensor is towards the inlet end of the tube.
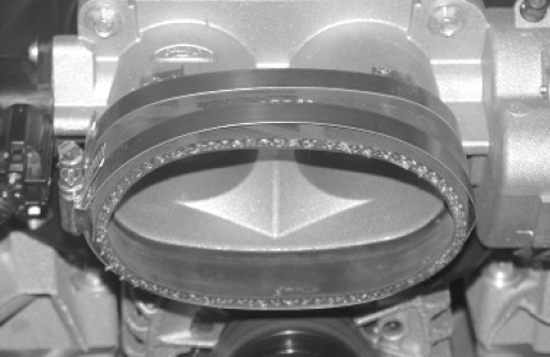
20. Install the silicone hose onto the throttle body with the provided hose clamp as shown.
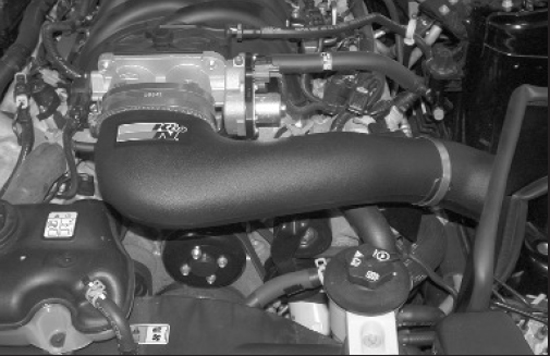
21. Install the K&N intake tube into the silicone hose at the throttle body and onto the saddle bracket assembly then secure with the provided hose clamps as shown.
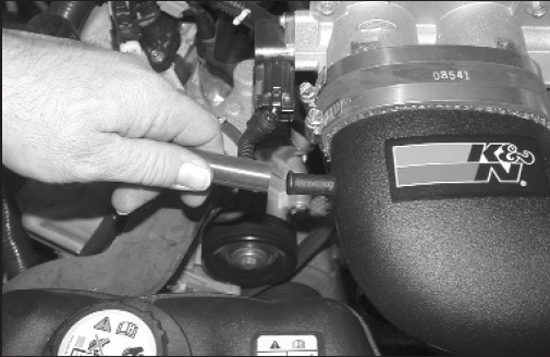
22. Install the supplied vent hose onto the vent port on the valve cover and then onto the K&N intake tube as shown.
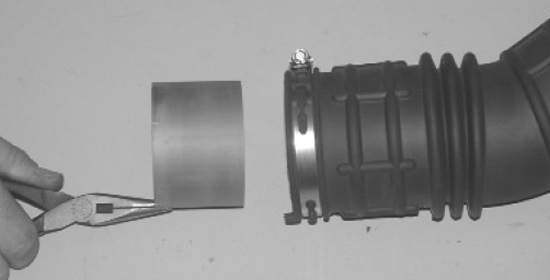
23. Vehicles that come with Hydrocarbon trap, use a pair of needle nose pliers to remove the Hydrocarbon trap from the stock intake tube as shown. The Hydrocarbon trap coating is very fragile; care should be taken during removal as not to damage it.
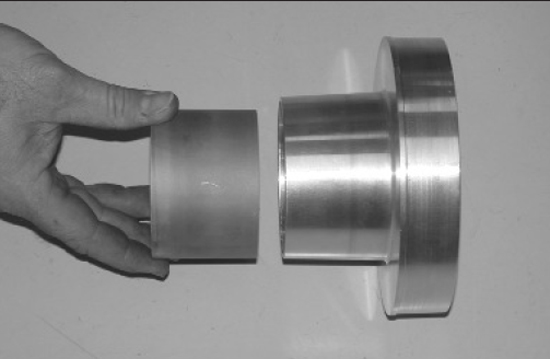
24. Vehicles that come equipped with Hydrocarbon trap, place the Hydrocarbon trap into the filter adapter as shown. The intake system is designed to use the factory Hydrocarbon trap. Failure to use the Hydrocarbon trap will result in poor performance and possible engine damage may result.
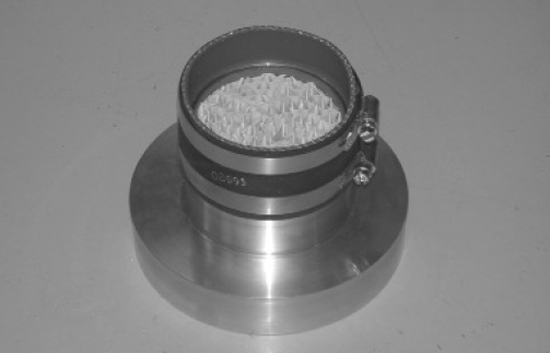
25. Install the silicone hose onto the filter adapter and secure with the provided hose clamp as shown.
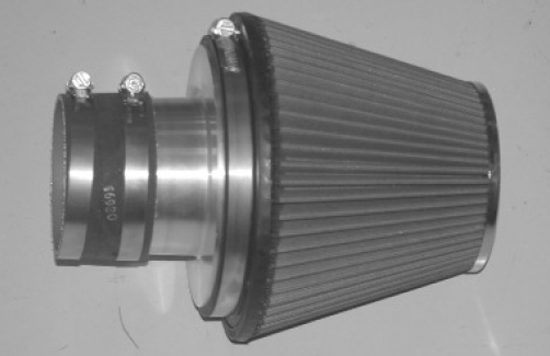
26. Install the air filter onto the air filter adapter and secure with the provided hose clamp as shown.
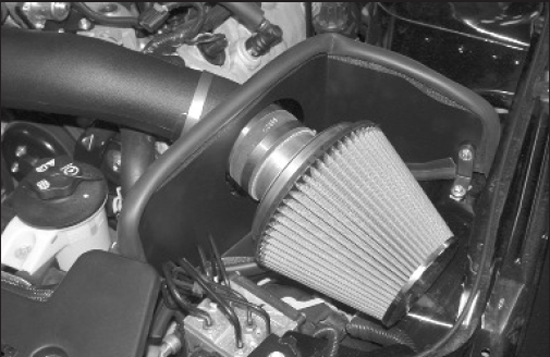
27. Install the air filter assembly onto the K&N intake tube as shown and secure with the provided hose clamp.
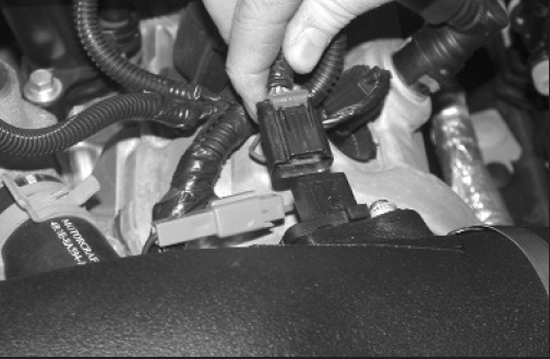
28. Reconnect the mass air sensor electrical connection as shown.
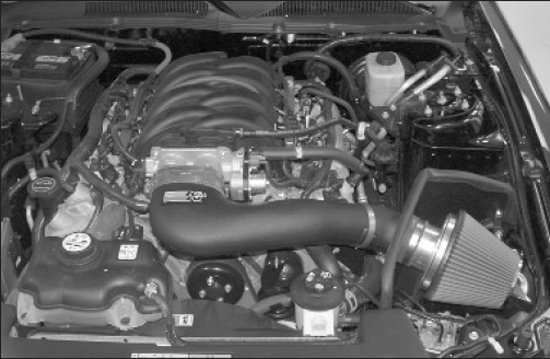
29. Reconnect the vehicle's negative battery cable. Double check to make sure everything is tight and properly positioned before starting the vehicle.
30. The C.A.R.B exemption sticker (attached) must be visible under the hood so that an emissions inspector can see it when the vehicle is required to be tested for emissions. California requires testing every two years, other states may vary.
31. It will be necessary for all K&N Performance Air Intake Kits to be checked periodically for realignment, clearance and tightening of all connections. Failure to follow the above instructions or proper maintenance may void warranty.
Installation instructions provided by K&N Engineering
Related Guides
-
Installation
-
Installation
-
Installation

