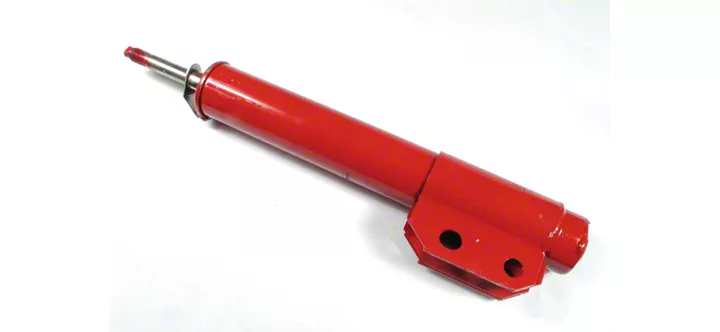
How to install a Lakewood 90/10 Front Drag Strut on your 1979-1993 Mustang

Shop Parts in this Guide
Installation
Read all instructions carefully before installing struts.
Caution:These struts are gas pressurized. Do not subject strut to direct flame from a torch if it becomes necessary to heat bolts for removal.
Work Safely
When changing struts, standard precautions should be observed to avoid any possibility of bodily injury. Do not get near or under vehicle until you are confident 'that it is safely supported and will not move or fa ll from its raised positio n. Be sure to worit on a clean, level s urlace for maximum safety.
Strut Removal
1. Secure emergency brake, place blocks or wedges in front of and behind both rear wheels to prevent movement in either direction.
Note: Work on one side at a time.
2. When you install the right-hand·side strut, turn wheels to the left to gain access to the lower mounting bolts. When installing the left-hand-side strut, turn wheels to the right to gain access to the lower mounting bolts on the left-hand side.
3. Once wheels are turned in the correct position, place floor jack under lower control arm near bal! joint (be sure not to damage ball joint grease fitting). Raise vehicle until wheel is off the ground.
4. Place an automotive-approved jack stand either under bumper or under frame by side door, then lower jack until car sits firmly on jack stand.
5. Remove wheel and inspect lower mounting bolt area. It may be necessary to remove the brake caliper and rotor in order to remove lower mounting bolts. (If ca liper must be removed, do not let it hang from brake hose or hose could be damaged).
6. Loosen upper piston rod nut located on strut tower inside engine compartment. Before removing nut. raise lower control arm with floor jack to relieve load on nut. (If tension is not relieved, strut will drop suddenly and could cause bodily injury or damage to cart.
7. Remove lower mounting bolts to se:>a rate strut from steering knuckle, then lower jack until strut can be removed. Never lower control arm to the extent that would allow rotor/caliper assembly to hang from brake hose, if caliper has not been removed).
- Do not remove wire strap from strut until positioned in vehicle for installation
- Inspect upper mounting pad and dust boot. Replace if worn.
- Be careful not to nick, scratch or damage polished piston rod during installation. If piston rod surface is damaged, strut service life will be drastically reduced and warranty will be voided.
- Piston rod is under pressure, use caution when removing wire strap from strut.
1. Compare original strut to Lakewood strut. There are two different widths on the steering knuckle mount (84-86 SVO and 87-91 GT & LX w,S.O liler engines are narrower). If your original strut is narrower than the Lakewood strut. use spacers (supplied) on each side of the steering knuckle to compensate for this condition (use in Step #4).
2. Examine upper mounting area to determine if sleeve (supplied) is required for installation. If the dust tube is directly attached to the upper housing, the spacer must be used. If the dust tube comes off with the strut, the spacer is not required.
3. Remove strap, and gas pressure will fully extend strut. Add sleeve (if required), then insert strut into dust boot to upper mounting pad. Attach with new upper mounting nut (supplied), and tighten only hand-tight.
4. Rotate strut and adjust control arm height with jack as required to align bolt holes on steering knuckle with mounti~g holes on strut (use spacers at this time if necessary). Re-install existing bolts and nuts and torque between 150-160 ft/lbs.
5. Torque upper piston rod nut to 60-75 ft/lbs.
Note: It may be necessary to hold top of rod above nut with wrench when tightening.
6. Reinstall brake rotor and ca liper assembly per manufacturer's instructions, install wheel and tighten lug nuts securely, remove jack stand and lower vehicle to ground to complete installation.
Repeat procedure for other side. Be sure to turn wheels in proper direction before beginning.
After installation, we recommend the front-end alignment be checked and set to manufacturer's specifications.
Note: For maximum efficiency, front sway bar should be disconnected for dragstrip operation. It is recommended that the sway bar be connected for street use.

