Guaranteed Free Delivery by 12/24! available on most items - Details
How to Install Maximum Motorsports 2-Point K-Member Brace (82-93 Coupe, Hatchback w/ Automatic Transmission) on your Ford Mustang

Shop Parts in this Guide
Read all instructions before beginning work. Following instructions in the proper sequence will ensure the best and easiest installation.
1. Park the car on level ground.
2. Block the rear wheels to keep the car from moving. Safely raise the car high enough so you can comfortably work underneath it and place the car on jack stands.
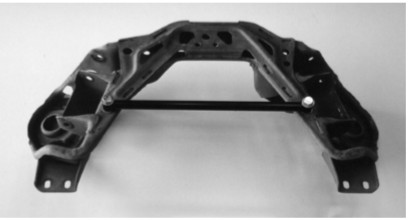
3. The tube will line up with 2 existing holes on the K-member (see photo). Be aware that it is possible to install the brace onto the car upside down. The mounting bolt tubes at the end of the brace are slightly angled. To determine the correct placement, position the brace until there is the best possible fit between it and the bottom of the K-member.
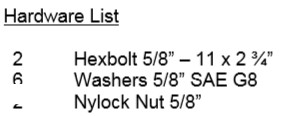
4. Using the supplied 5/8” hardware, bolt the brace to the K-member. Insert the bolt upward through the end of the tube and then through the K-member. Place a washer between the bolt head and the brace. Place a second washer between the brace and the K-member. Install the third washer and locknut on the bolt and tighten to 78 ft/lb.
5. Lower the car. Drive it for a day or two and then check the bolts, re-tightening if necessary.

2-Point K-Member Brace placement on the Kmember as viewed from the rear of the car


