FREE 1 to 3-Day Delivery on Orders $119+ Details
Best Sellers


How to Install Maximum Motorsports Adjustable Front Sway Bar (05-14 All) on your Ford Mustang
Installation Time
2 hours
Tools Required
- Standard assortment of hand tools
- Jack and 2 jack stands
- Torque wrench

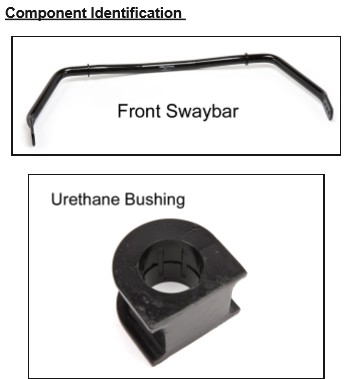
Maximum Motorsports’ 36mm adjustable front swaybar significantly reduces body roll, and lets you tune your Mustang’s handling characteristics. Three endlink mounting holes allow altering the swaybar’s effective rate. Recommended for use with the MM Road & Track spring set. Included in the MM Road & Track Boxes for 2005-2014 Mustangs.
Read all instructions before beginning work. Following instructions in the proper sequence will ensure the best and easiest installation.
Supplemental Installation Notes
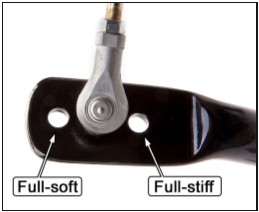
• The front swaybar has 3 adjustments: from full-soft to full-stiff. Adjustment is controlled through the placement of the front endlinks in the swaybar. The first setting, closest to the end of the bar, is the softest setting. The setting in the middle is recommended for street and daily use. The third setting is the stiffest and recommended for dry roads and track time.
• Always use the same settings on both sides of the car.
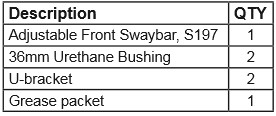
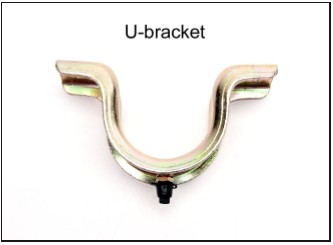
This Kit Contains
Installation
1. Raise front of car and support it using jack stands.
NOTE: Vehicle must be lifted and supported under rocker panel pinch welds to avoid damaging chassis (as specified in Ford service manual). Do not lift by K-member.
2. Remove front wheels.
3. Disconnect front swaybar endlinks from swaybar.
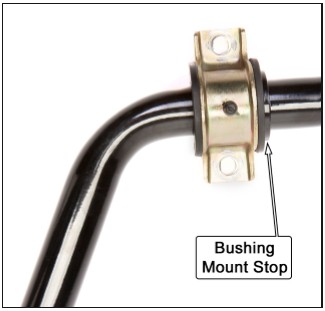
4. (2011-14 ONLY) Remove the stock crossmember brace that attaches OEM K-member to the OEM radiator support.
NOTE: To gain access to the forward mounting bolts on the brace, remove the 3 retaining screws at the rear most part of the front splash shield. While complete removal of the front splash shield is not necessary, it can simplify the removal and installation of the crossmember brace.
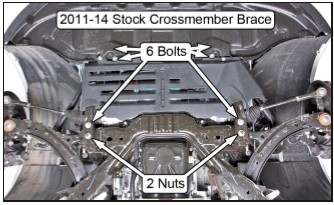
5. Remove swaybar mounting brackets from the radiator core support.
6. Remove swaybar from car.
7. Lubricate the new swaybar and the inside of the bushings with the supplied grease.
8. Install the bushings onto the bar just outboard of the bushing mount stops.
9. Install new swaybar and new mounting brackets onto the radiator core support and torque the 4 nuts to 70 Nm (52 lb-ft).
10. (2011-14 ONLY) Reinstall the stock crossmember brace that attaches OEM K-member to the OEM radiator support. Torque the 6 bolts and 2 nuts to 65 Nm (48 lb-ft).
NOTE: Reinstall front splash shield and/or any hardware that was removed.
11. Attach swaybar endlinks in desired position. Torque hardware to 115 Nm (85 lb-ft).
NOTE: The front swaybar has 3 adjustments, from soft to full firm. Adjustment is controlled through the placement of the front endlinks in the swaybar. The first setting, closest to the end of the bar, is the softest setting. The setting in the middle is recommended for street and daily use. The third setting is the stiffest and recommended for dry roads and track time.
12. Reinstall wheels and safely lower vehicle to the ground. Torque lug nuts to manufacturer’s specifications.