Best Sellers
How to Install Maximum Motorsports Sport Series Rear Lower Control Arms (99-04 All, Excluding Cobra) on your Ford Mustang
Shop Parts in this Guide
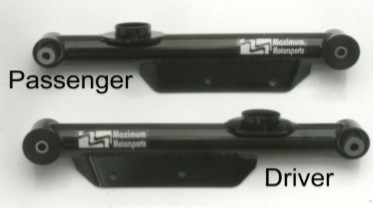
Read all instructions before beginning work. Following instructions in the proper sequence will ensure the best and easiest installation.
1. Block the front wheels to keep the car from rolling.
2. Jack up the rear of the car and support the chassis on jack stands.
3. Lower the rear axle to a height just above full droop. Support the axle on jack stands.
4. Remove the rear wheels.
5. Remove the rear swaybar. There are four bolts, two per side. If so equipped, unclip the ABS wire from it’s bracket.
6. Loosen the lower control arm pivot bolts, 2 bolts per control arm.
7. Support the control arm near the axle mount with a jack. Remove the lower control arm pivot bolt from the axle end. Slowly lower the jack to release the spring tension. Be careful not to lower it too quickly or the spring may become dislodged and fly out, causing injury and/or damage. Once the spring is completely uncompressed, remove it from the car.
8. Remove the control arm pivot bolt from the chassis and remove the control arm from the car.
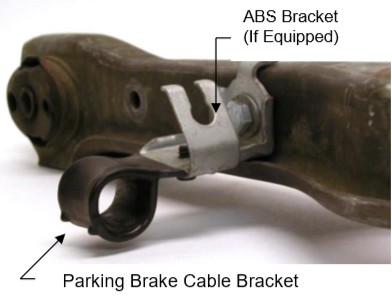
9. The configuration of the parking brake and ABS brackets needs to be changed. Disconnect the parking brake cable from the caliper. To do this, remove the E-clip and pull on the end of the cable with pliers to unseat the cable end from the caliper. Make sure the parking brake is off!
10. Slide the Parking Brake Bracket off the cable.
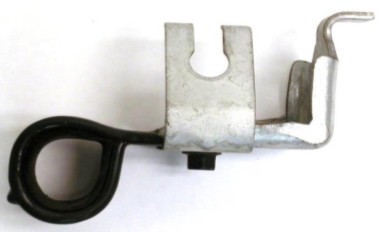
11. Remove the ABS bracket.
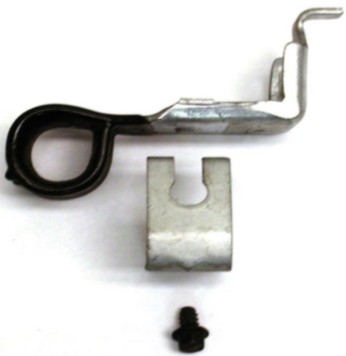
12. Flip the parking brake bracket 180 degrees and place the ABS bracket on top of the parking brake bracket.
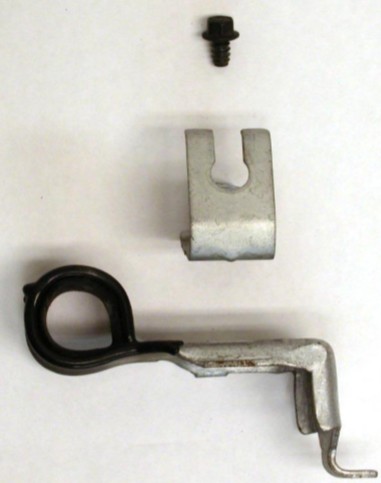
13. Tighten the ABS Bracket screw.
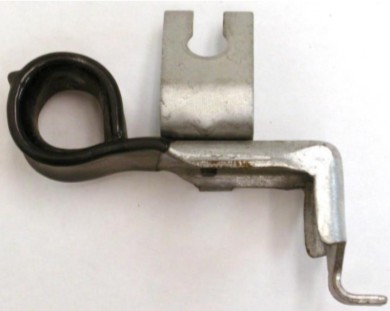
14. Slide the bracket back onto the parking brake cable and reattach the Parking Brake cable to the caliper.
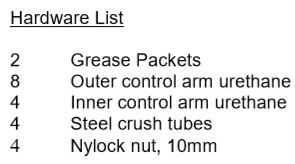
15. Install the polyurethane bushing into the MM Control Arm. Using the supplied grease, apply a light coating of grease to the outside of the urethane pieces. Install one of the 8 outer pieces into the control arm. From the other side, install one of the 4 inner bushings, seating it against the previously installed outer bushing. Install the second outer bushing, seating it against the inner bushing.
16. Apply grease to the inside of the bushings. Use a small screwdriver or other tool to work the grease into the flutes of the bushing.
17. Insert the steel crush tube through the center of the urethane bushings.
18. Apply a light coat of grease to the outside flange of the installed urethane bushings, where they will contact the chassis.
19. Reattach the control arm to the chassis.
20. Install the lower spring isolator on the MM Control Arm.
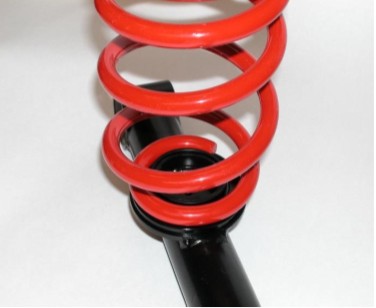
21. Place the spring on the control arm and raise the arm into position with the jack. Position the “pigtail” towards the rear, as shown below. Be sure the spring is correctly seated into both the upper and lower perches.
22. Install the rear pivot bolts at the axle housing.
23. Torque the chassis pivot bolt to 111 ft-lb.
24. Torque the axle pivot bolt to 111 ft-lb.
25. Repeat steps 6 to 24 for opposite control arm.
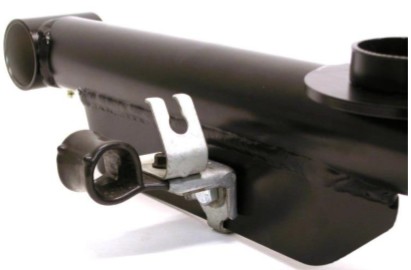
26. Reinstall the rear swaybar using the supplied nuts. Attach the Parking Brake Bracket to the rearward swaybar bolt in the position shown below. Tighten the swaybar bolts to 41 ft-lb.
27. Reattach the ABS wires on both sides of the car.
28. Verify the parking brake works from inside the car. Adjust to factory specifications if necessary.
29. Reinstall the rear wheels.
30. Lower to the ground and torque the lug nuts.
