Guaranteed Free Delivery by 12/24! available on most items - Details
Mishimoto 14in. Performance Slim Radiator Fan - Installation Instructions
Installation Time
2 hours
Tools Required
- Basic Socket Set or Wrench Set
- Metric Set
- Deep Well 10mm or 10mm Wrench
- Wire Strippers
- 5 ft. Wire
- 2 Position Switch
- Solderless butt connectors or soldering iron
- Phillips and Flathead Screwdrivers
Installation
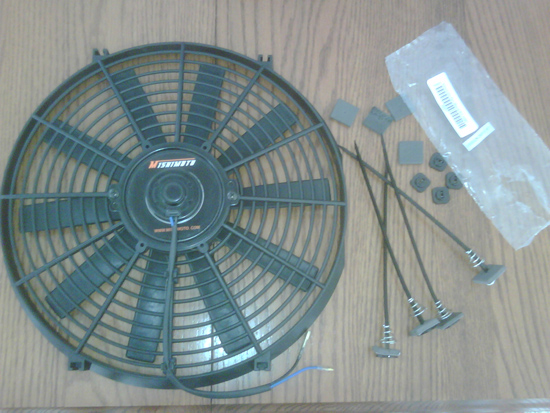
1. The first thing to do is open your package and make sure you have everything. There should be your new radiator fan with four attachments that resemble a T and O connected together. When I first got mine, I did not have these and had to call Mishimoto to get a replacement. You should also have 4 heavy duty plastic fasteners, 8 adhesive foam pads, 4 springs, and 4 end connectors.
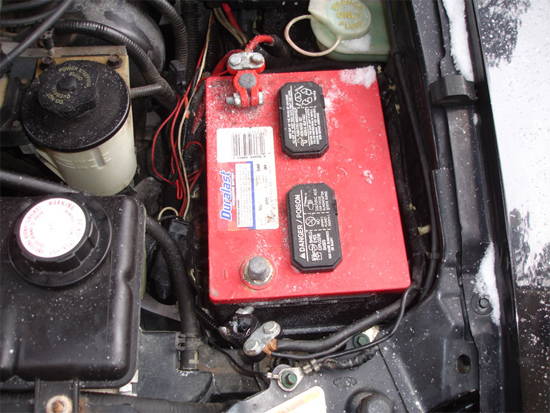
2. Disconnect your battery.
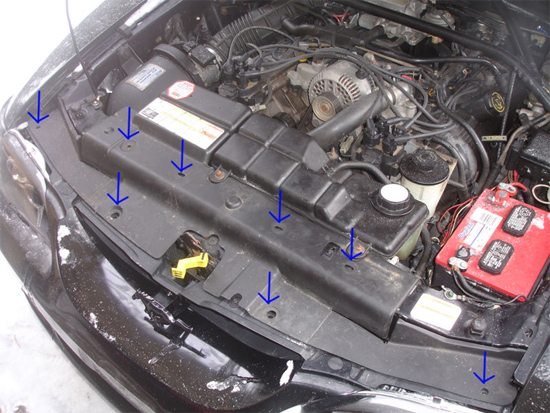
3. Take off your radiator cover (if applicable). There are 8 clips that hold it on all together.
4. Next, take off the coolant reservoir by removing the three, 10mm nuts.
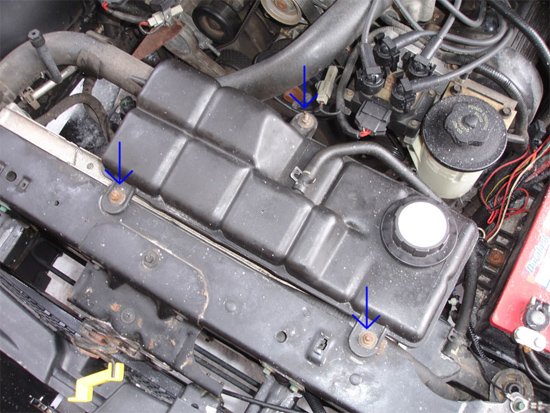
5. Now pull the coolant reservoir up off the bolts, and pull the overflow tube up and over the cap so it is out of the way. Then twist the passenger side of the tank to the front of the car and push the whole assembly to the driver’s side of theca so it is out of the way.
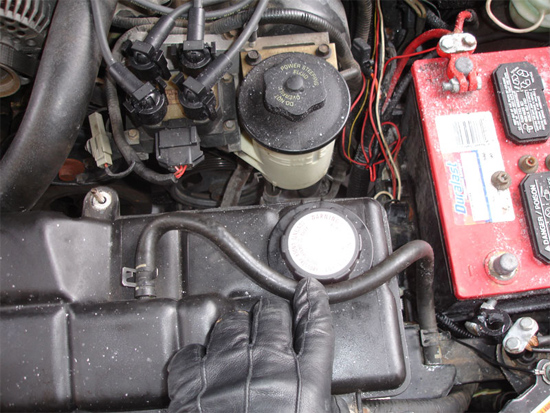
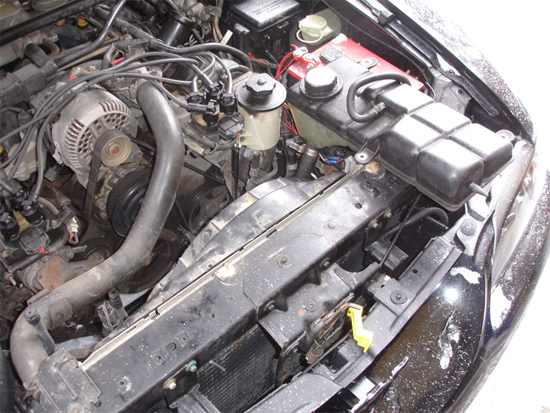
6. You can now get a clear view of the fan. There are two, 8mm bolts on each side of the fan.
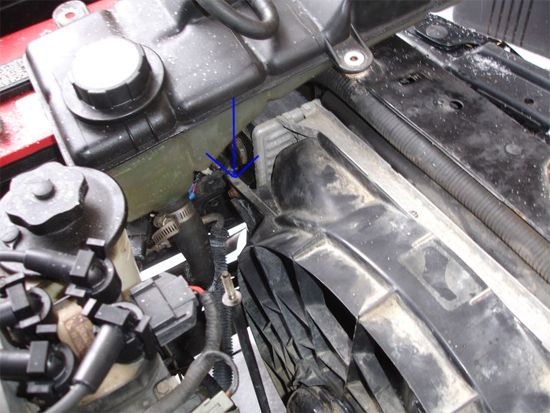
7. Next you unclip the connector from the radiator fan motor. After that, the fan will be loose. Move it slightly towards the driver side of the car, and pull up on the passenger side and the whole fan should come out no problem.
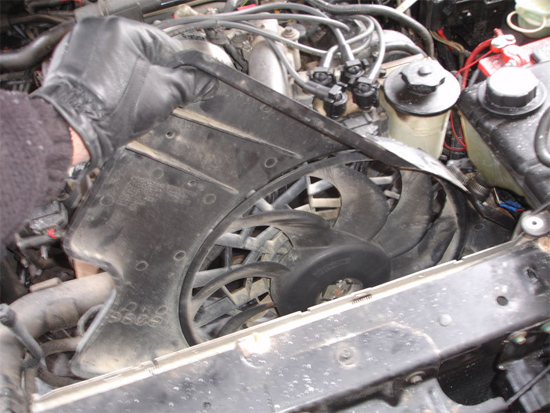
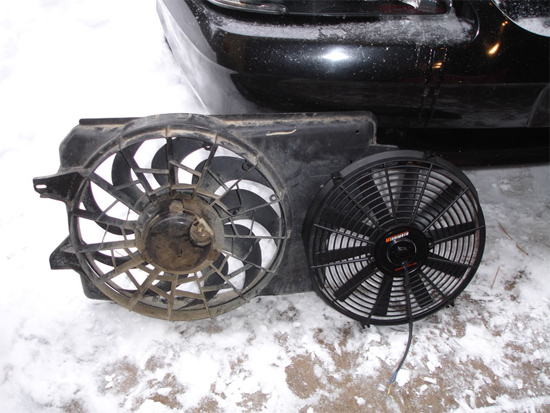
8. Here you can see the difference of the new Mishimoto fan compared to the stock fan with shroud. Even though it is smaller with no shroud, it still performs excellent.
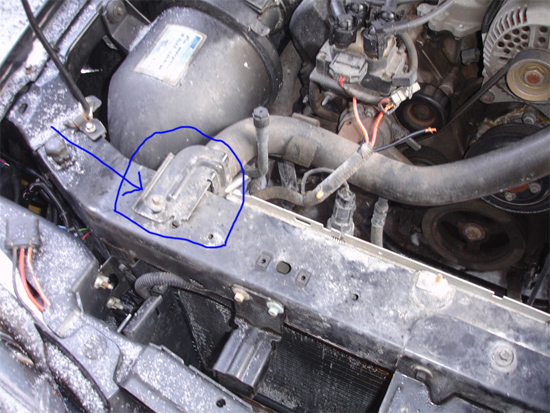
9. After pulling out the fan, you will see that it’s kind of a tight fit between the radiator and condenser. You will have to remove the mounts of the radiator so you can tip it towards the motor, so you have enough room to get your hands between the two in order to install the mounts for the new fan. You may need to remove the battery if you do not have a swivel socket to get at the radiator mount by the battery. If you do not remove it, be careful not to hit the posts with your ratchet or wrench
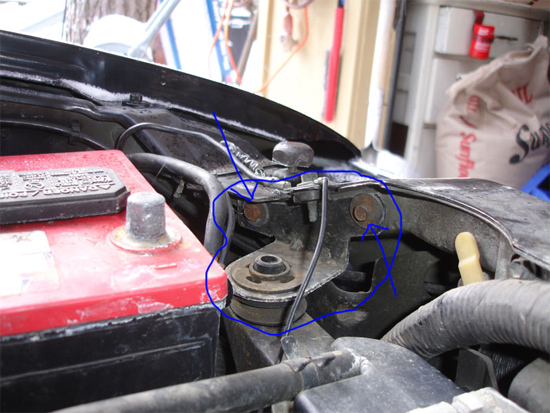
10. You can now install the new fan. I would recommend installing the bottom two fasteners first. You may look at the installation pieces they gave you and wonder how they go together. It goes: Fan, pad, radiator, pad, spring, fastener, and then the plastic zip fastener going through all of them. Be careful as you’re pushing the fastener through the radiator. It should go through the fins of the radiator, in between the coolant passages running left to right. Then cut off the excess zip fastener after pulling everything tight.
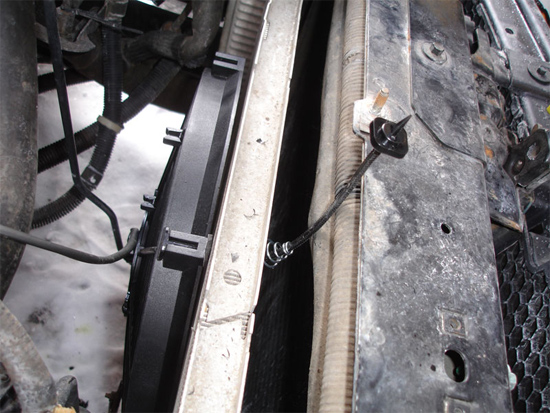
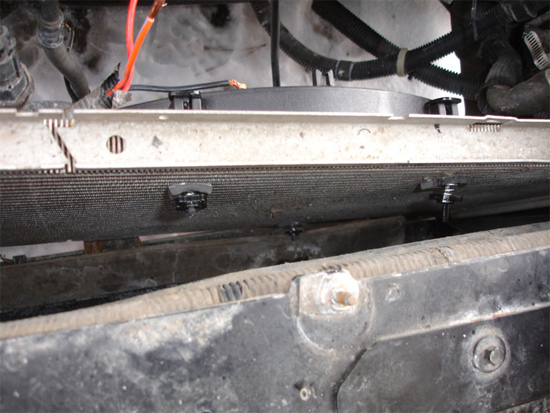
11. After installing the radiator fan, you can bolt the radiator mounts back into place. Next, you can do the wiring for the new fan. There are many different ways you can do this. One way is to find the orange and blue wire and connect it to the blue wire on the fan, and then connect the black wire from the harness to the black wire on the fan. There will be a red and orange wire left. You can tape this one off as it will not be needed.
12. I decided I wanted to have control of when the fan switched on. I connected the orange/blue wire to the blue wire on the fan. I then ran a wire from the black wire on the fan to the interior of the car through the firewall. I then attached it to a switch mounted on the dash. The other wire I attached an inline fuse to it and grounded it on the chassis. This way, the fan always has power running to it with the key on, but will only turn on when my switch is turned on. You can do it either way you please, and you can add in a relay if you wish.

13. After you wire it all up, you can put the reservoir back in place, bolt it back up with the three nuts, and then install the radiator cover. Start up the car and if you put in a switch, see if it works. Or go drive the car around close to home and see if the fan will kick on when it is supposed to. Good Luck!
14. Any questions, please email us.
Installation instructions provided by AmericanMuscle customer William Lukas 1.19.09

