
Mishimoto Performance Aluminum Mustang Radiator Installation Guide (Manual - 96 GT/Cobra)
Installation Time
2 hours
Tools Required
- Drain pan
- #2 Phillips screwdriver
- Flat blade screwdriver for loosening hoses
- Large pliers
- Small pliers
- Rags (to clean any spilled coolant)
- Deep-dish 8mm and 10mm sockets/ratchets
- Floor jack and two jack stands
- 8 Zip tie (not necessary, but makes the install cleaner)
- inch open end wrench
Installation
Removal:
1. Remove the negative (black) battery cable from your car’s battery using the ½-inch wrench. If you wish, you can remove the battery itself to reduce the risk of banging the new radiator on it during install, but this is optional.
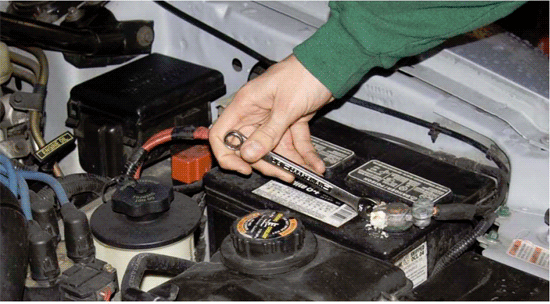
Removal of the negative battery terminal cable.
2. Place the drain pan below the drain plug and drain the coolant from your existing radiator by unscrewing the drain plug, which is located on the passenger side of the radiator. Note that the drain plug will not actually detach from the radiator. The coolant will drain quicker if you also unscrew and remove the radiator fill cap; just make sure that your drain pan doesn’t overflow.
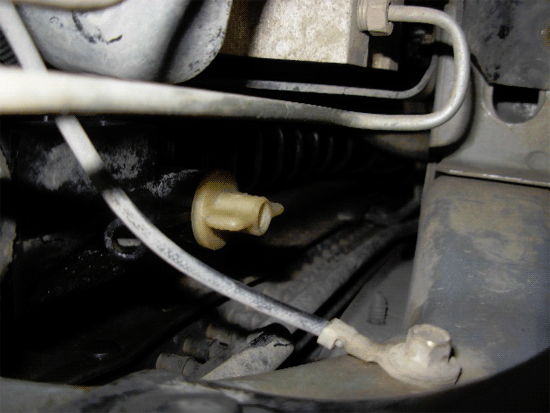
Coolant drain plug.
3. Using the 10mm deep-dish socket and ratchet, unscrew the three nuts that retain the coolant reservoir.
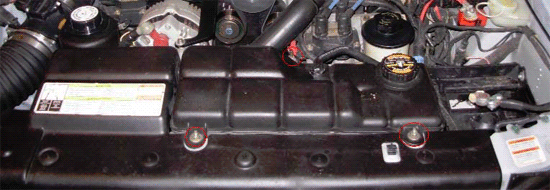
Coolant reservoir nuts circled in red.
4. Disconnect the coolant reservoir level sensor. Then detach the coolant reservoir tube from the bottom of the reservoir using the large pliers and a flat blade screwdriver.
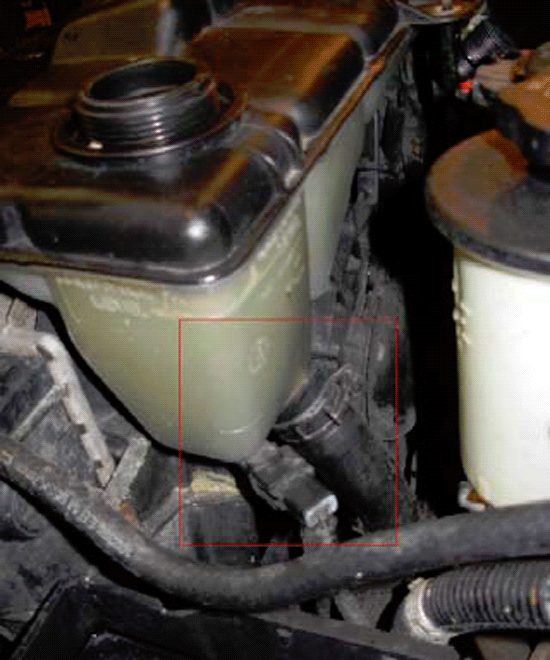
Coolant reservoir with level sensor and tube outlined in red.
5. Using the small pliers and a flat blade screwdriver, carefully remove the coolant reservoir overflow tube from the coolant reservoir.
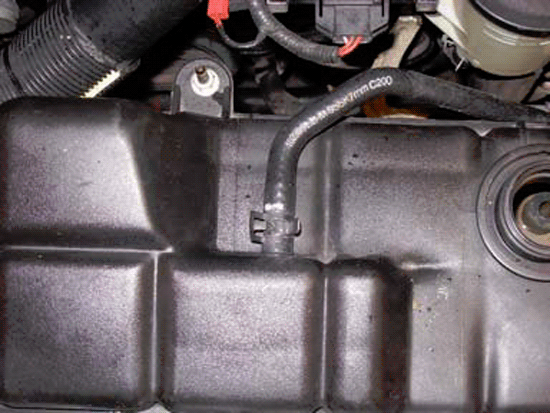
Coolant reservoir overflow tube.
6. ack up the front of the car using the floor jack and secure using the two jack stands.
7. Pull the coolant reservoir off the one horizontal and three vertical mounting studs and remove from vehicle. The rear stud is a threaded rod that is attached to a rubber fitting under the center of the radiator and fan. Remove this by pulling it out of the rubber fitting.
8. Unscrew the eight plastic rivets (circled in red) using the Phillips screwdriver and remove the plastic rivet bases. The radiator cover should then pull off easily.
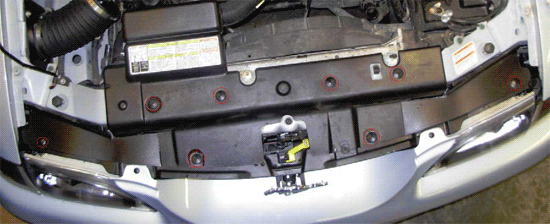
Upper radiator in car.
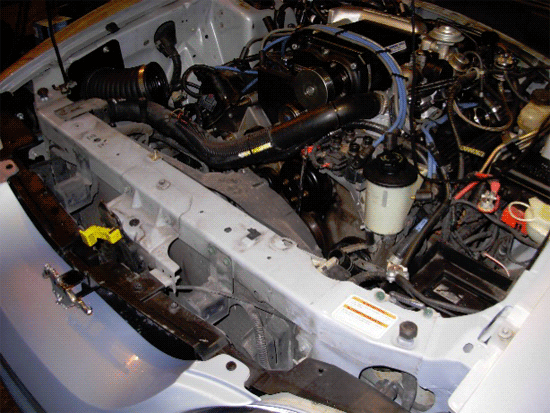
Upper radiator cover removed
9. Using the small pliers and flat blade screwdriver, remove the upper radiator overflow tube from the radiator.
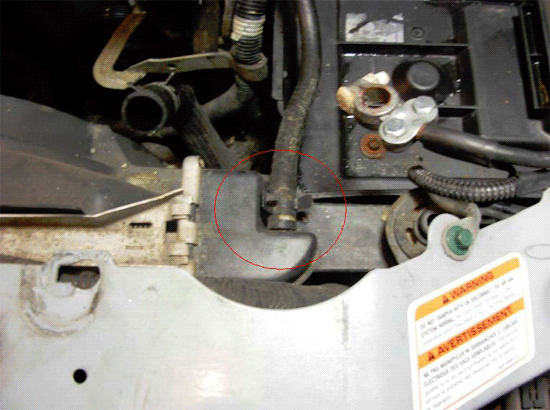
Upper radiator overflow tube circled in red.
10. Disconnect the two fan electrical connectors from the fan shroud. They are located on the passenger side of the shroud. Then disconnect the fan power from the fan motor.
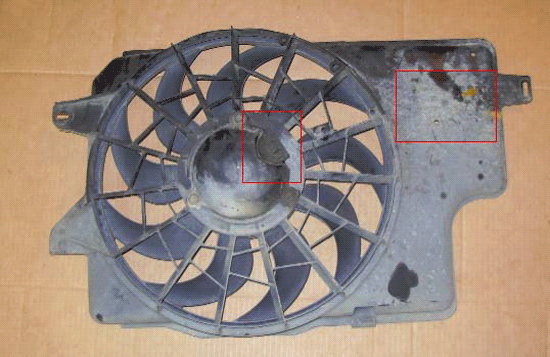
Fan shroud. Locations of electrical connectors are outlined in red.
11. Using the large pliers and a flat blade screwdriver, detach the two large hoses from the radiator. There is one attached to the upper passenger side and one on the lower driver side.
12. Unscrew the two radiator fan bolts (one on each side) from the radiator using the 8mm socket/ratchet and remove the fan/shroud assembly.
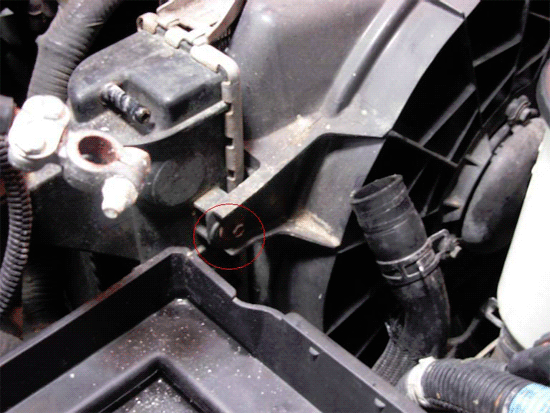
Back of radiator fan from the driver side. Bolt is circled in red. There is another on the passenger side.
13. Unscrew the two upper radiator mounting brackets using the 8mm socket/ratchet. There are three bolts holding them to the car; two on the driver side and one on the passenger side. Remove the passenger side bracket. The driver side bracket will come out with the radiator itself.
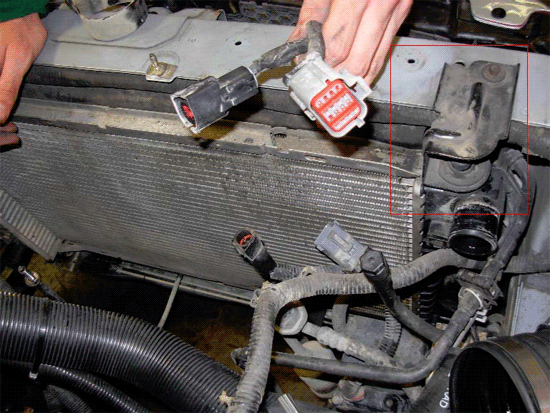
Passenger upper radiator mounting bracket.
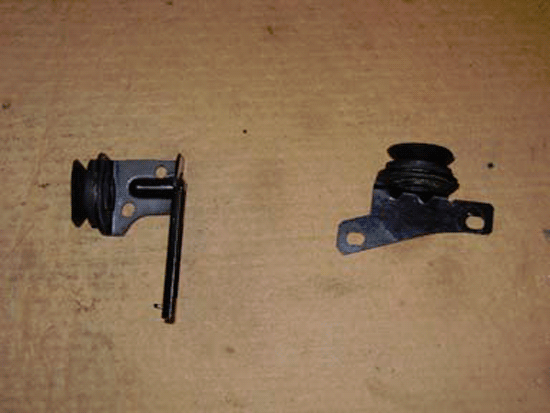
Upper radiator mounting brackets.
14. CAREFULLY pull the radiator up and out from the vehicle. There are two vertical mounting studs that it rests on. The radiator must be pulled clear of these before it can be removed. Do not bang it against anything on the way out or it will be damaged. There should be a rubber debris deflector attached to the bottom of the radiator. If it is not there, search the base of the radiator-mounting frame in the car for it.
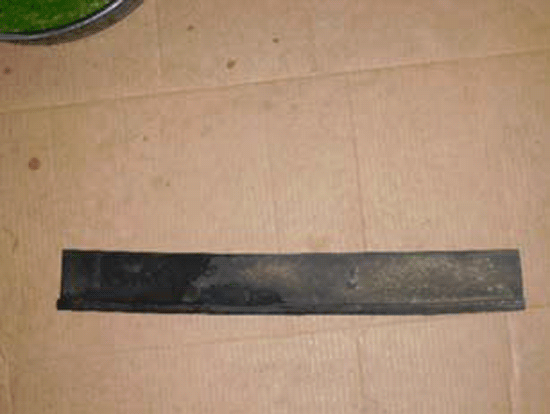
Rubber debris deflector.
15. This step may not be necessary depending on the year of your Mustang, but for mine it was needed. Since the Mishimoto radiator is twice as thick as a stock Mustang radiator, it sticks in to the engine bay twice as deep as the stock radiator. This can lead to clearance issues with the ABS module. The solution is to unscrew the three screws holding the ABS mounting bracket to the engine bay and then slot the holes in the bracket to allow the ABS system to be slid towards the rear of the car by about¼.” Then, simply remount the ABS bracket as far back as the slots will let you and you should have enough clearance for the radiator.
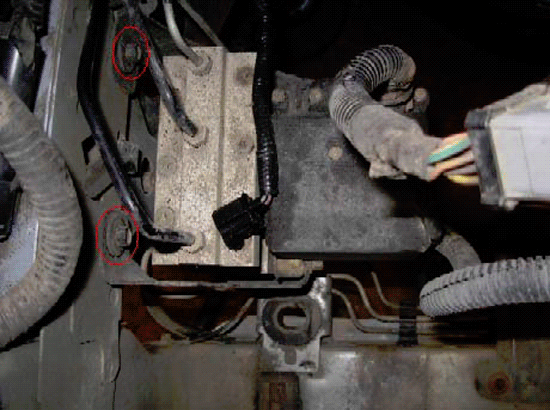
ABS mounting bracket screws circled in red.
16. Slide the driver side upper mounting bracket on the Mishimoto radiator upper mounting stud.
17. CAREFULLY install the radiator into two lower mounting holes, ensuring that both of the posts on the radiator are engaged in the holes and that you don’t hit the radiator fins on anything in the process, as this will cause damage to the radiator.
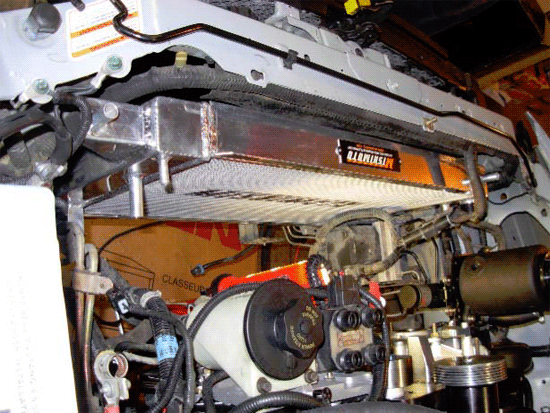
Mishimoto radiator mounted into lower mounts.
18. Clip the rubber debris deflector strip onto the bottom of radiator. Make sure the flap covers the bottom of the radiator. This is a good time to make sure that the radiator drain plug is closed. It is located in the same place as the stock one on the radiator.
19. Slip passenger side upper radiator mount onto upper radiator mounting stud.
20. Bolt both upper mounting brackets to car using the 8mm socket/ratchet. There are two bolts on the driver side and one on the passenger side.
Install fan with two 8mm bolts onto the radiator. Make sure it’s between the lower bracket (see pic below) and radiator. It is a tight fit.
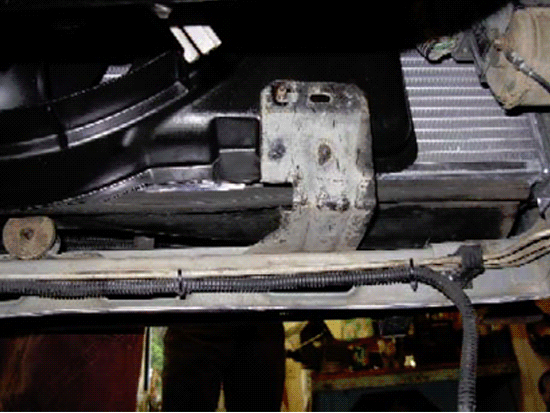
Lower passenger side bracket. Notice that the fan shroud is behind it.
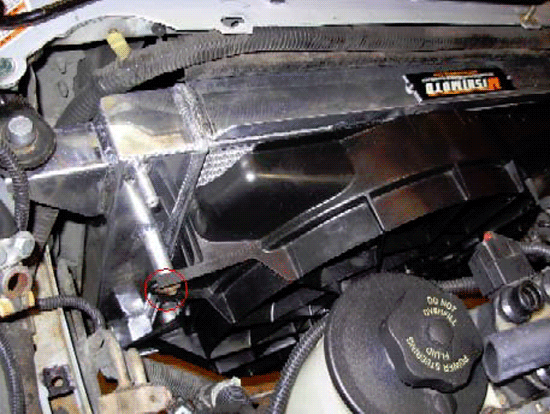
Driver side mounting bolt for fan shroud.
22. Connect the power wire to the fan motor and clip the two ABS wires together. Then attach the ABS wire clips to the fan shroud. It makes for a cleaner install to zip-tie the ABS wire connectors together, because one of them will no longer be able to reach its mounting hole due to the wider radiator (see pic below).
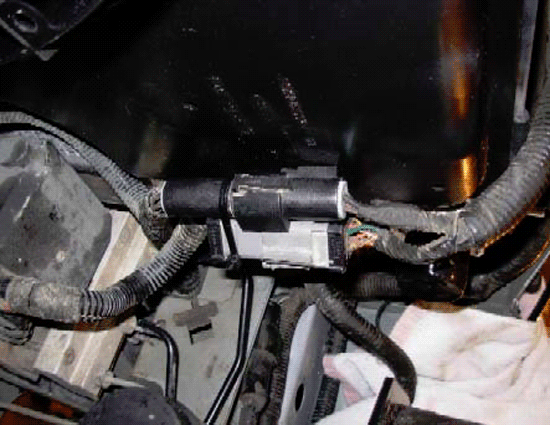
ABS connectors zipped together.
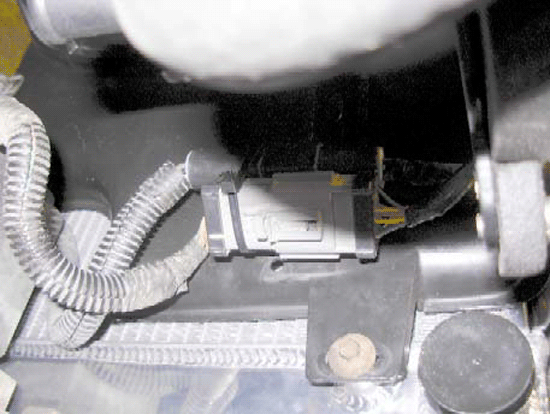
ABS connectors attached to fan shroud (looking down from above).
23. Attach and clamp the two large coolant tubes and one small coolant tube to the radiator, using the large and small pliers respectively.
24. Affix coolant reservoir mounting rod to the rubber fitting that is under the center of the radiator.
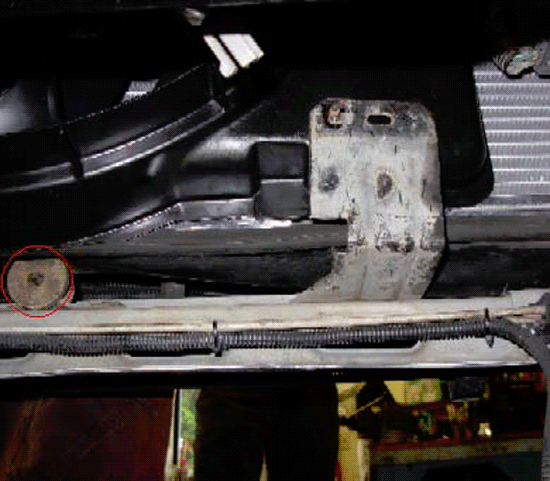
Rubber fitting for coolant reservoir mounting rod circled in red.
25. Install the coolant reservoir onto the two mounting studs. Make sure that the mounting rod also goes through the reservoir’s rear mounting hole. Screw on the three nuts that go on the mounting studs and rod, using the 10mm deep-dish socket.*WARNING: Do not overtorque the front nuts.* Then, install the coolant reservoir overflow tube onto the reservoir, using the small pliers.
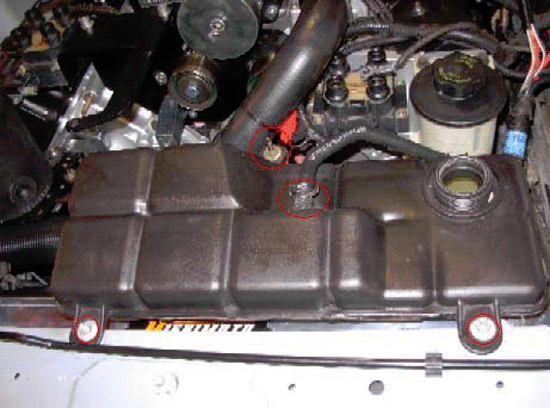
Mounting studs, rod, and overflow tube circled in red.
26. Attach the low-coolant sensor wire to the low-coolant sensor, located on the bottom of the coolant reservoir.
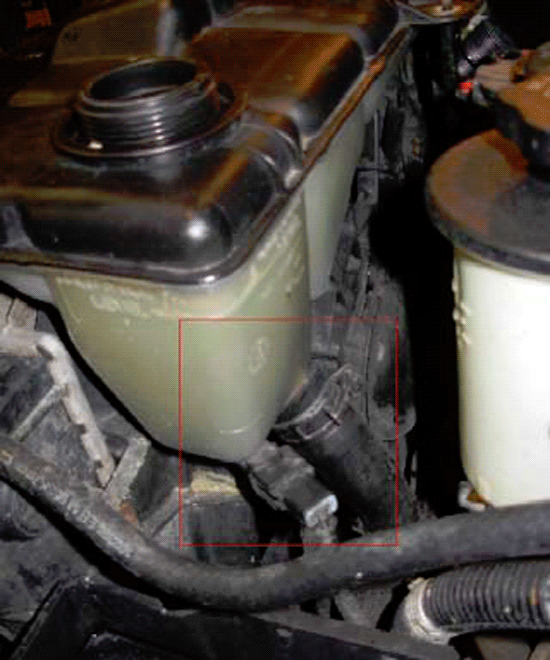
Coolant reservoir with level sensor and tube outlined in red.
27. Install the lower coolant reservoir coolant tube to the coolant reservoir, using the large pliers.
28. Install the radiator cover, making sure that the horizontal mounting stud on the coolant reservoir sticks into the hole of the radiator cover. Then secure the eight plastic rivets (circled in red) by first pushing in the bases and then inserting the screws into the rivets. The radiator cover should then pull off easily.
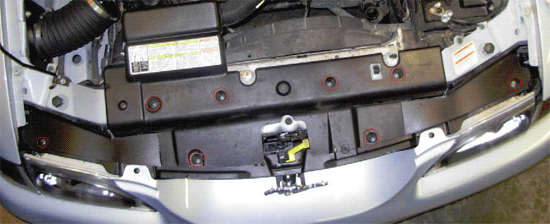
Upper radiator in car.
29. Lower the car using the floor jack and remove the two jack stands.
30. Refill the coolant reservoir with the proper ratio of distilled water and coolant (which depends on the outside temperature in your area) through the coolant reservoir fill hole. Note that you will need to let the coolant settle after filling it and will need to repeat the filling process several times as it takes the coolant a while to fill the radiator. The car will take more coolant than it did stock due to the larger radiator.
31. If you removed the battery, reinstall it now. Otherwise, proceed to step 32.
32. Reattach the negative battery wire to the negative battery terminal using the ½-inch wrench.
33. Screw the coolant reservoir cap onto the coolant reservoir. Start the vehicle and make sure that there are no coolant leaks anywhere, by looking for puddles on the ground and smelling for coolant. Then, after letting it idle for a while, check for any white smoke in the engine bay.
34. Shut the car down after running it for a couple minutes and re-check the coolant level after letting the car cool. If the level is low, refill it, start the car, and repeat all of step 33 until it no longer needs any more coolant. Once it no longer needs coolant after running it, the installation is complete.
Installation instructions provided by AmericanMuscle customer Jeff Braun 8.12.08

