Guaranteed Free Delivery by 12/24! available on most items - Details
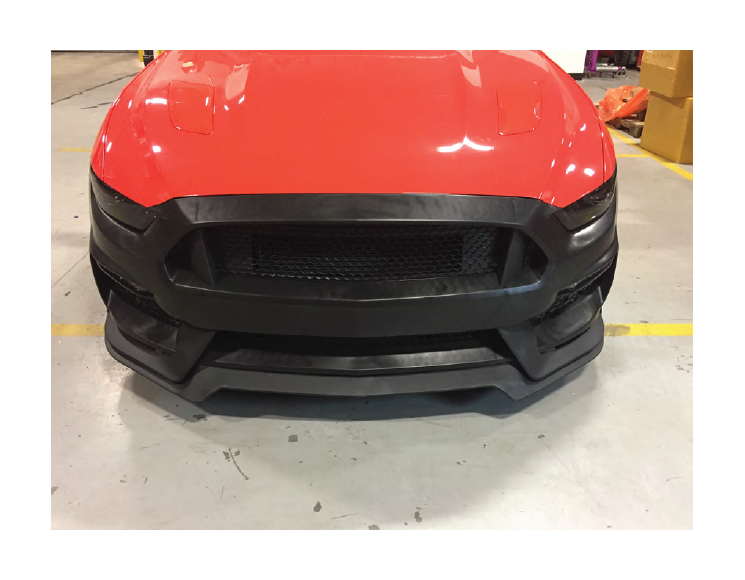
How to Install MP Concepts GT350 Style Front Bumper Kit - Unpainted on your Mustang

Shop Parts in this Guide
Step 1:
Jack the vehicle up and support the font end with jack stands.
Step 2:
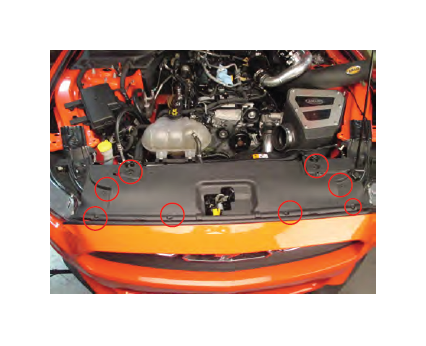
Remove the 8 clips securing the plastic radiator cover to the support and remove it from the vehicle.
Step 3:
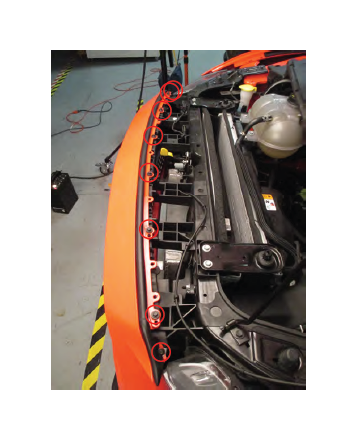
Remove the 8 bolts securing the bumper cover to the rad support.
Step 4:
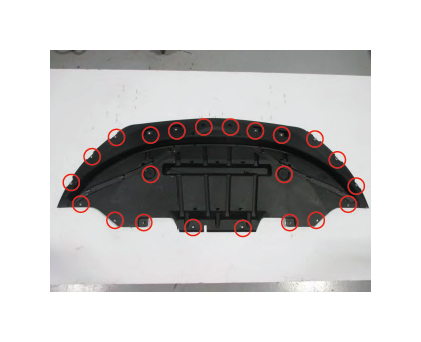
Support the front of the car so you can access the bumper splash shield. **Note there are two versions of the splash shield. Both are attached to similar locations
Step 5:
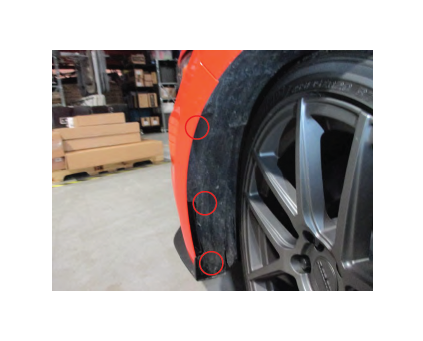
On each side of the bumper, remove the (3) plastic clips holding the fender liner to the bumper.
Step 6:
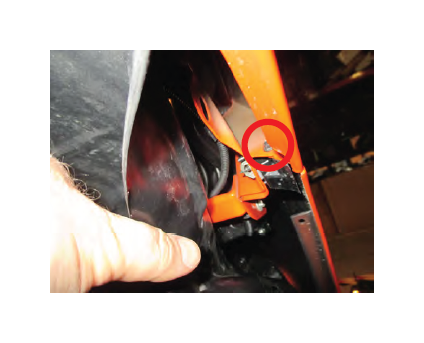
Fold back the fender liner so that you can access the one 7mm bolt that holds the bumper to the fender. **Note: This bolt is tricky, it may help to remove the wheel for better access.
Step 7:
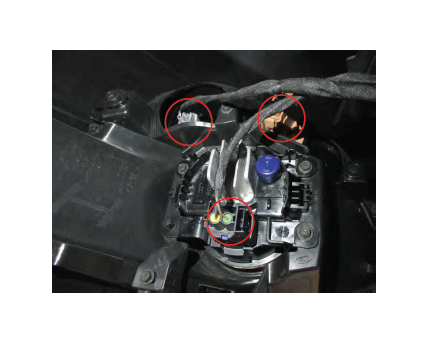
With the splash shield removed, you can access the plugs for the turn signals and fog lights.
Step 8:
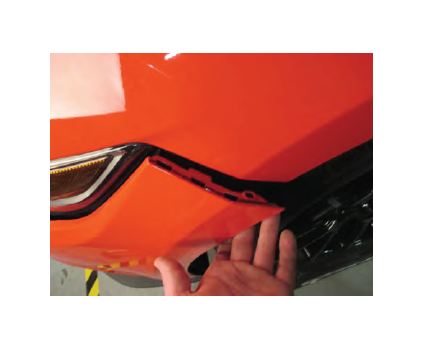
Once the bumper cover is ready to remove, use firm pressure to pull the edge of the bumper to pop it from the fender clips. Have a helper support one side so that you don’t scratch the paint. Slowly remove the bumper and support it on a soft non-abrasive surface.
Step 9:
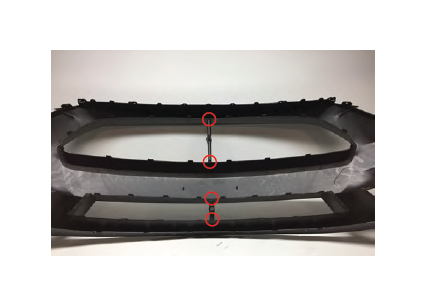
Begin by removing the grille bracing from the upper and lower grille. ** Recommended: Us a pair of wire cutters to cut the top and bottom edge. Carefully use a razor blade to clean up any extra brace material.
Step 10:
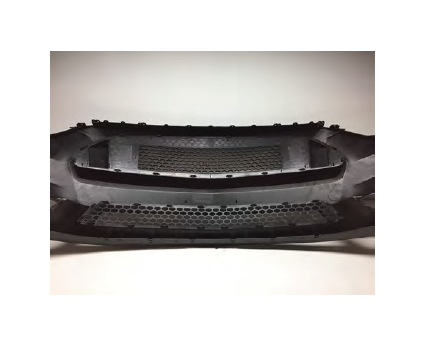
Install the upper and lower grille inserts. The grilles will clip onto the bumper.
Step 11:
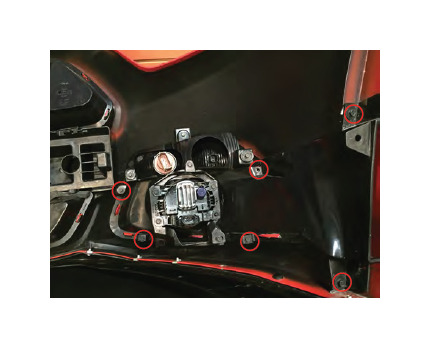
Remove the fog light bracket from the factory bumper.
Step 12:
Remove the screws securing the turn signals to the fog light bracket.
Step 13:
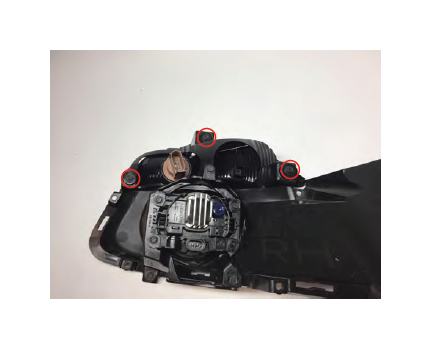
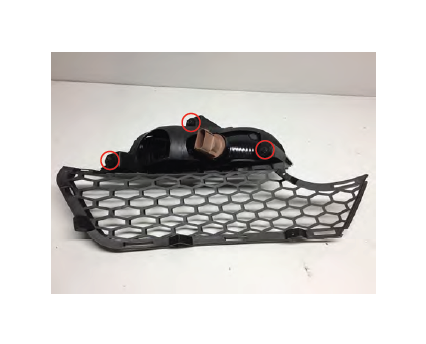
Install the factory turn signals onto the new turn signal bracket using the factory screws.
Step 14:
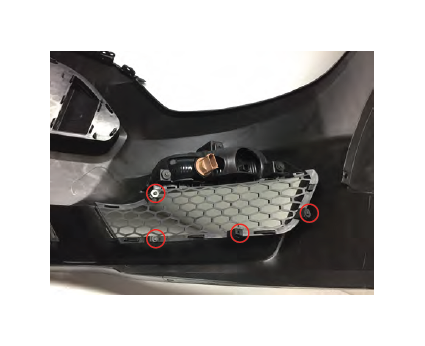
Install the turn signal bracket onto the bumper. The bracket will clip onto the bumper and be secured with the factory hardware.
Step 15:
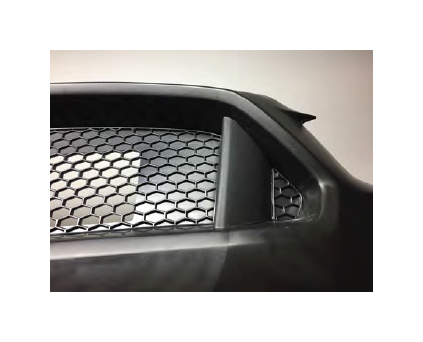
Install the grille extensions from the front side of the bumper by clipping them to the grille.
Step 16:
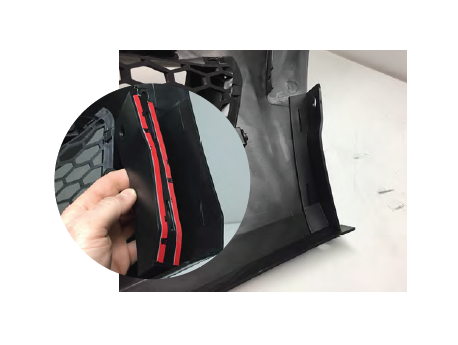
Install the fender liner bracket using double sided tape.
Step 17:
Transfer the hood weather stripping from the factory bumper to the new bumper.
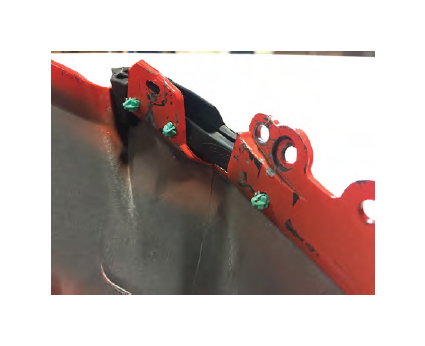
Step 18:
Transfer the screw clips from the factory bumper/chin spoiler to the new bumper.
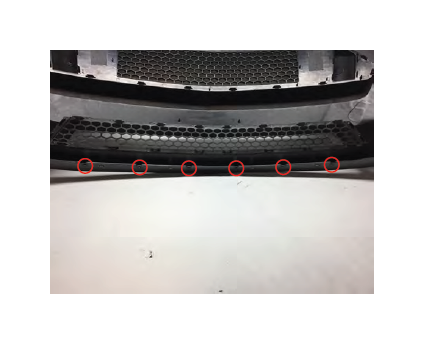
Step 19:
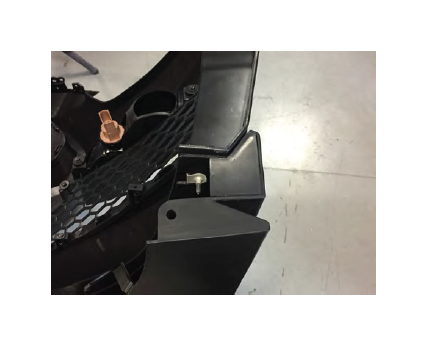
Install the new chin spoiler by clipping it over the bumper cover and then use the factory hardware to secure the lower edges to the bumper.
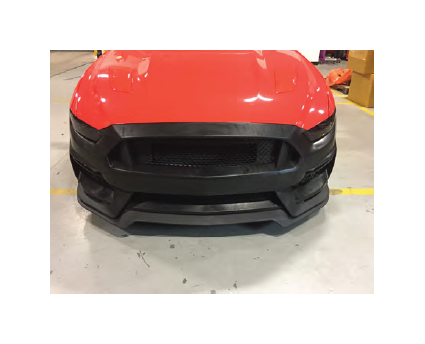
Step 20:
It may be necessary to trim part of the chin spoiler in order to reuse the factory clip. Use wire cutters to cut away enough of the chin spoiler to slide on screw clips.
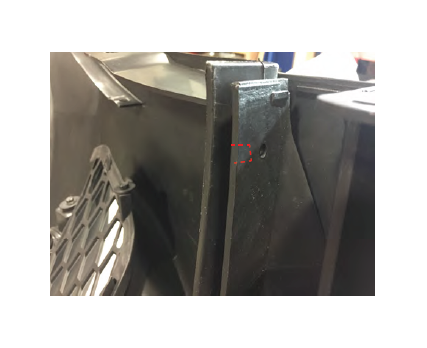
Step 21:
Use the small filler panel and double-sided tape to finish the install.
Step 22:
Fold the Splash shield brackets up and attach the splash shield.
