
Best Sellers
Mustang Chrome Gauge Rings ('94-'04) - Installation Instructions
Installation Time
30 minutes
Tools Required
- T-15 Torx Tool
- Sharp Nail bent to 90 degree angle (optional)
- Droplight or other Portable Lighting Source
Installation
1. Disconnect the battery, by removing first the negative terminal followed by the positive. You must disconnect the battery and wait approximately 15 Mins before beginning the project.
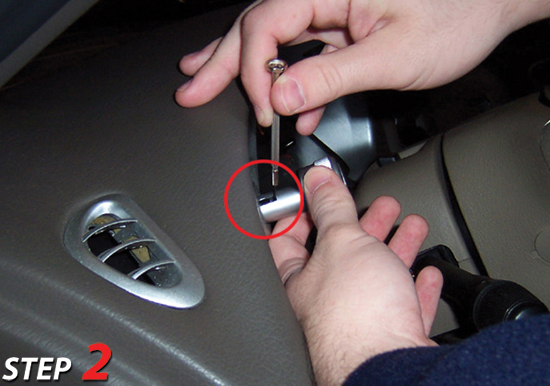
2. Remove the headlight knob to the left of the Steering Wheel. Pull the knob out into the "lights on" position and rotate the knob counter-clockwise until the slit is facing towards the door. Inside the slit is a metal clip; release this clip by using the bent nail to lift the clip outward toward the driver's side door, and pull firmly on the headlight knob. The knob should slide off relatively easily.
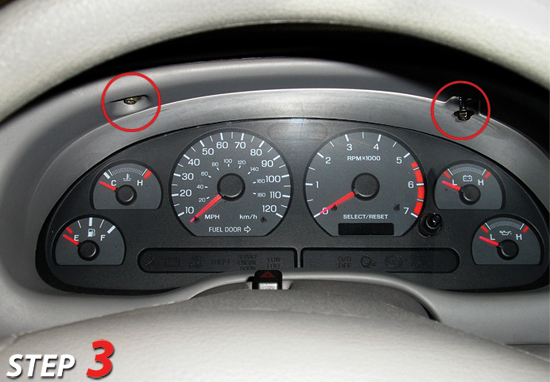
3. Remove the 2 screws holding the dash panel to the dash with the T-15 Torx bit. Once removed, the entire panel can be removed by pulling straight outward with gentle but firm pressure, which will release the clips and pins also securing it in place at the bottom and around the steering column.
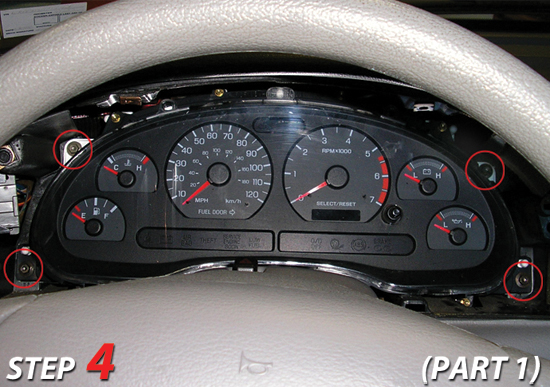
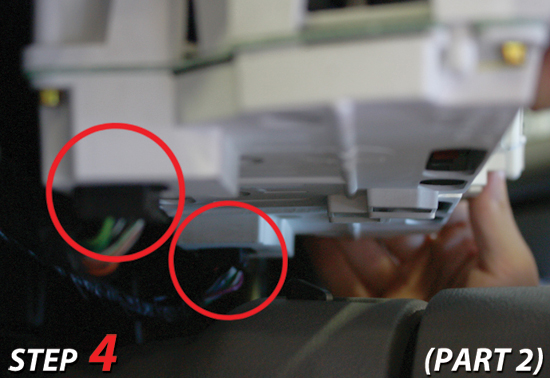
4. Remove the gauge cluster from the dash. Begin by removing the four T-15 (or Phillips head) screws securing it to the dash. Gently pull it away from the dash and release the two clips connecting it to the electrical system. The picture below illustrates the 2 connectors you will have to release for the gauge cluster to be removed from the vehicle.
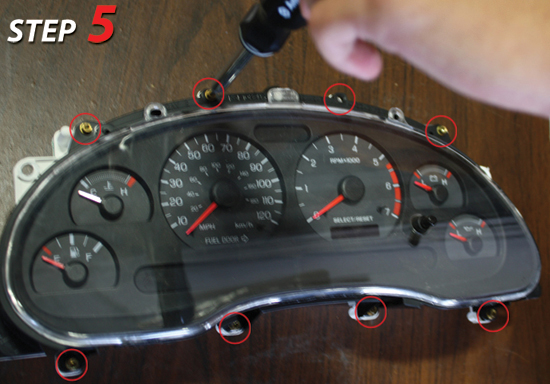
5. Place your gauge cluster on a clean, dry surface. Remove the 8 Torx screws holding the lens and surround on the cluster. Lift off the black surround and lens.Note:Depending on the year and model Mustang you have, it is possible that the lens and black surround will be 1 piece. This will not prevent installation of the bezels.
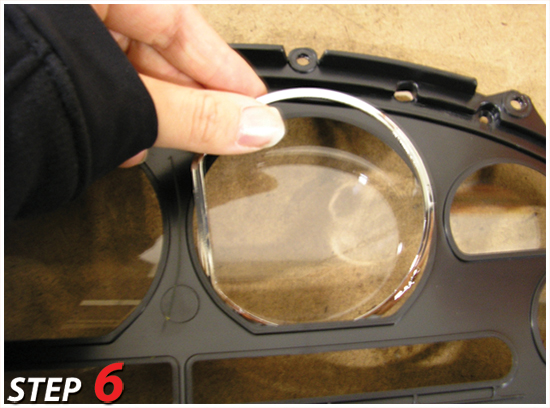
6. If your clear lens separates from your black surround, remove it and insert the bezels into the front of the surround. Apply gentle but firm pressure on both sides of the bezel to snap them into place. If your clear lens does not separate from your black surround, slide the bezels into the larger center openings from the back. For the large bezels, you will need to slide them in diagonally (see photo). Apply gentle pressure on both sides of the bezel to snap it into place.
7. Reassemble the gauge cluster unit by putting the surround & clear lens back on the unit and replace the 8 Torx screws.
8. Reassemble your dash by sliding the gauge cluster back in the dash and replacing the four T-15 screws (see Step Four for location of screws).
9. Finish reassembling your dash by sliding the dash panel back into place and aligning the clips, then replacing the 2 Torx screws (see Step Three for illustration). Slide the headlight knob back on; you should be able to replace the metal clip. Reconnect your battery and double-check that your gauges are working and accurate.
Installation instructions provided by Manufacturer


