Guaranteed 12/24 Delivery Still Available see item page for details! available on most items - Details
How to Install Pre-Painted MMD Side-Scoops on your 2010-2013 Mustang
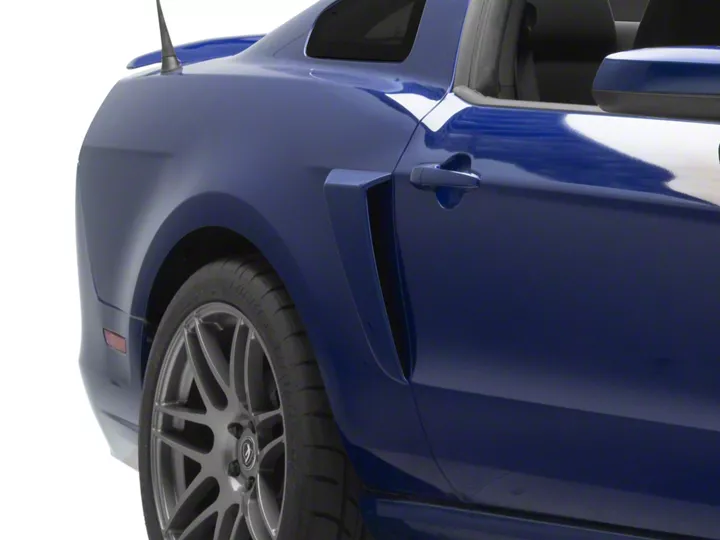
Shop Parts in this Guide
Before Beginning
Before beginning, be sure to thoroughly clean the
areas of the vehicle where the side scoops will
adhere.
TOOLS REQUIRED
Exacto Knife / Scissors
ESTIMATED TIME 1 Hour
Step 1
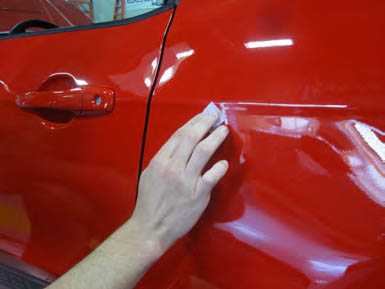
Using the supplied alcohol pad, wipe down the area of the quarter panel where the side scoop will attach.This will ensure a clean surface for the adhesive tape to bond with.
Step 2
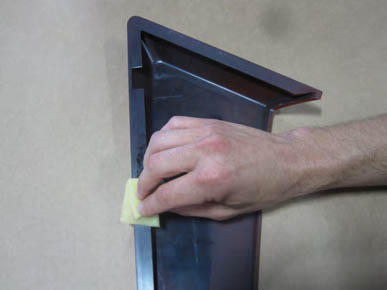
Wipe down the edges on the reverse side of the side scoop with the included 3M Adhesion Promoter as shown.
Step 3
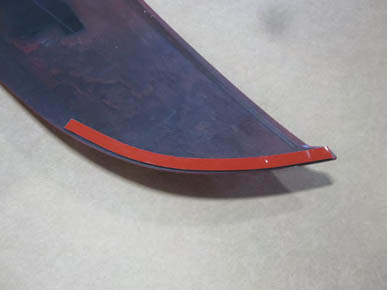
Starting at the bottom of the scoop, apply the included 5” x ¼” strip of adhesive to the tape ledge. Be careful to not create any buckles or raised areas when bending the adhesive around the edge.
Step 4
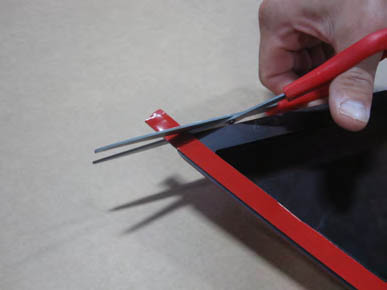
Again starting toward the bottom, apply
the included 15” x ½” strip of adhesive to the side scoop.Using a razor blade or
scissors, trim any excess tape from the top of the scoop as shown.
Step 5
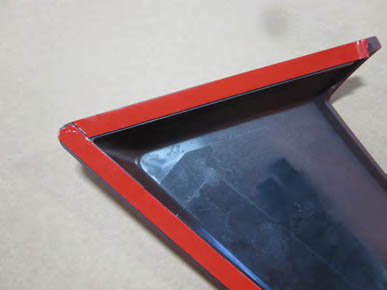
Lastly, apply the 9” x ½” strip of adhesive to the side scoop and trim the excess where is meets the longer side piece.
Step 6
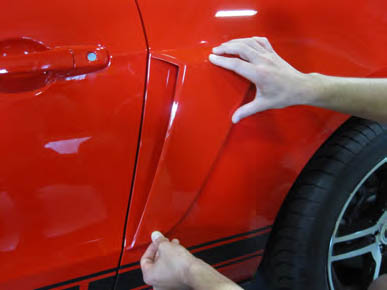
Carefully peel the backing away from the adhesive and install the scoop onto the vehicle, using the upper & lower body lines as guidance for placement.The scoop should sit about ¼” back from the door as shown. Do not press down to fully set the adhesive at this point.
Once the scoop is properly aligned on the vehicle, press down firmly around the outer edges to fully seat the adhesive. Repeat Steps 1-6 for the opposite side to complete the installation
