How to Install Pedders Extreme Xa Coilover Kit on your Mustang

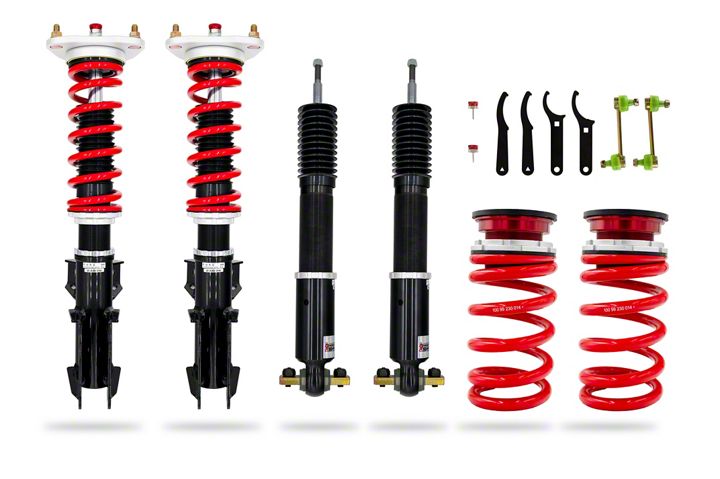
Shop Parts in this Guide
DAMPING ADJUSTMENT
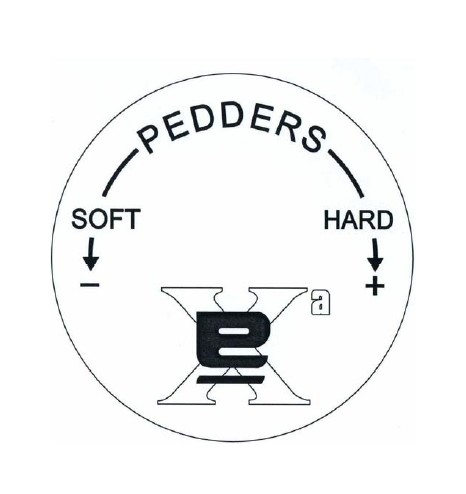
These units are damping adjustable in 30 steps that are indicated by “clicks” of the adjuster.
Each step adjusts both Rebound and Compression together.
Turning the adjuster anticlockwise until it stops is the Maximum Soft Position.
Turning the adjuster clockwise until it stops is the Maximum Hard Position.
**NOTE**
DO NOT FORCE THE ADJUSTER ONCE IT REACHES THE FULL SOFT OR FULL HARD POSITION OR DAMAGE WILL RESULT
All units are preset from the factory on 8 clicks from full hard

HEIGHT ADJUSTMENT FOR
STRUTS AND SPRING SEATED SHOCKS
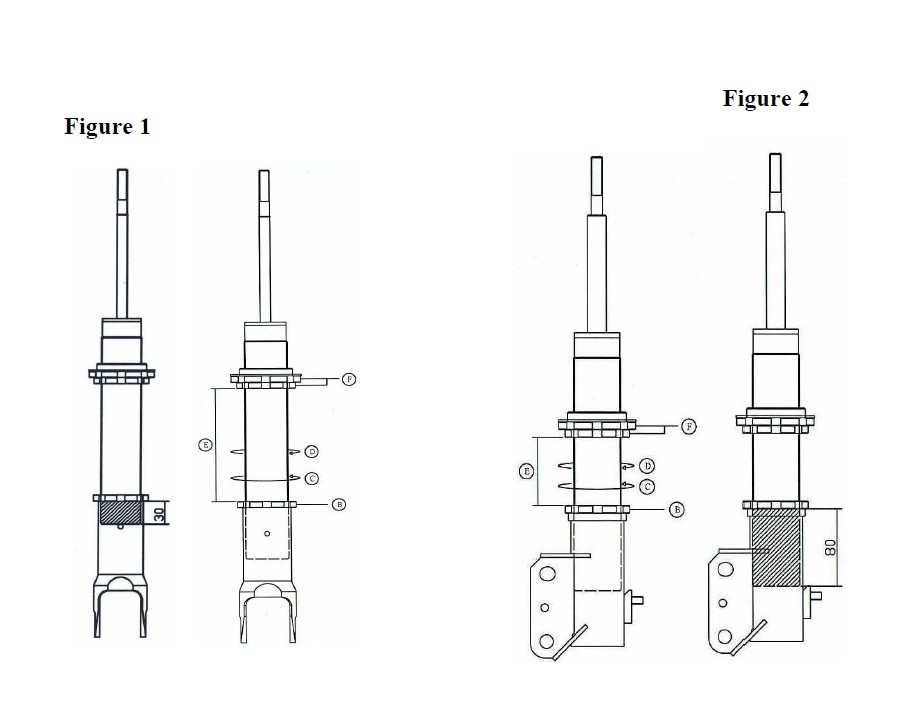
Struts and spring seated shocks are supplied with the bottom spring seats trapping the spring by approx. 2 - 3mm.
**DO NOT USE THE LOWER SPRING SEAT TO RAISE OR LOWER VEHICLE HEIGHT**
To adjust ride height on Struts or spring seated shocks (E) first clean any dirt away from lower locking ring (B) and body thread. Loosen steel locking ring (B) at the base of the unit and screw the threaded body tube up (direction C) or down (direction D) in the base bracket to change the height. The steel locking ring (B) at the base must then be tightened using a suitable drift and a hammer to ensure it is completely tightened. A minimum length of threaded body MUST be left inside the lower bracket or mount for safety.

For height adjustment of fitments with separate coil and shock see following page
HEIGHT ADJUSTMENT FOR FITMENTS WITH SEPARATE COIL AND SHOCK
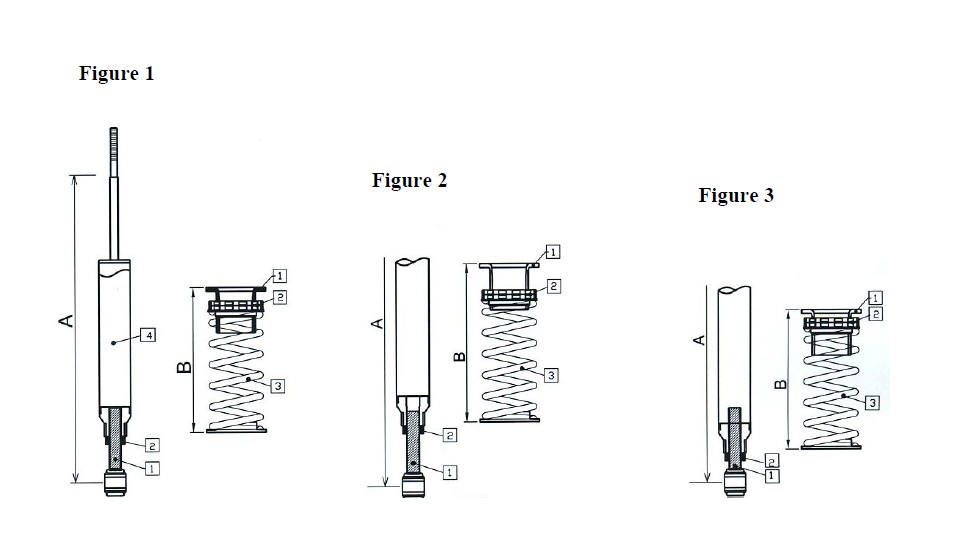
For vehicles where the coil and shock are fitted separately please refer to the diagrams below relating to height adjustment.
Figure 1 shows a typical adjustable shock and separate coil with:
Dimension A = shock length
Dimension B = spring height including adjuster perch
1 = threaded adjuster
2 = adjustable lock nut
3 = coil spring
4 = shock
Figure 2 shows both:
Dimension A = shock length increased for raised height
Dimension B = spring height increased by adjusting spring perch for raised height
Figure 3 shows both:
Dimension A = shock length reduced for lowered height
Dimension B = spring height reduced by adjusting perch for lowered height

GENERAL FITTING SUGGESTIONS
1) These products should be installed by a qualified Professional Tradesperson.
2) Raise the vehicle body on a hoist with the suspension unloaded and ensure that it is safe to work on.
3) Remove the road wheels.
4) Remove the original suspension assemblies from the vehicle taking note of positioning and direction of brackets and links.
5) Install the new Extreme suspension units in the vehicle making sure all brake lines, sway bar links etc. are correctly connected to the appropriate brackets and tightened.
**CAUTTON**
**Air impact tools must not be used to tighten top mounts to piston rods or damage to the new units will result**
6) Refit the road wheels and lower the vehicle to the ground. At this point the vehicle MUST be moved a minimum of 2 car lengths back and forth to correctly settle the suspension.
7) On a flat level surface measure the height at all four corners from bottom of rim to guard and decide on any height change required.
8) Raise the vehicle again and remove the road wheels. Adjust the height as required using ONLY the locking ring at the base of the body on struts and spring seated shocks. REFER TO PAGE 2 FOR HEIGHT ADJUSTMENT PROCEDURE
***DO NOT ADJUST VEHICLE HEIGHT BY MOVING THE BOTTOM SPRING SEAT***
For fitments using separate coil and shock REFER TO PAGE 3 FOR HEIGHT ADJUSTMENT PROCEDURE
9) Refit the road wheels and lower the vehicle. A Four wheel alignment MUST be performed to properly finish the fitment.
10) Road test vehicle and adjust damping to suit owners requirements.
REFER TO PAGE 1 FOR DAMPING ADJUSTMENT PROCEDURE
11) Ensure that the owner/driver of the vehicle is given the tools and instructions and understands how to properly adjust the units.
Always refer to applicable local laws regarding use of this type of product on street vehicles.

