Best Sellers
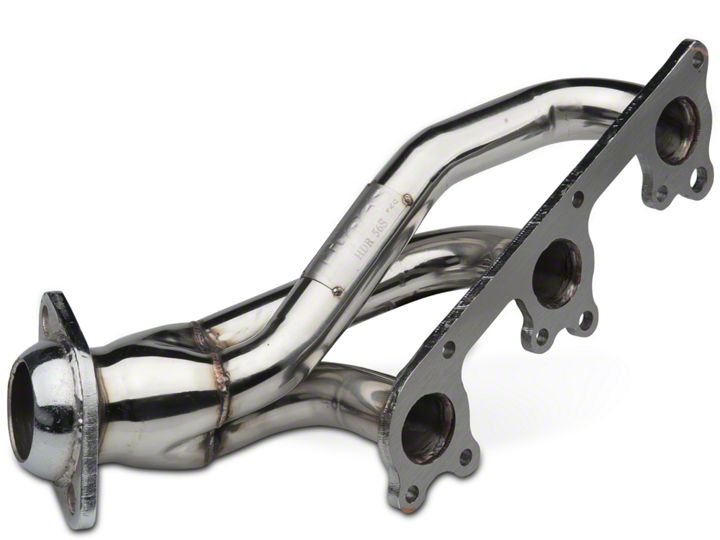
How to install Pypes Polished Long Tube Headers on your Mustang

Shop Parts in this Guide
Installation
Thanks again for purchasing your new 304 polished stainless steel Pypes Performance Exhaust (PPE) Ford Mustang Headers. Please be sure to confirm hardware, gaskets and instructions were included in the kit before beginning installation. If you find any components missing or need technical assistance, please contact our office at 800-421-3890.
Work Safe: When supporting a vehicle on jack stands, be sure the ground surface is level and solid, hot asphalt will not support jack stands. Double check your placement before sliding under the vehicle.
Note: Many factors may affect the installation: broken, worn or aftermarket motor mounts, aftermarket suspension components, bent frame or chassis components from accidents, different engines or cylinder heads.
Attention: These items have a highly polished finished which can be marred or scratched during installation. If these products need to be returned and are damaged in any way, you will be charged a 20% restock/polish fee.
Disclaimer: By installing any PPE products, you indicate that you have read the following and agree to these terms:
The purchaser is responsible for following the instructions and safety guidelines set by PPE.
PPE assumes no responsibility for any damages from improper installation, abuse, lack of care or incompatibility with other manufacturers products.
The purchaser is responsible for any damage to the products if returned.
These products are manufactured using 304 polished stainless steel. Exhaust heat will turn the finish to a bluish/gold color. This is normal and not a cause for a warranty claim or return.
Warranty: PPE will repair or replace the product at no charge (See enclosed warranty card). We are not responsible any labor charges or shipping fees.
Installation: These next few steps will be required for installing all the above part numbers.
Raise and support the vehicle on jack stands or a lift.
Remember to block or chock the rear tires.
Disconnect the negative (-) cable from the battery.
Label and remove the spark plug wires. Be careful as the rubber boot may have seized to the spark plug itself. Gently twist the boot until it breaks free.
Make sure to remove any debris which may have gathered near the exhaust ports.
Soak all necessary bolts with penetrating oil to allow for easy removal. Be careful, old and rusty manifold bolts break easily.
Removing them from the head is no walk in the park.
Unbolt the motor mounts as jacking or lifting of the engine may be necessary.
Removal of the front rim/tire may help gain access to lower header bolts.
Dip stick tube removal may be necessary on some applications
Unbolt the factory h-pipe from the factory manifold and the factory cat-back. Disconnect the O2 sensor wiring and remove the h-pipe.
Unbolt and remove the driver and passenger side factory manifolds. Removal of AIR or EGR accessories may be necessary on some applications.
Clean and prep the gasket mounting surface for the new headers.
When installing your new headers, snug the bolts starting from the center working your way to each end in a crisscross pattern.
Finish by tightening all the bolts using the same method. It’s always good to use anti-seize compound when installing header bolts.
HDR50S / HDR52S:
- It may be necessary to trim the dip stick tube bracket as the new header tubes are larger in diameter.
- Motor mount removal while not necessary, it is highly recommended.
- Remove the starter and reinstall on the passenger side once the header is installed.
- Make sure to reconnect and tighten any battery cables, motor mounts, intake tubes, or strut tower braces etc.
- Make sure all hoses and wiring is clear from the header tubes.
- Reinstall you H-pipe. Properly seat the ball and sockets and tighten.
HDR53S / HDR58S:
- Unbolt steering rack from the frame.
- Disconnect the steering shaft from the rack.
- Motor mount unbolting will be necessary.
- Jacking or lifting of the engine will be necessary.
- Remove the starter and reinstall once the passenger side header is installed.
- Make sure to reconnect and tighten any battery cables, motor mounts, steering racks, steering shaft, intake tubes, or strut tower braces.
- Make sure all hoses and wiring is clear from the header tubes.
- Reinstall you H-pipe. Properly seat the ball and sockets and tighten.
HDR54S / HDR55S:
- Dipstick stick removal is necessary.
- An “E7” female torx socket will be necessary to remove the manifold studs.
- If you choose, you can reuse your original studs and nuts.
- Removal of the coil pack will also be necessary.
- Make sure to reconnect and tighten any EGR, battery cables, motor mounts, steering racks, steering shaft, intake tubes, or strut tower braces.
- Make sure all hoses and wiring is clear from the header tubes.
- Reinstall your H-pipe. Properly seat the ball and sockets and tighten.
HDR56S:
- EGR removal is necessary on the driver side.
- Dipstick stick removal is necessary.
- An “E7” female torx socket will be necessary to remove the manifold studs.
- If you choose, you can reuse your original studs and nuts
- Removal of the coil pack will also be necessary.
- Make sure to reconnect and tighten any EGR, dip stick, battery cables, motor mounts, steering racks, steering shaft, intake tubes, or strut tower braces.
- Make sure all hoses and wiring is clear from the header tubes.
- Reinstall your Y-pipe. Properly seat the ball and sockets and tighten.


