
How To Install A Raxiom Tail Light Sequencer - Plug-and-Play For Your 2010-2014 Mustang
Installation Time
45 minutes
Tools Required
- Trim and Molding Tool Set (http://www.americanmuscle.com/trim-molding-tool-set.html)
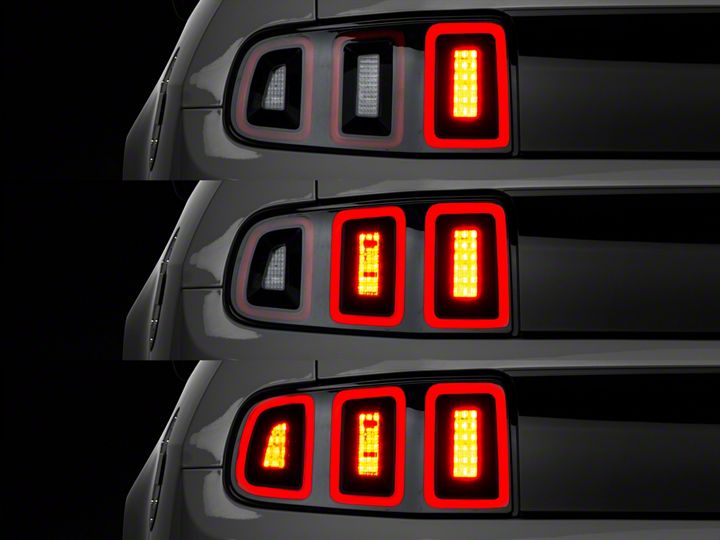
Shop Parts in this Guide
Tools Required:

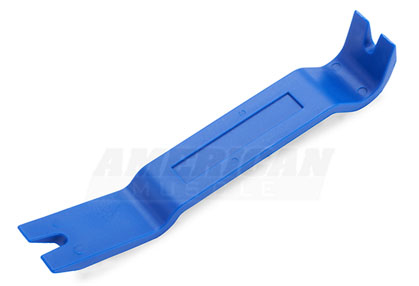
For this particular part, there are no traditional metal tools required. The Trim and Molding Tool Set are the two tools I used, and thus is heavily recommended; however you can probably use any similar tools as long as they won't break or scratch anything.
Procedure (about 15 minutes):
1) Locate and remove any plastic screws that are present on the interior trunk plastic (shown in light blue). The top one you can easily unscrew with your hands, and the bottom one should pull right out (if present).
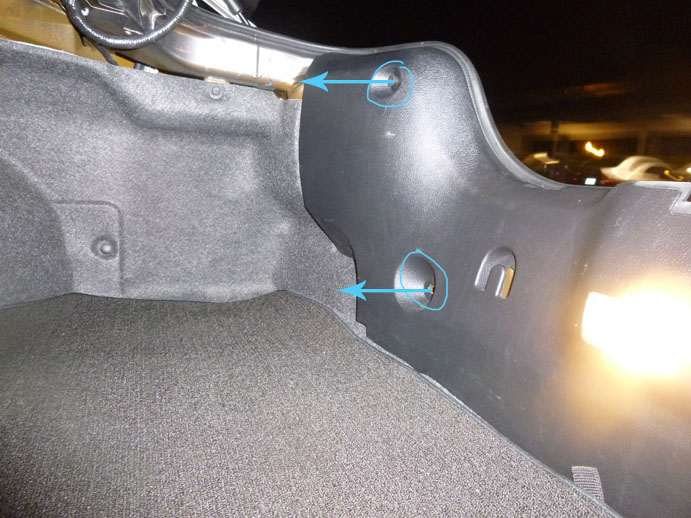
2) With all 2 (or 4) fasteners out, the interior plastic should be loose on the left and right sides, yet firm in the center. There are two plastic clips (see below) holding the trunk plastic in place that need to be pulled out in order to get access to the tail light connector. You'll also need to lift the trunk carpet (it rests on a lip on the bottom of the trunk plastic). For this step, I used the flat side of tool A to gently pry up center part (circled in red) enough to unclip the two clips (in yellow). If your clip is already separated from the plastic piece like mine was, use tool B to pry it out. After the interior trunk plastic is unclipped, set the plastic piece in the trunk as shown (be careful not to stress the wires since they're attached).
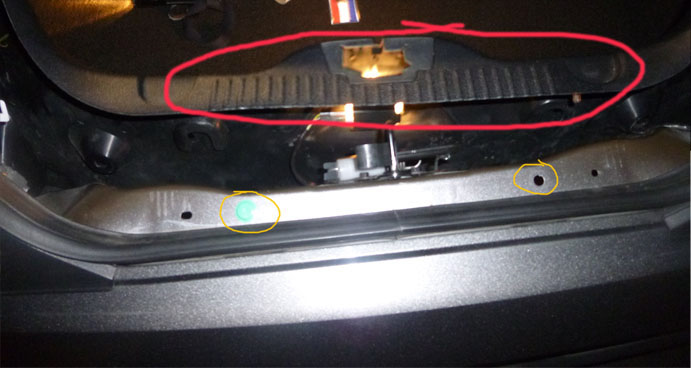
3) After sliding out the plastic piece, you should see the taillight connectors (in green) near the back of each of the tail lights. Push on the release tab and disconnect the connector.
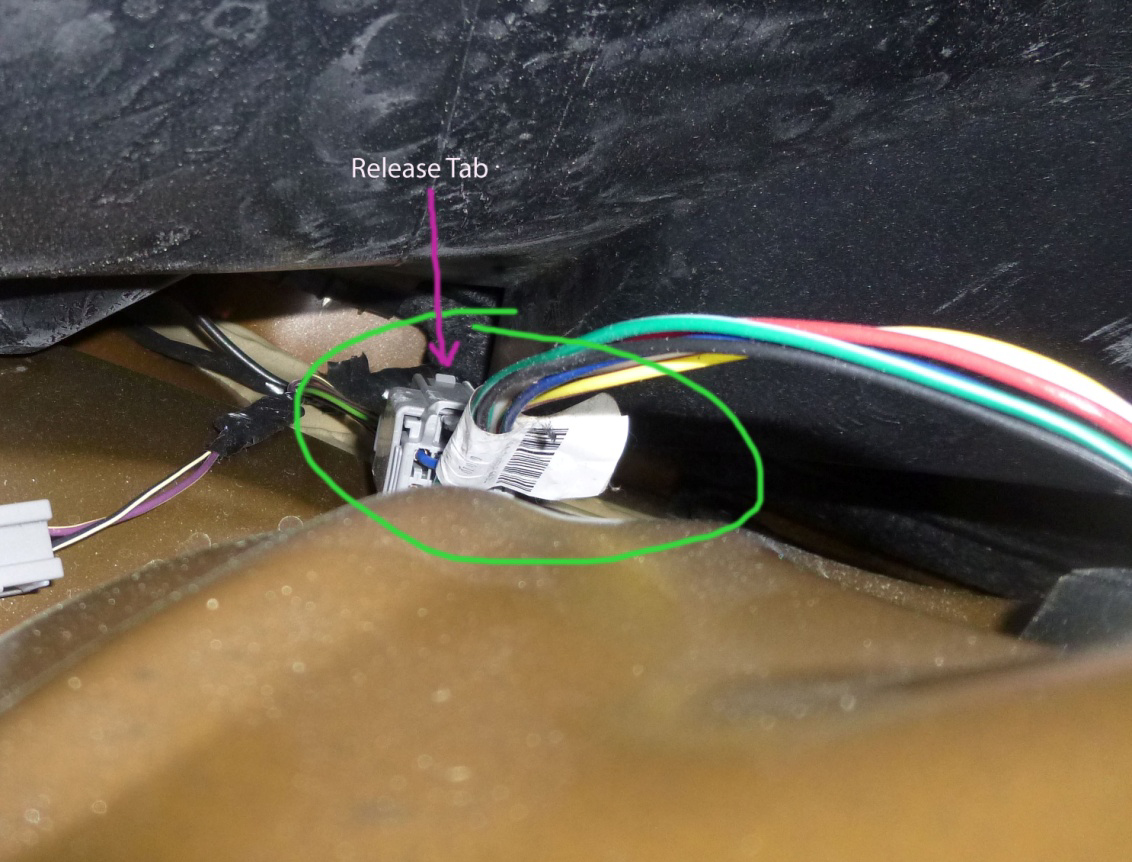
4) The Raxiom sequencer will go in between where the wires are currently clipped together (like an extension cord of sorts). Attach each side of the Raxiom sequencer to the cables you just unclipped (shown in green). Repeat for the other side.
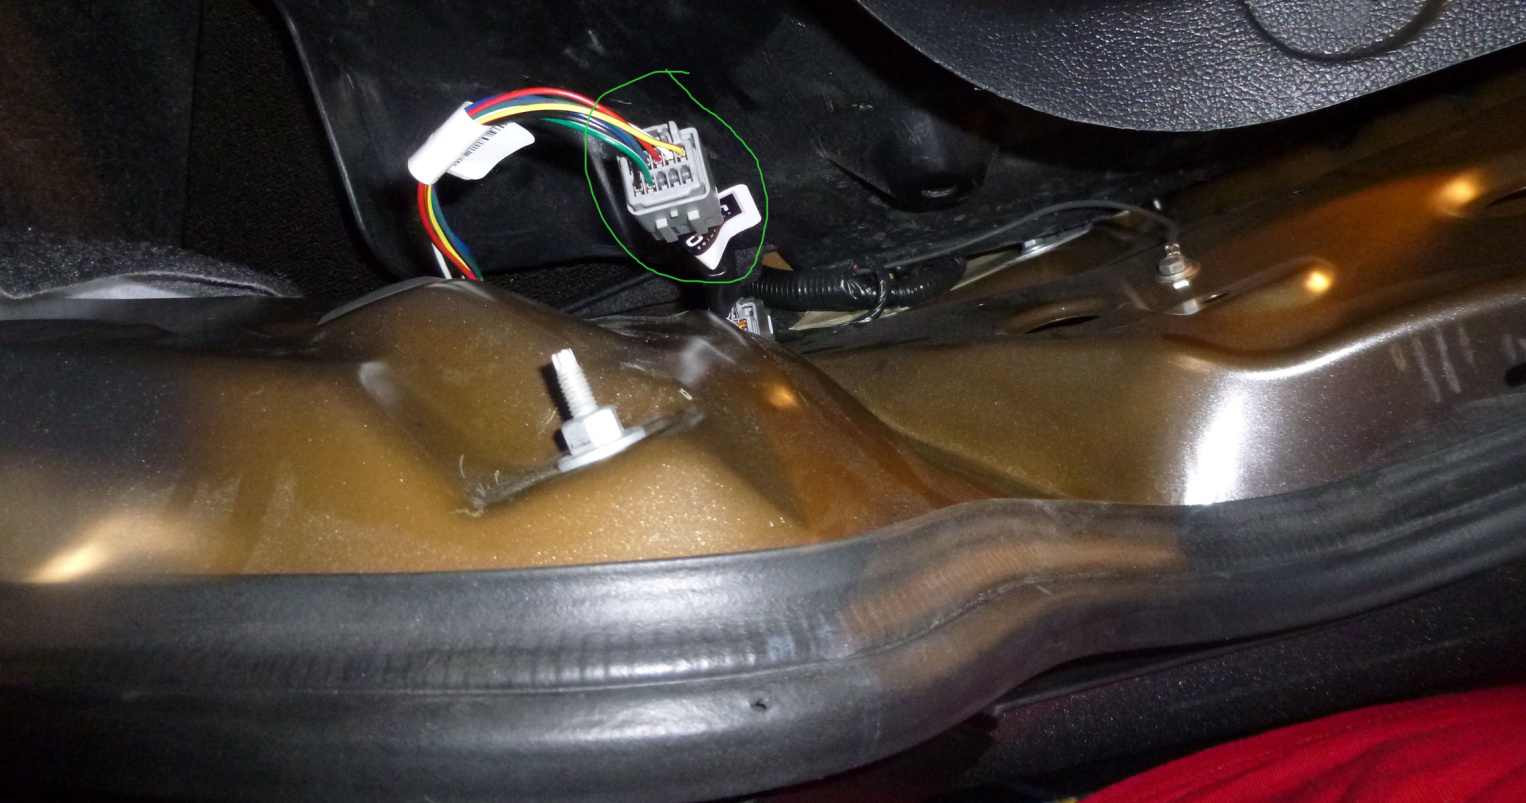
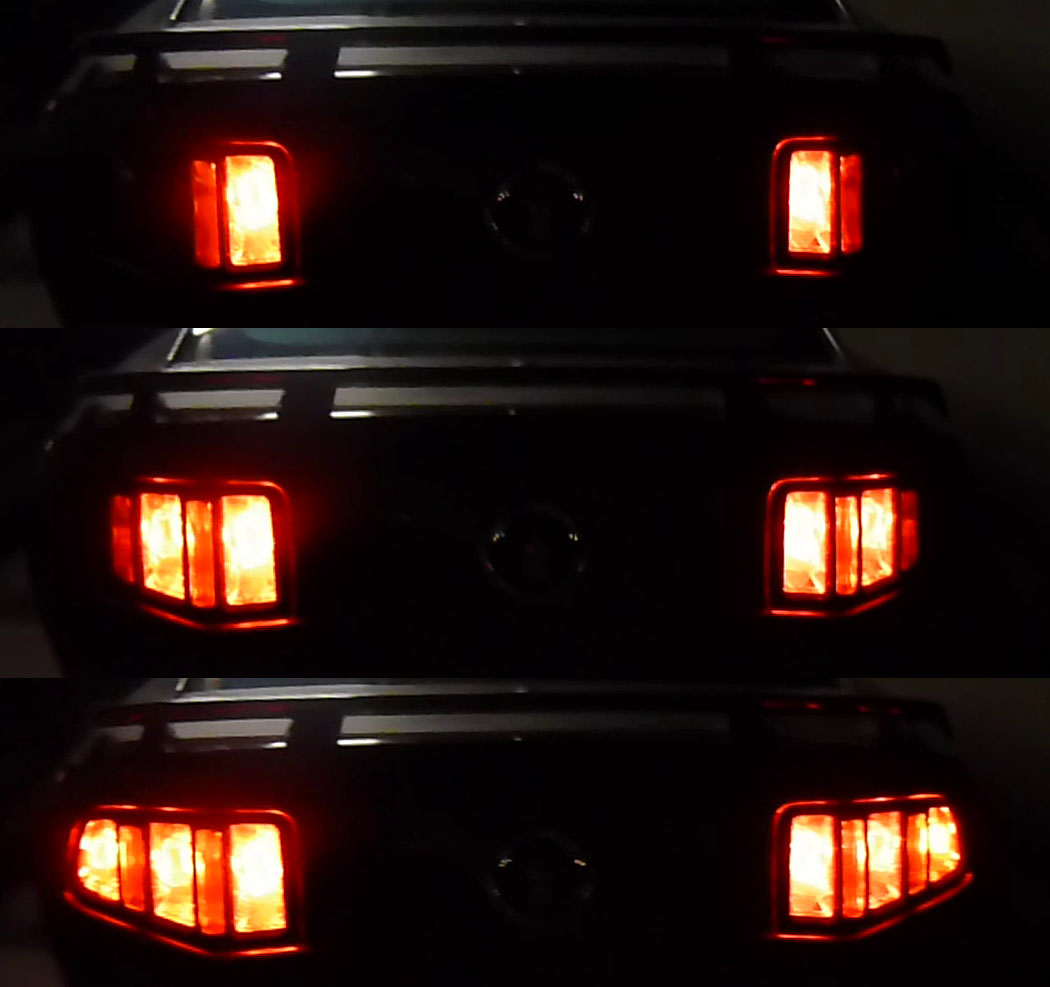
5) Before snapping the plastic liner back in place, turn on your hazards to make sure the sequencer is working. It should function as in the "After" picture on the next page. If the lights aren't turning on at all, or it isn't sequencing properly, check the connection and make sure the cables are firmly connected to the sequencer.
6) After you have confirmed the sequencer is working, it's time to put it all back together. You're basically the steps in reverse order. Snap the interior plastic back in place, starting with the center. Make sure the trunk light and trunk latch are perfectly lined up and that the clips are resting on the holes, and then firmly press down on the center of the plastic until you hear the two clips snap into place. Reattach the plastic clips/screws from step 1. The interior trunk plastic should now be secure.
7) Close the trunk and enjoy your new sequential lights!
BEFORE:

AFTER:
Installation Instructions written by AmericanMuscle Customer Connor Lange 9.14.2014

