Top Sellers in Camaro
How to Install RedLine Tuning Hood QuickLIFT ELITE System - Stock Hood on your Mustang
Shop Parts in this Guide
Step 1 - Unpack QuickLIFT system and verify contents.
Remove all items from the packing tube. You should have the following components before beginning:
* (2) Gas springs (RT-QL-180-6A)
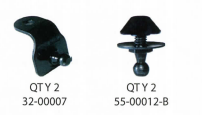
* (2) Hood insert kits - patented system using ball-stud, conical washer and hood-insert
* (2) Fender mounting brackets
* Printed Color Instructions
Step 2 - Gather the required tools.
Please gather the following tools before you begin the installation:
* Socket wrench with 10mm and 1 /2" sockets - that's it.
Step 3 - Install hood ball-stud system (Hood frame hole located mid-way up hood)
A. Thread ball-stud approximately half-way into ball-stud retainer leaving 4-5 visible threads between retainer and the conical washer. Feed retainer into hole, located on each side mid-way up the hood's frame. (See Frame-1 below)
B. Tighten ball-stud by hand (clockwise rotation) while lightly pulling on ball-stud to keep the insert from spinning. SLIDE INSERT TOWARD OUTSIDE EDGE BEFORE FINAL TIGHTENING (Frame 3)- It is important that the insert is slid outward toward side of hood and is tightened in this position with insert oriented vertically in hole.
C. Tighten ball-stud using 1 /2" socket wrench to 15 ft/lbs.
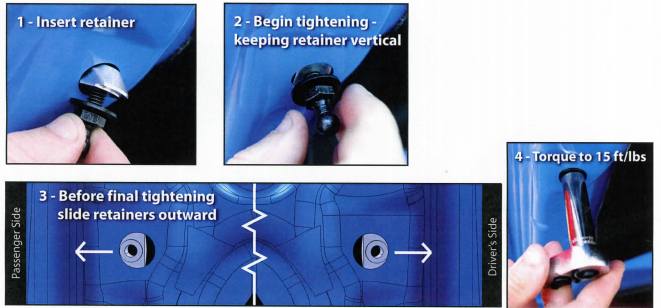
Slide retainer assemblies to outside edge of hole, retain vertical position, then tighten down (This moves the gas spring away from the shock tower in closed position)
Step 4 - Install fender brackets.
A. Remove fender bolt shown using a 10mm socket wrench.
B. The fender bracket is designed to fit tightly against the fender lip. Install the fender brackets as shown on both driver and passenger sides of vehicle.
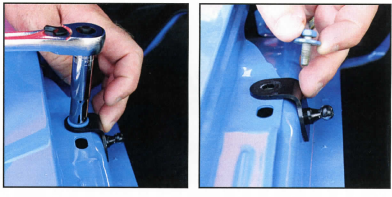
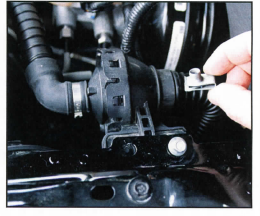
. If your Mustang has a sound tube bracket mounted just under the driver's side bracket, Follow the next easy steps to relocate this bracket.
Step 1 - Remove the bolt that attaches the sound tube bracket, as well
as the clip-nut.
Step 2 - Relocate the bracket to the LOWER side of fender lip as shown.
Step 3- Reuse the clip-nut that was attached to bracket and thread
on (with the nut on aiming upward as shown). Final assembly is shown to the right before nut is attached.
Step 5 - Attach gas springs.
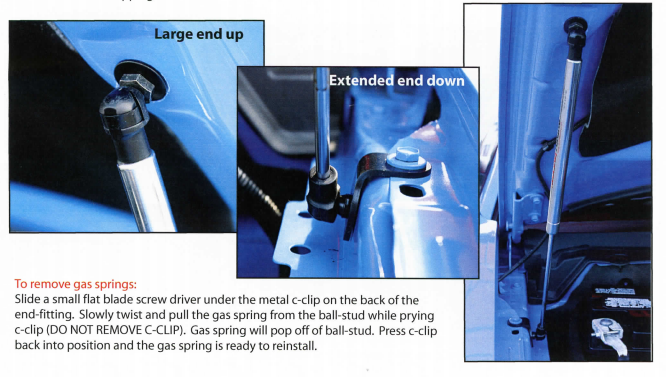
A. Firmly snap on large end of gas spring to the hood ball stud (as shown below).
B. Then snap on extended end of gas spring to the fender ball-stud. You may have to twist the socket to align to ball-stud before snapping on.
