Top Sellers in Mustang
How to Install Roush Fog Light Kit on your Mustang
Installation Time
2 hours
Tools Required
- Air Saw
- Drill Bit Kit
- Torque Wrench
- Drill
- Automatic Center Punch
- Safety Glasses
- Commercially Available Clear Coat
- Deburring Tool
- Ratcher
- 7mm Metric Socket
- 8mm Metric Socket
- Trim Tool
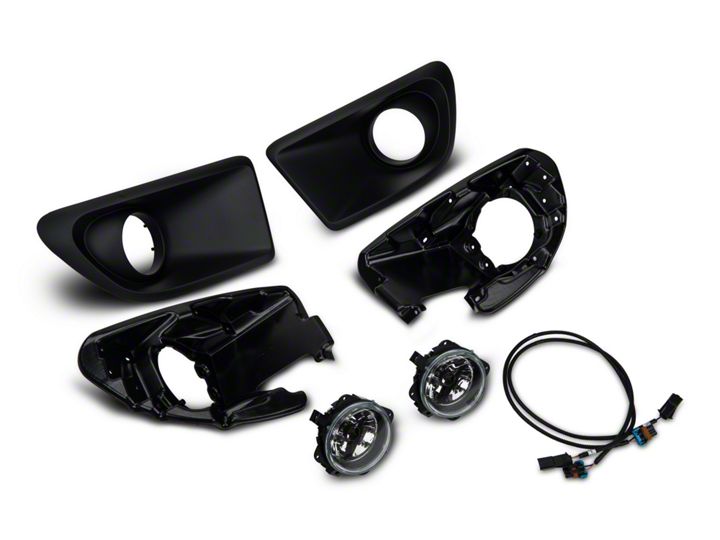
Shop Parts in this Guide
Installation Instructions
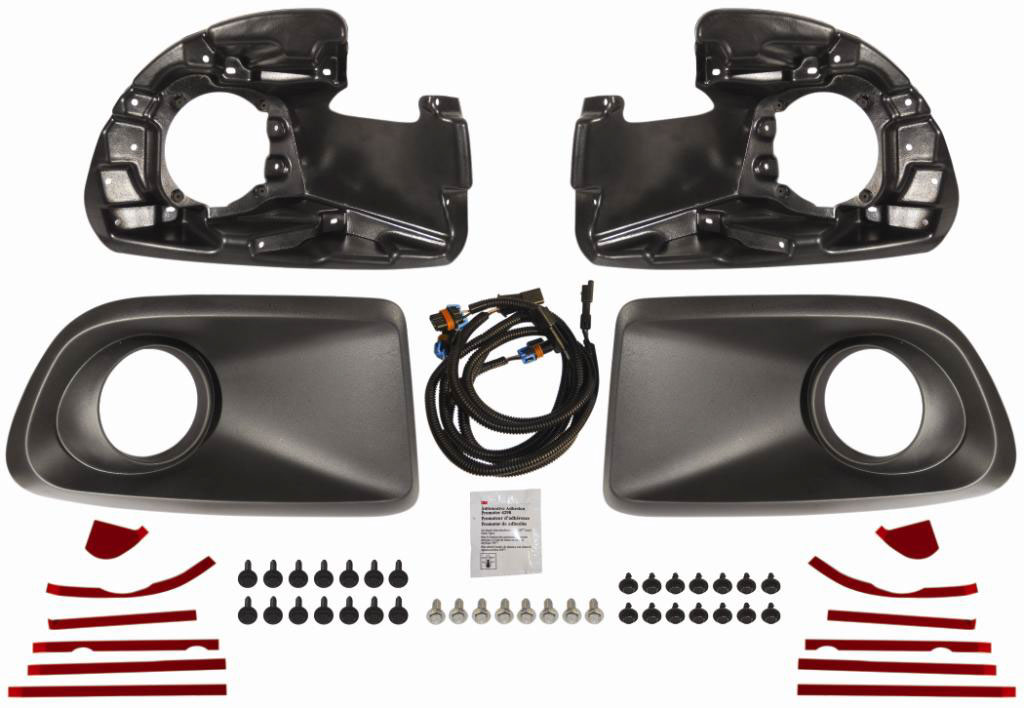
SECTION A – Removal
The following section will guide you through the removal of the factory fog lamp assembly.
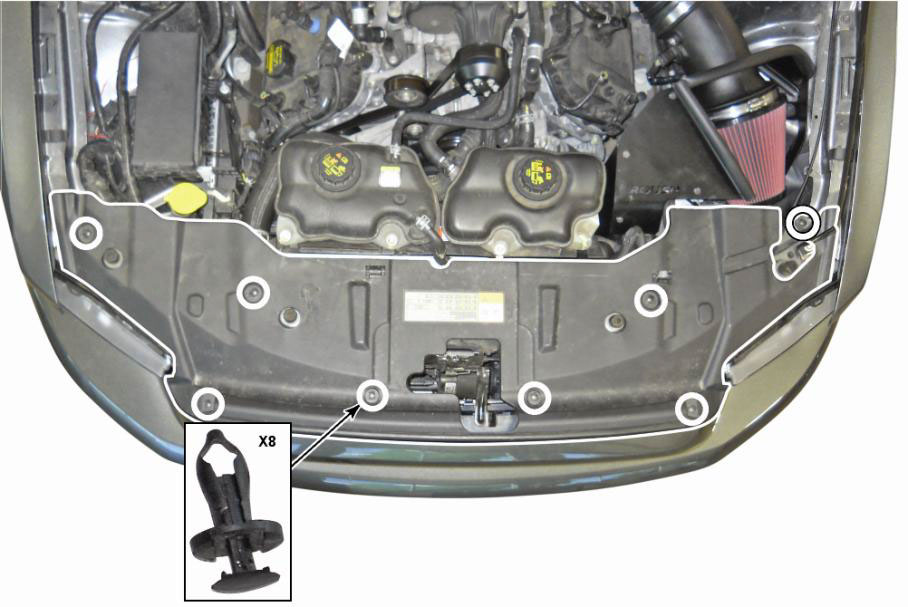
1. Open the hood and remove the eight (8) pin-type retainers and the upper radiator sight shield.
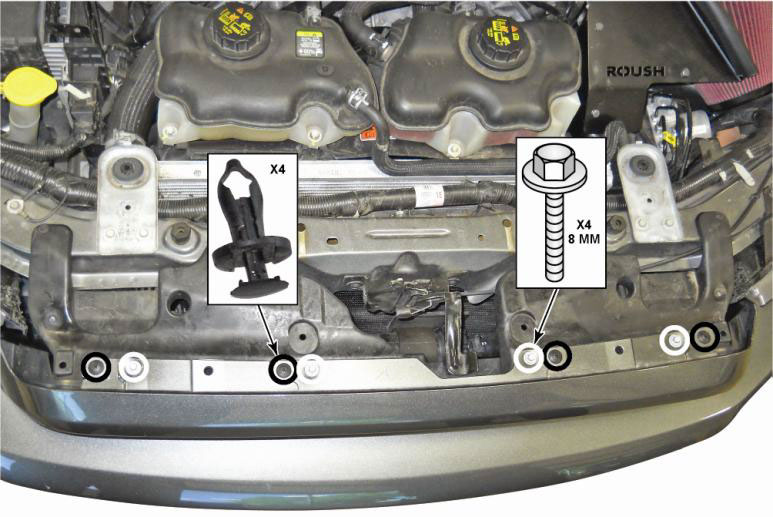
2. Remove the four (4) pin-type retainers and the four (4) 8 mm bolts from the top of the bumper cover.
- To install, tighten bolts to 3 Nm (27 lb-in).
3. Turn the steering wheel to the right to gain access to the three (3) 7 mm bolts on the LH side of the vehicle and repeat on the RH side of the vehicle.
- To install, tighten bolts to 1.3 Nm (12 lb-in).
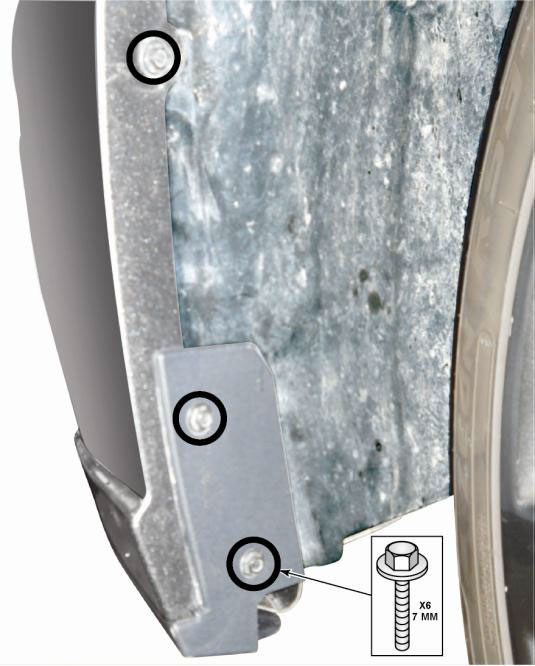
4. Remove the three (3) 7 mm outer lower valance bolts on the RH side. Repeat on the LH side.
- To install, tighten bolts to 3.2 Nm (28 lb-in).
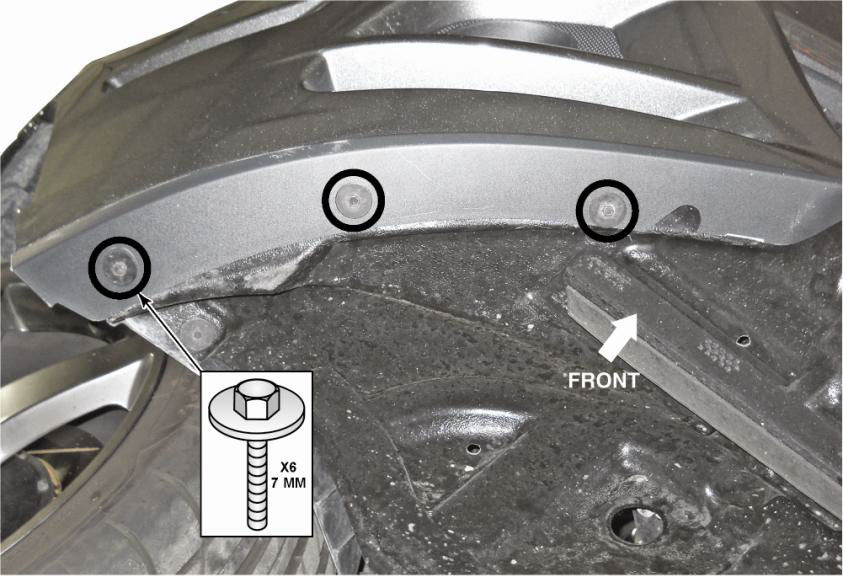
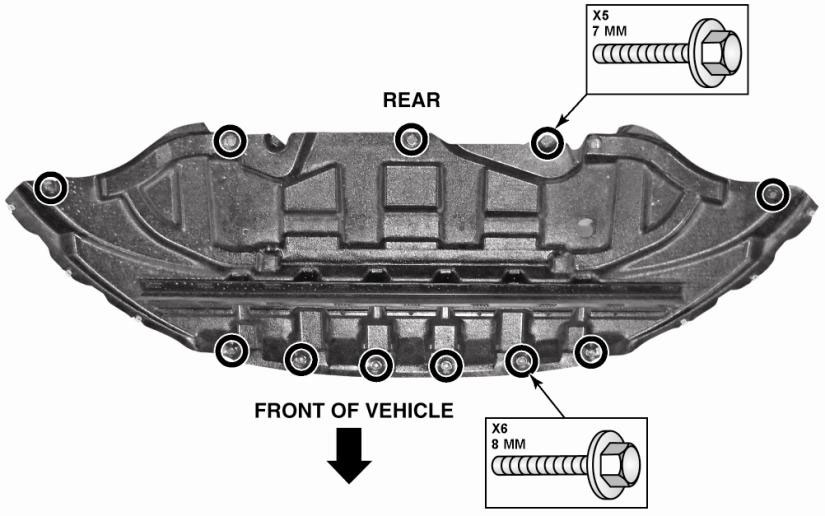
5. Remove the front six (6) 8 mm bolts and the rear five (5) 7 mm bolts. Pull down and back to remove the lower air deflector.
- To install, tighten bolts to 3.2 Nm (28 lb-in).
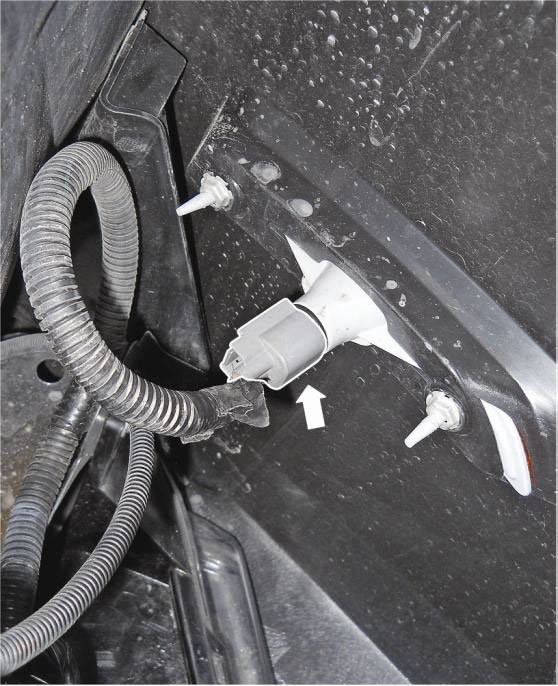
6. Disconnect the two (2) side marker light connectors on the LH and RH side.
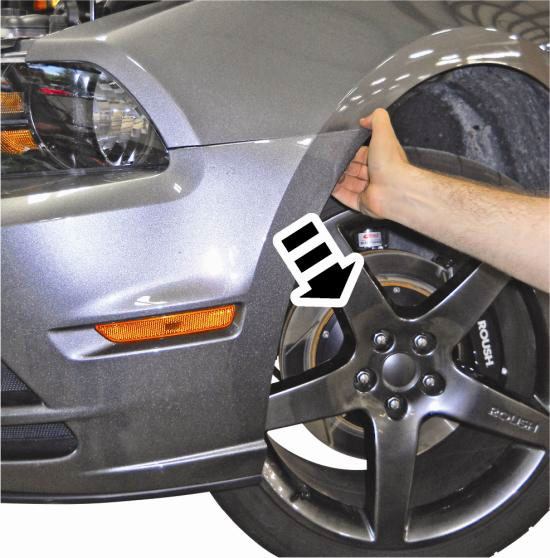
7. Pull outward to unsnap the LH and RH sides of the bumper cover
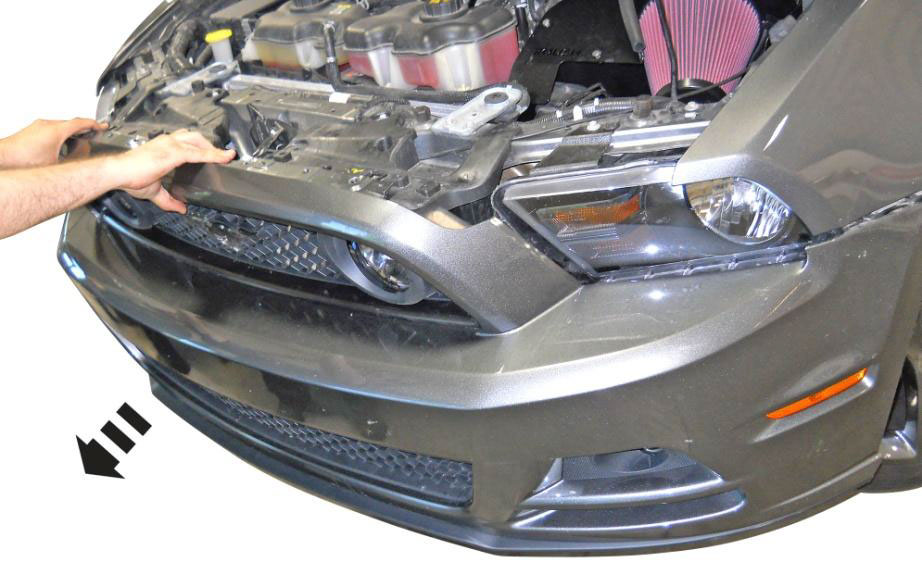
CAUTION: To protect the bottom of the bumper cover from damage, place on a protective surface once removed.
NOTE: If equipped, disconnect the fog lamp connectors. (GT model shown, V-6 model similar).
8. Pull at the area shown on the bumper cover to remove and place on a suitable work surface.
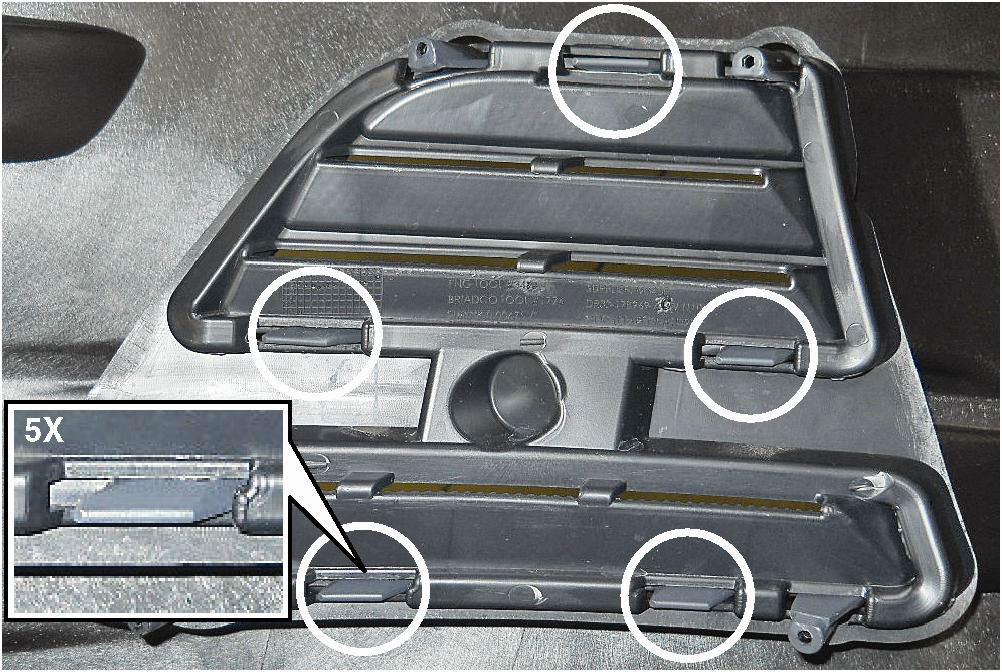
9. Release the five (5) retaining tabs and remove the fog lamp delete panel from the bumper cover.
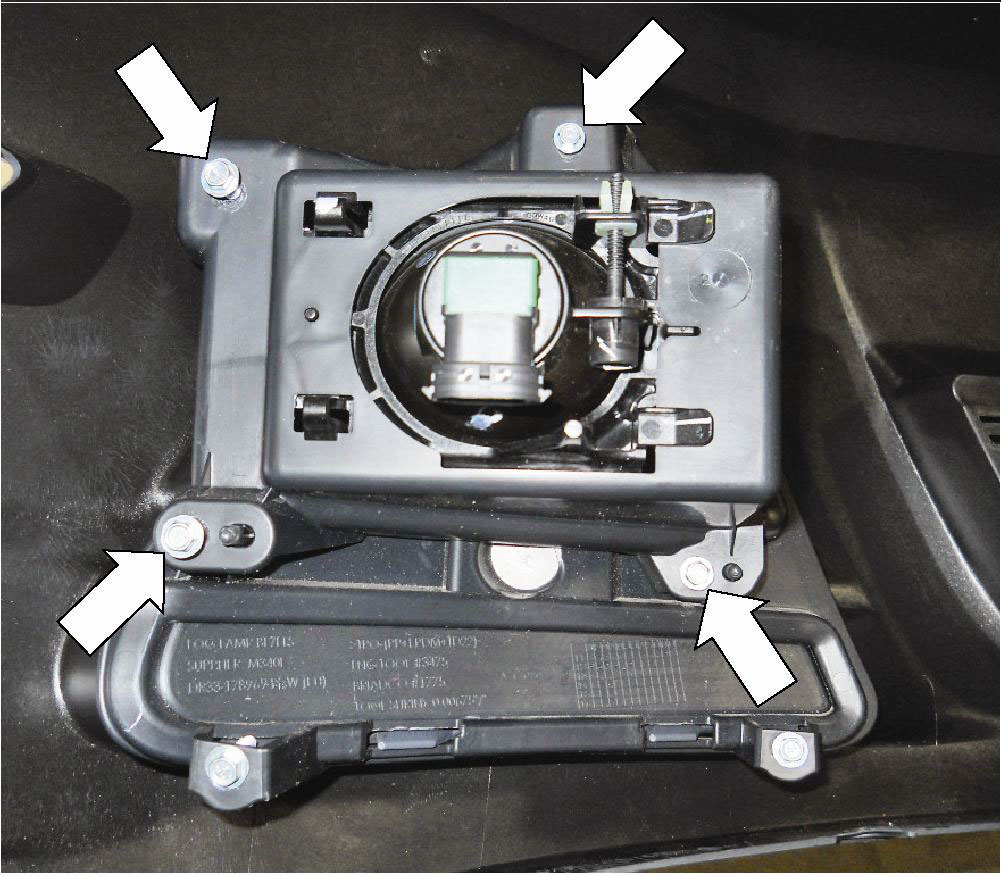
10. If equipped, remove the four (4) screws and the fog lamp assembly.
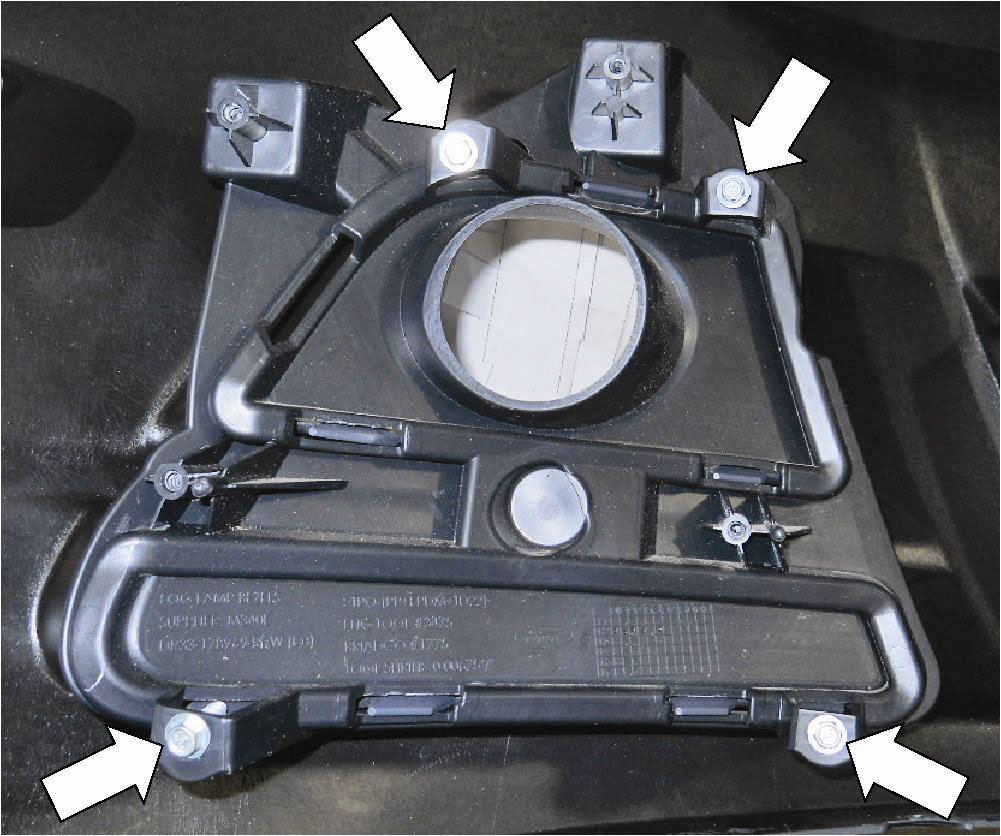
11. Remove the four (4) screws and the fog lamp mounting bracket.
SECTION B – Modification
NOTE: Cut out the templates along the solid lines so the outboard template “fin” can wrap.
1. Cut out the LH and RH templates (1313-15200TMPL-AA) supplied in the kit.

2. Position the exterior hole template on the bumper cover, align the marker lamp provision, align the bottom of the template to the bottom of the bumper cover edge and tape in position.
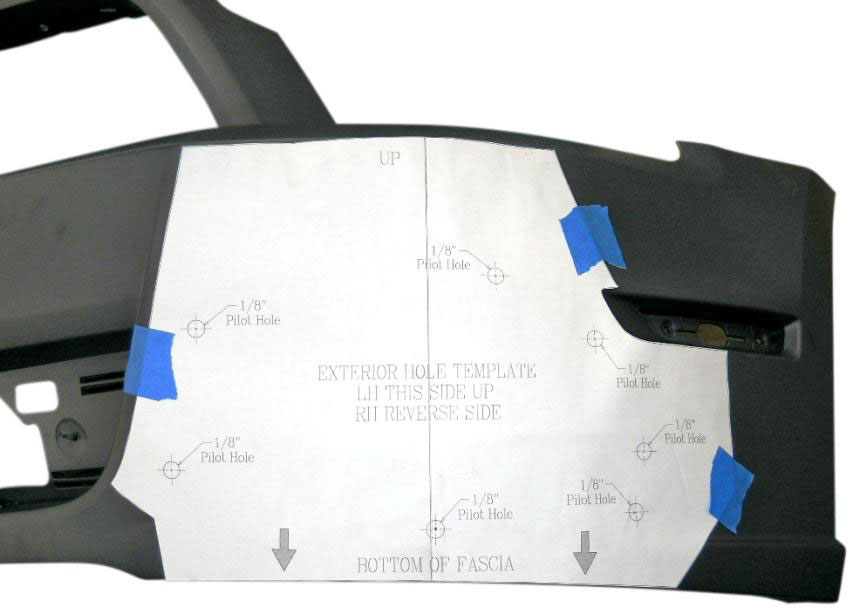
3. Using a center punch, mark the area shown on the template for the seven (7) pilot holes.
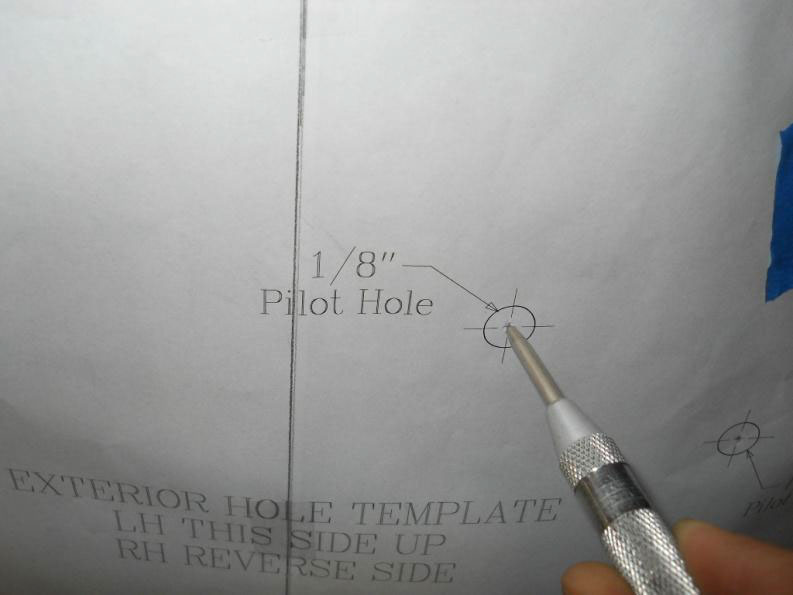
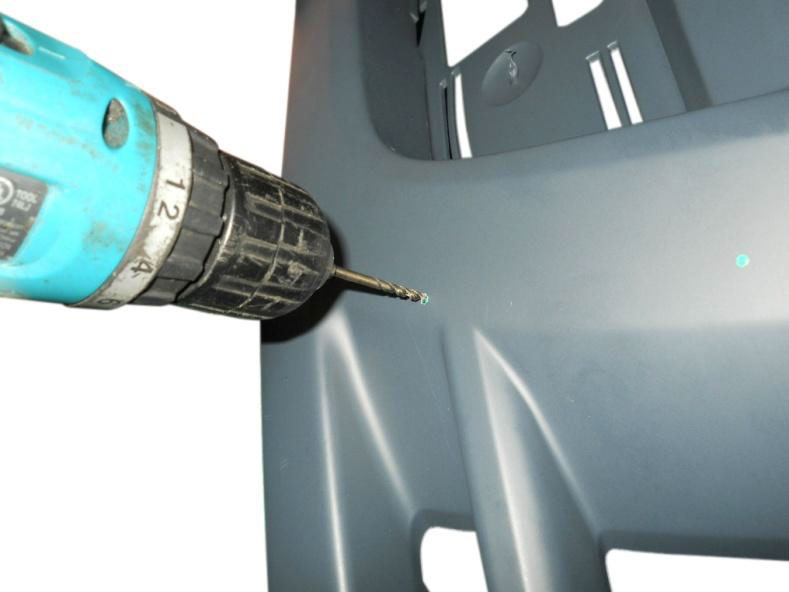
4. Remove the template and drill the marked locations to a 1/8” pilot hole, working your way up to a 3/8” pilot hole.
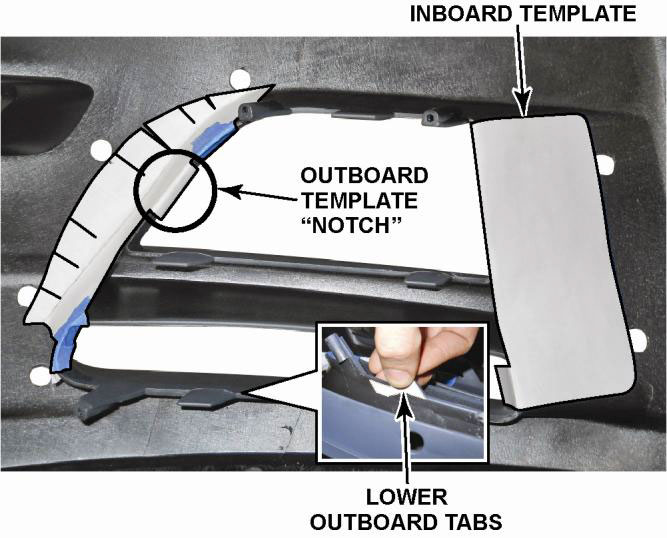
5. Cut out the LH and RH fog lamp bracket templates provided and position on the backside of the bumper cover. Align the tab of the outboard template to the “notch” and fold the tabs of the inboard template as shown taped in position below. Position the lower outboard tab by hand.
6. Mark the area around the templates on the bumper cover
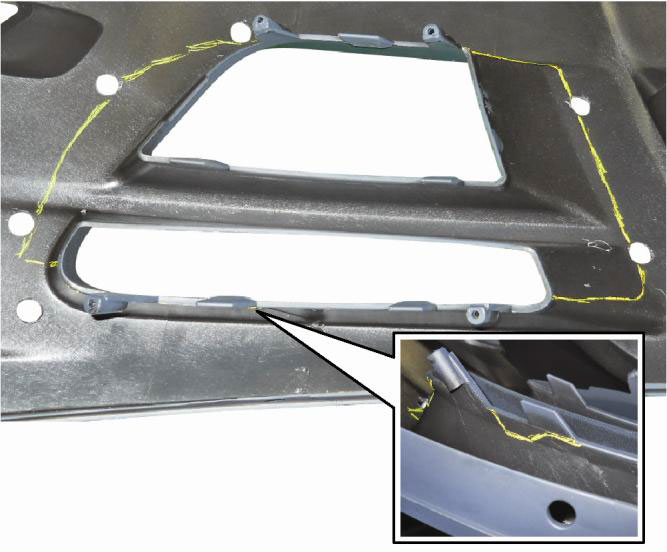
7. Using an air saw, cut out the area marked on the bumper cover.
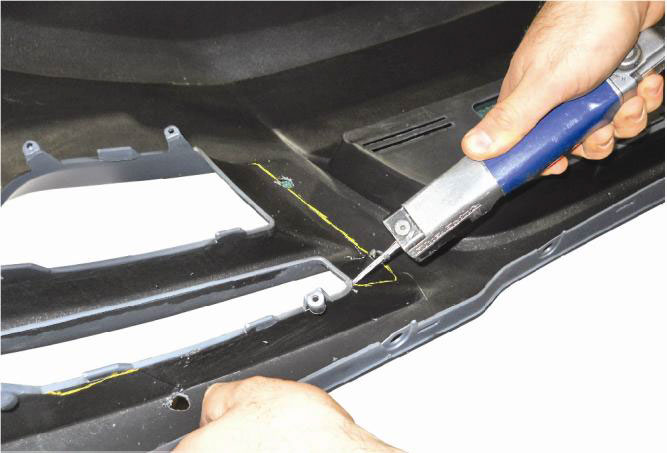
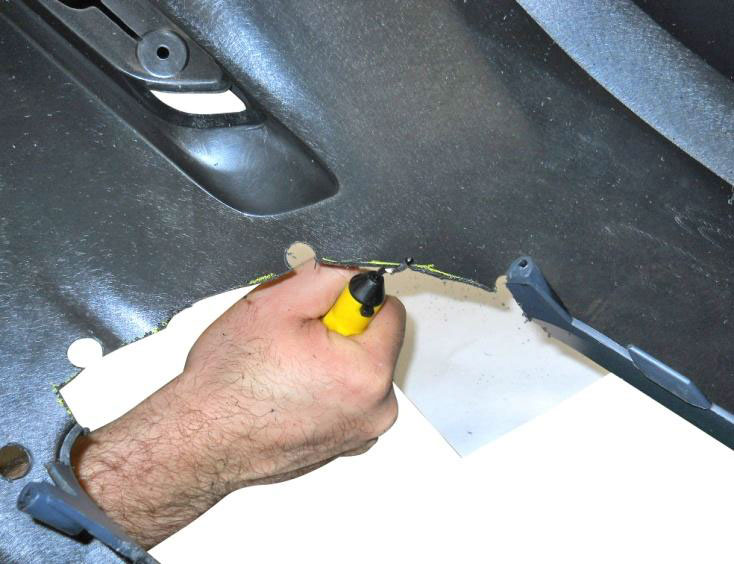
8. Deburr the cut edges on the bumper cover and repeat steps 2 through 8 for the opposite side. Once both sides of the bumper cover have been cut, test fit the fog lamp bezels for proper installation.
CAUTION: If the fog lamp bezels fit too tightly, the holes may have to be increased in size. DO NOT EXCEED 15/32” HOLE SIZE or the fog lamp bezel will not fit properly on the bumper cover.
SECTION C – Installation
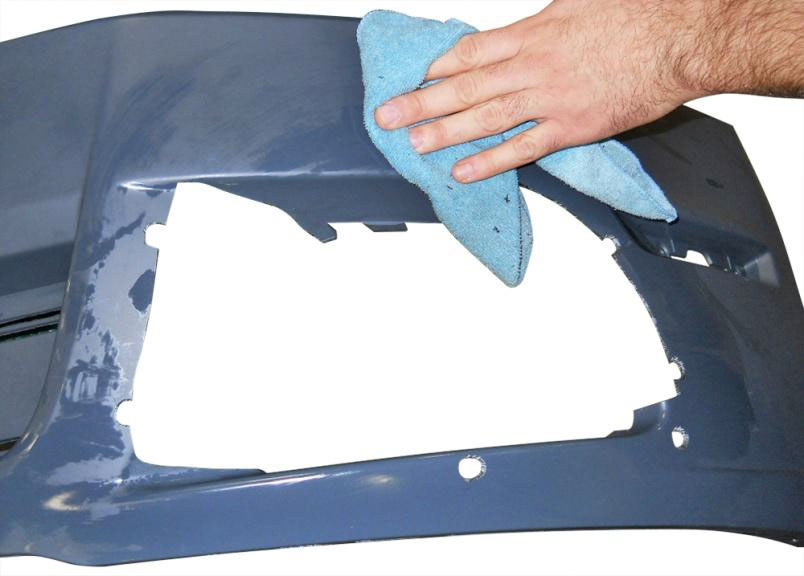
1. Clean the bumper cover surface with alcohol-based cleaner.
2. Using the 3M adhesion promoter 4298 (021200-27571) found in hardware kit (1313-FGBZHWK), wipe the outer rear edges of the fog lamp bezels.
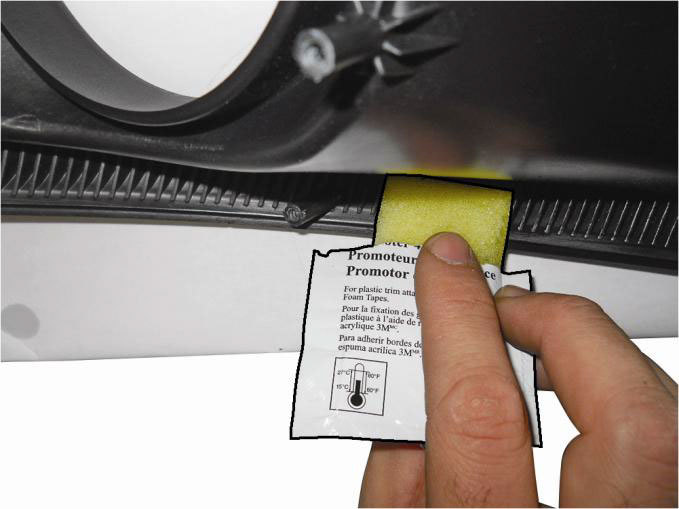
3. Peel the backing on one side of the two-sided tape (1313-17B968TPAL and 1313- 17B969TAPR) found in hardware kit (1313-FGBZHWK) and place on the rear side of the LH and RH fog lamp bezels (1313-17B968BLK and 1313-17B969BLK).

4. Peel the backing on the two-sided tape and install the fog lamp bezels onto the bumper cover.
- Align the contoured edge of the fog lamp bezel with the body line on the bumper cover.
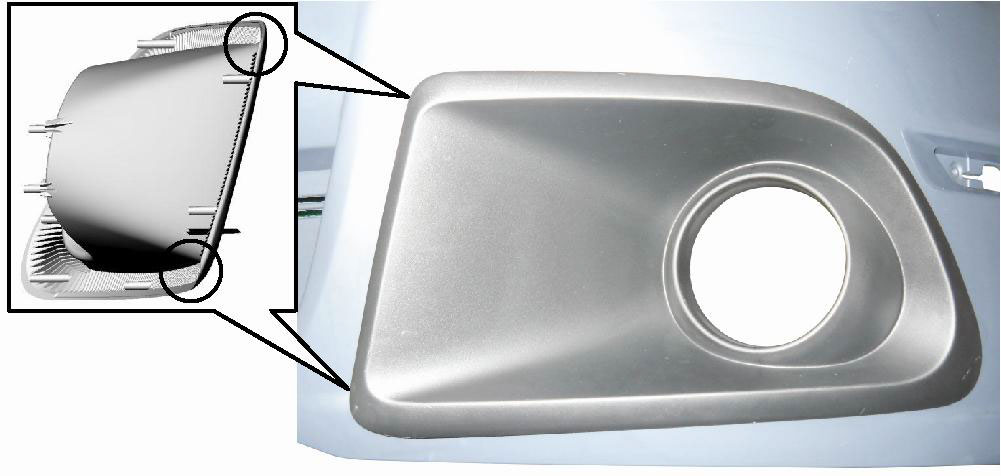
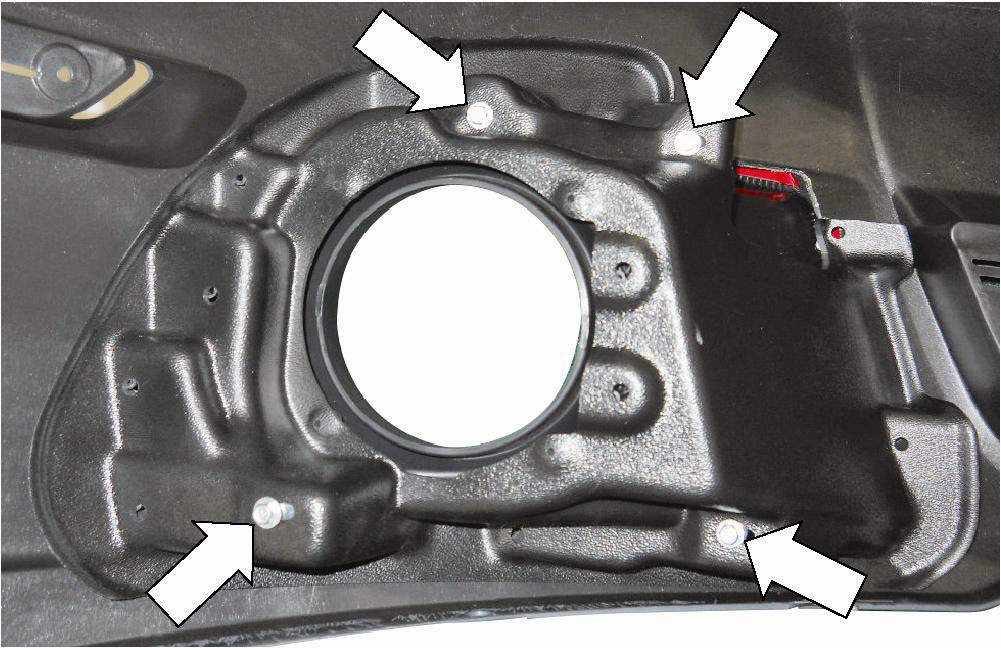
5. Install the four (4) outer screws (W507043-S437) found in hardware kit (1313- FGBZHWK) and the fog lamp bracket assembly to the fog lamp bezel.
- Tighten screws to 1.9 Nm (17 lb-in).
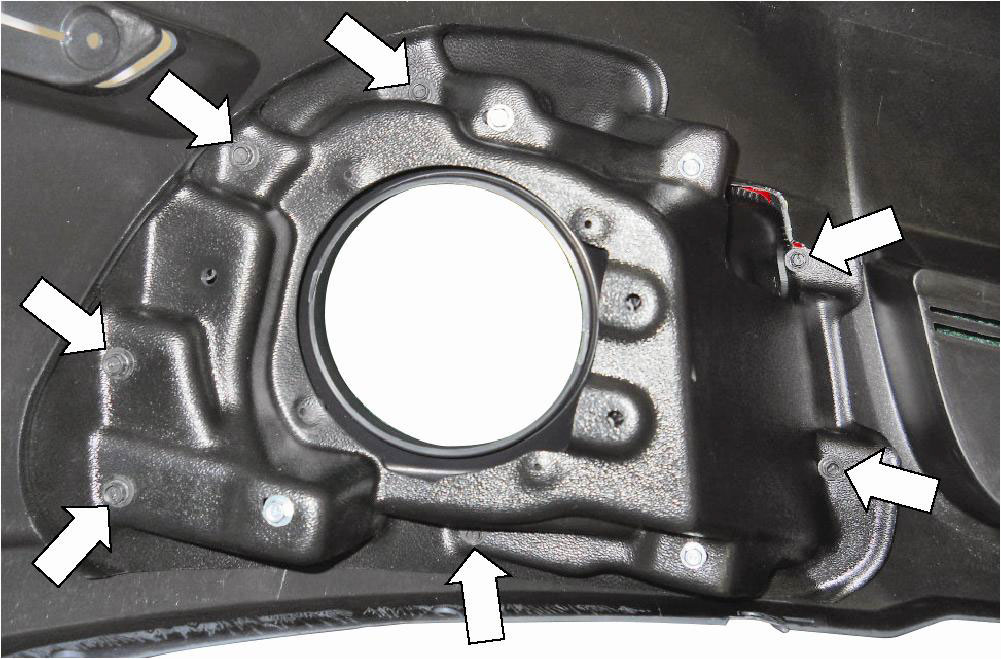
6. Install the seven (7) outer screws (24A000009-G18Q) found in hardware kit (1313-FGBZKIT) on the LH and RH fog lamp brackets (1313-17267 and 1313- 17268).
- Tighten screws to 1.0 Nm (9 lb-in).
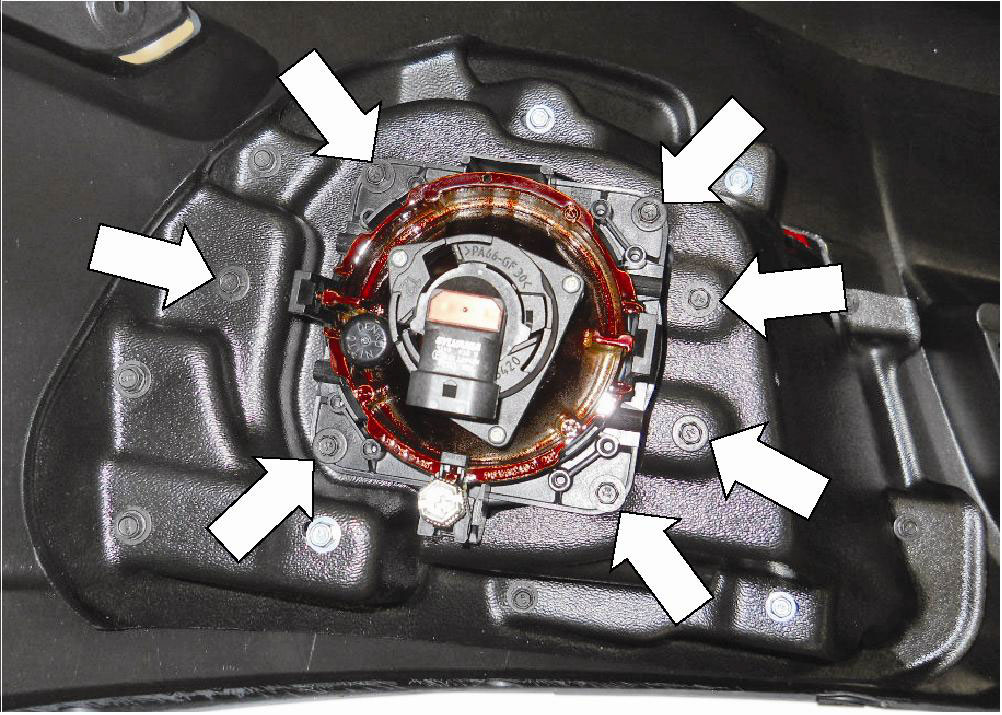
7. Install the three (3) fog lamp bracket-to-fog bezel screws (SM4.2X140X13GM613M) found in hardware kit (1313-FGBZHWK). Install the fog lamps (SM01-6400-AL) and the four (4) screws (SM4.2X140X13GM613M) on the LH and RH fog lamp brackets.
- Tighten screws to 1.0 Nm (9 lb-in).
NOTE: If your vehicle is a V6 and not equipped with the factory-style headlights, modification to the factory harness will be necessary and is not included in this procedure.
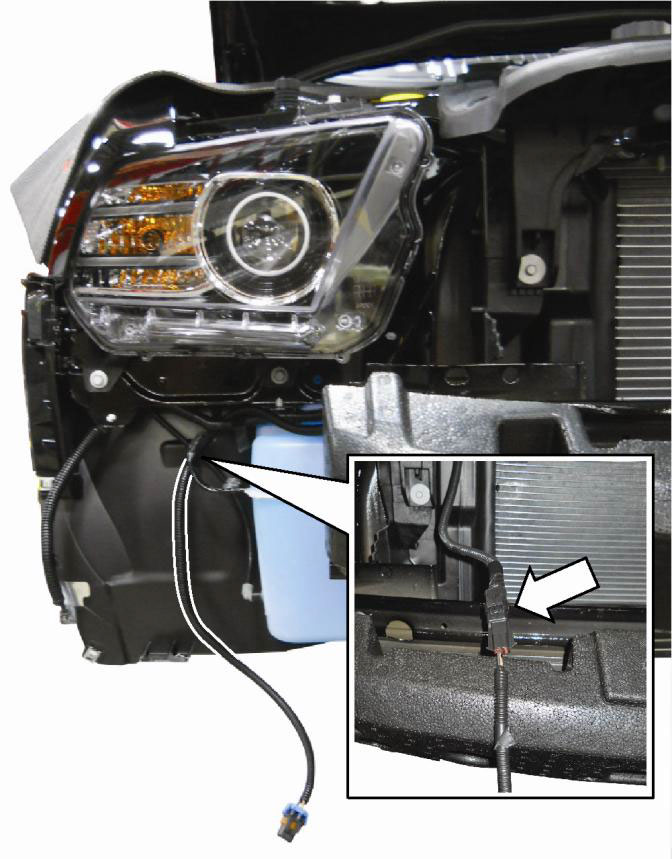
8. Install the two (2) fog lamp harnesses (1313-15A211). Connect the harnesses to the factory fog lamp connectors and route the harness through the vehicle framing, under the headlamp assemblies.
CAUTION: When routing the harness, be sure it is routed clear of sharp edges that could damage the harness.
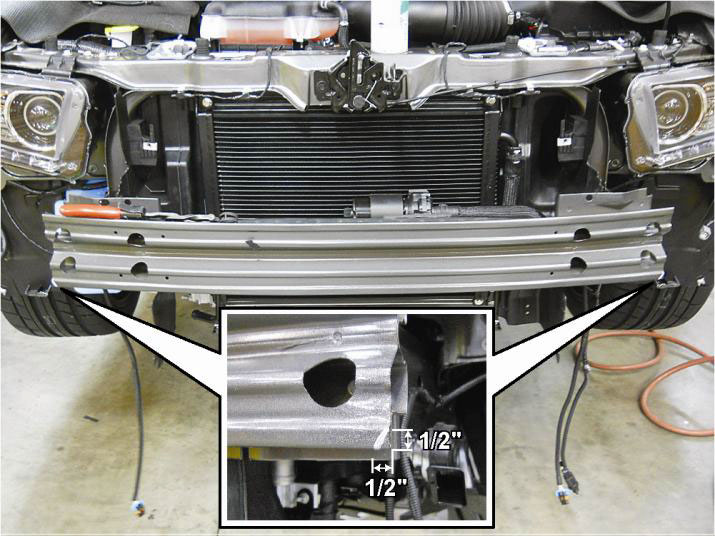
9. On the front bumper beam, measure and mark 1/2” inward and upward. Draw a diagonal line connecting the marks and cut the triangular shape from the lower LH and RH corner. Apply commercially available clear coat (Motorcraft PN 19500- 6000) to prevent corrosion.
- To install the front bumper cover, reverse the removal procedure steps 1 through 8.
NOTE: Connect the LH and RH fog lamp harness connectors to the fog lamps before installation of the lower air deflector
Congratulations!!! You have completed the installation of your new ROUSH Performance Products 2013 Mustang Fog Lamp Bezel Kit.


