How to Install an SHR Fuel Door on Your 2005-2009 Mustang
Installation Time
15 minutes
Tools Required
- 7mm Socket / Ratchet
- 3/8" combination wrench
- Trim tool remover or a pair of side-cutters

Shop Parts in this Guide
Installation
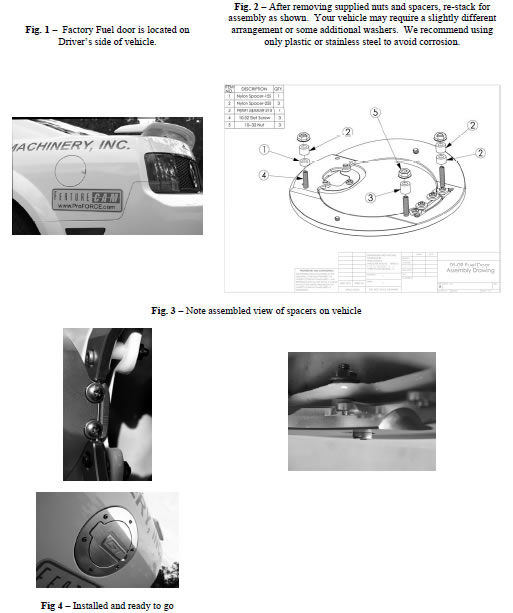
1. No smoking, sparks, or open flames during installation!! With the car off, start by opening the factory fuel door (Fig 1), and removing the gas cap to fuel door retaining line with the trim tool remover or side cutters. Leave the gas tank cap in place. If desired, you can re-install the lanyard line onto one of the studs of the new door during assembly.
2. Using the 7mm socket, remove the two bolts that hold the factory fuel door to the quarter panel sheet metal. Hold the door while doing this so it does not drop and damage itself or the quarter panel. After safely removing the factory door, remove the rubber bump-stops for the door as well.
3. Remove the nuts from the new fuel door, and remove the washers and Delrin spacers. Leave the studs in place. Once removed, re-stack as shown in Fig.2-3 on the fuel door. Assemble the door to the car, with the door open to help in alignment. Once it is in place, stack the delrin spacers on the inside of the quarter panel, followed by the appropriate nuts. Once assembled by hand, use the 3/8” wrench to tighten using sufficient pressure to pull the door into final alignment. Loc-Tite is recommended on studs to insure piece does not loosen on car, and is already used on studs where they attach to the fuel door.
4. Remove tools, close the door, and enjoy! Fuel doors are anodized or optionally plated for a long life, and normal care, maintenance, and periodic lubrication of the hinge mechanism will extend their life even more. Do not forget your gas cap when fueling vehicle, as it will no longer remain attached to the car if you did not re-use the lanyard line. (Fig 4)


