Top Sellers in Camaro
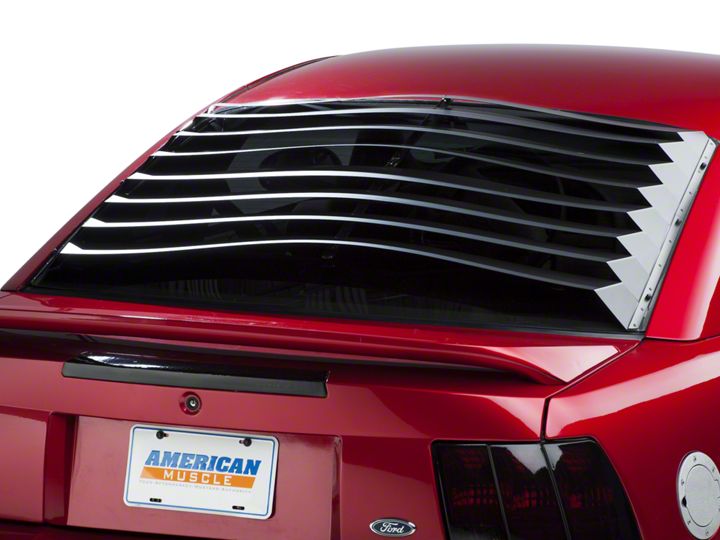
Mustang Smooth Aluminum Rear Window Louver ('94-'04) - Installation Instructions
Installation Time
60 minutes
Tools Required
- Paper Towels/Lint Free Rag
- Rubbing Alcohol (to clean window)
- Soft Lead Pencil or Wax Crayon
- Putty Knife
Shop Parts in this Guide
Installation
Prepping for Install:
1. Clean the glass with alcohol and paper toweling or clean rag, giving special care to ensure clean edges and corners. The glass must be above 60 degrees F (warm to the touch) for the special adhesive to bond securely. If necessary, warm the glass with the rear window defogger or a hair dryer.
2. To achieve proper fit of all components, they must first be temporarily secured or "tacked" to the glass as outlined in the following steps.
3. After complete installation of the louver, avoid pressure spray car washes or extreme cold weather for the next 24 Hrs to allow the adhesive to bond properly.
Installation Steps
1. Place the louver on the window with the leading edge of the top slat as close to the window molding as possible and centered side to side. Using a soft lead pencil, mark lightly on the molding the location of the two hinge holes at the top of the louver. Then mark the location of the two tie down studs at the lower outside edges. When all four marks have been made on the molding, take the louver off the window. (On cars without edge molding on the glass, use a crayon and mark the glass itself.)
2. In order to ease the installation of attaching hardware on cars with rubber window molding, lubricate the part of the plate that goes under the molding with a small amount of dish washing detergent.
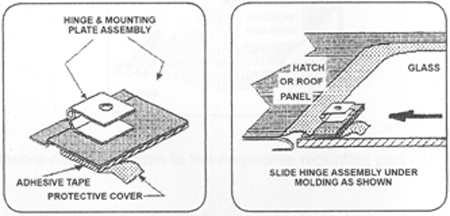
3. Fold back a small section of the protective backing from the double-sided tape on both hinges as shown. This will allow you to "tack" them in place during the trial fit. Using a putty knife, lift the molding and slide the plate under, starting with one corner. After the hinges are under the molding, slide them as necessary to align with the pencil mark made previously. Push the corner with the exposed tape against the glass to hold it in place. Repeat the process for the two tie assemblies. If your car has no molding on the glass edge, your tie downs will hook over the edge of the glass.
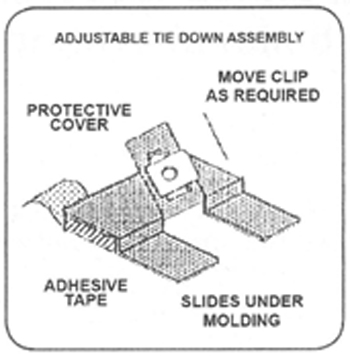
4. When all attaching hardware has been "tacked" in place, re set the louver on the car and fasten the hinges and 1/4 turn tie down.
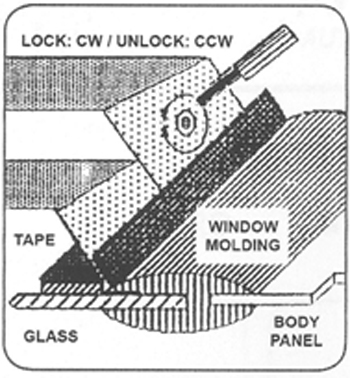
5. If any of the attaching hardware does not fasten to the respective mounting part of the louver, slide it into the proper position.
6. After the louver has been temporarily fastened to all four pieces of attaching hardware, re-mark the location of the hardware if necessary. This will help ensure position location for permanent mounting. Unfasten and remove the louver from the car leaving all attaching hardware still "tacked" to the glass.
7. Without moving the hinges or tie downs, carefully remove the remainder of the protective backing from the double sided tape and press all parts firmly onto the glass. Check the taped areas from inside the vehicle. Look for air bubbles or signs of incomplete bonding and rework any areas any pressing firmly into place.
8. Peel the remainder of the protective covering from the tape or the side panels and press them into place using the crayon or pencil marks as a guide.
9. Mask off an area around the brackets. Apply a thin bead of clear or black silicone to all edges of the hardware mounting plates and "squeegee" in with finger to ensure moisture cannot "undercut" the tape. Remove mask from the rear window.
10. Bonding takes 24 Hrs to cure. DO NOT install the louver during this time period. DO NOT wash car or drive in rain during this period.
11. Reinstall the louver. Loosely fasten the hinge screws. Then fasten 1/4 turn fasteners. Then tighten the hinge screws. Avoid pressure spray car washes and extreme cold weather for the next 24 Hrs to allow the adhesive to cure.
Installation instructions provided by Manufacturer

