
Stack Racing Polished 75mm EGR Spacer ('86-'93 5.0L) - Installation Instructions
Installation Time
60 minutes
Tools Required
- Standard Size Sockets
- Ratchet
- Ratchet Extension
- Liquid Wrench (If having problems removing Throttle Body Studs)
- Shop rags
- Screw Driver
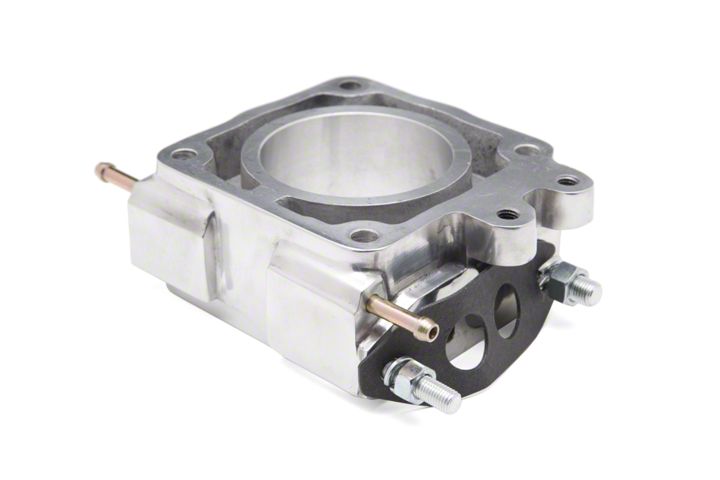
Shop Parts in this Guide
Installation
1. Disconnect Negative Battery Cable
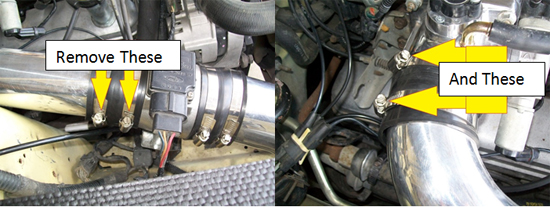
2. Remove your stock air intake; if you are running a Cold-Air Intake you only need a screwdriver to remove the connecting straps. You will then slide the cuffs back far enough to slide your MAF housing out of the way. Finally finish removing the upper intake pipe from your throttle body using a screwdriver. If you are still running your stock air-box intake, you must remove the cuff holding the air-box to the MAF (Mass Airflow Sensor)and slide the MAF out. Now remove the upper intake piping by loosening the fasteners.
3. The next step is to disconnect the IAC and TPS sensors from the throttle body housing to prepare it for removal. You will only need a basic socket and a screw driver to remove these parts, once they are removed check that your gasket is in good shape.NOTE: For Steps 3-6 AND 8-9 Refer to this Picture.
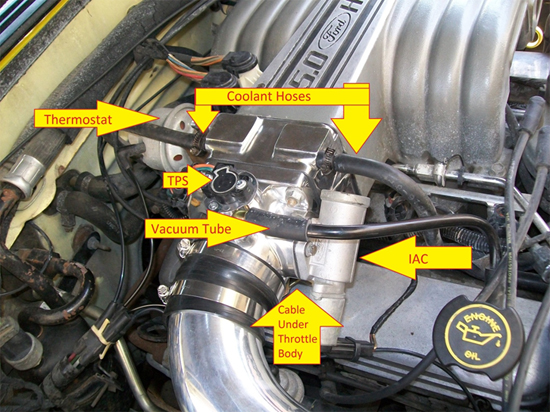
4. Remove the vacuum hose connected to the top of the throttle body, it is very easily pulled apart; just twist this hose out of the way with the IAC and TPS sensors.
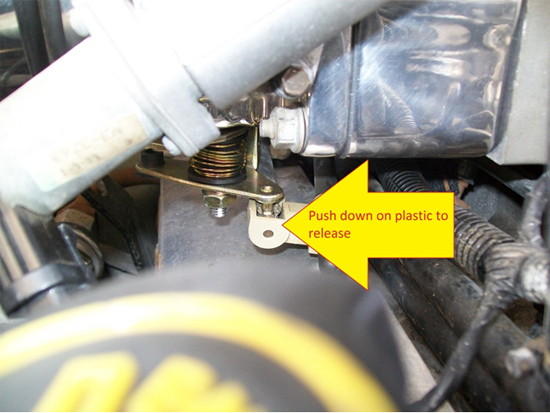
5. Now remove the throttle spring, simple push down on the white plastic piece to pop it off of the throttle body. Then remove the nuts holding the mount onto the EGR spacer right on the left of the throttle body.
6. After you remove these parts, you are ready to remove the throttle body itself. Start by removing the 4 nuts on the throttle body, this will require a single socket and extension because some of the nuts are difficult to reach. Unscrew all four nuts being careful not to drop them into the engine compartment. You should now be able to pull your throttle body away from the stock factory EGR spacer.
7. Removing the Throttle body can actually be very hard if the studs have rusted, if you are in this situation (like I was) you can simple place a clean show rag into your throttle body opening so that no debris enters your intake, and use Liquid Wrench to penetrate the studs. Give the Liquid Wrench a few Mins to do its thing and you should be able to remove the Throttle Body with a tug, and then set it aside.
8. Disassemble the stock factory EGR spacer by removing the thermostat located on the left of the EGR spacer. This will require two different socket sizes, remove the thermostat and set it aside. You can discard the old gasket seeing a brand new one is included.
9. Now that the thermostat is removed, remove the two coolant lines from the top of the spacer (Be very careful as these may still have coolant in them.) Twist them up out of the way with the sensors and vacuum tube.
10. You can now slide the spacer off of the studs, if you have trouble, use some Liquid Wrench again to help with any rust.
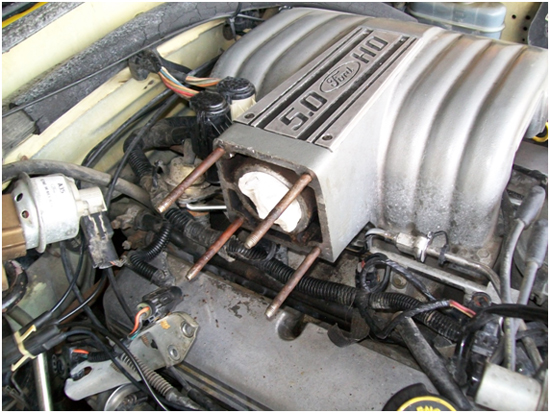
11. Now that you have all of the components removed, discard the old gaskets on the intake, thermostat, and throttle body. Clean the studs and make sure that all mating surfaces are clean.
12. Slide on your new Stack Racing EGR Spacer gasket on first followed by the new EGR Spacer. Reconnect the two coolant hoses, and then insert the two screws that came with the spacer to reinstall the thermostat. Slide the thermostat gasket into place and re-install your thermostat being careful not to over torque.
13. Now slide on the new throttle body gasket followed by the throttle body being sure the mating surfaces are tight with no visible gaps or leaks.
14. Reattach the vacuum hose, IAC sensor, TPS Sensor, and the throttle cable support by installing them back onto the new Stack Racing EGR Spacer.
15. Secure the Throttle Body by reinstalling the nuts onto the studs and torqueing them to 12-18 lbs. being careful to not over-torque them.
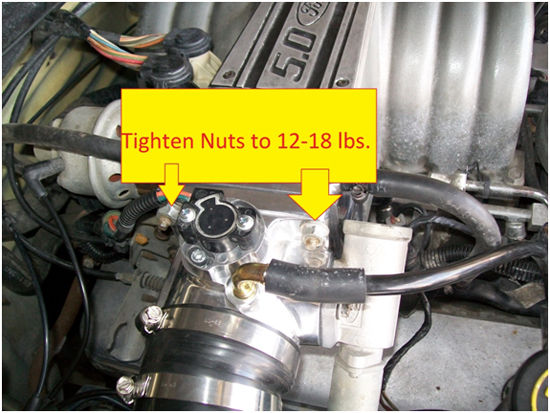
16. Once everything is back in place re-install your Intake, and your MAF Housing.
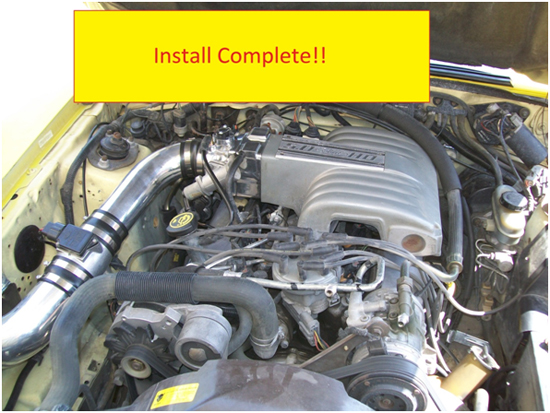
17. Reconnect your negative battery cable, and test.
18. Adjust your Idle if necessary.
Idle Adjustment
1. Remove your IAC connector
2. Start your car
3. Turn the nut on the throttle body to desired Idle Speed (650-1000 for stock stangs)
4. Reconnect your IAC connector
- Readjust if necessary.
Installation instructions provided by AmericanMuscle customer Kyle Baumgard 3.26.10
Related Guides
-
Installation
-
Installation
-
Installation

