FREE 1 to 3-Day Delivery on Orders $149+ Details
How to Install an SR Performance Fastback IRS Tie Down Kit on Your 2015-2016 Mustang
Installation Time
3 hours
Tools Required
- 13mm Wrench
- 21mm Wrench
- Pry Bar
- Jack
- Jack Stands
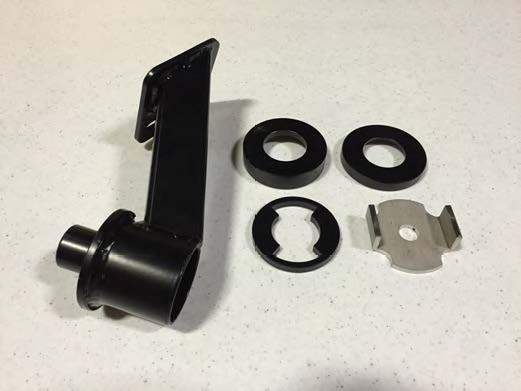
Contents:
(2) - Front Upper Isolators
(2) - Front Lower Isolators
(2) - Front Tie Down Brackets
(2) - Rear Upper Isolators
(2) - Rear Lower Isolators
**Important Notes:
It is HIGHLY recommended that you get a professional alignment after any suspension modification.
Step 1:
Lift the rear of the vehicle and support with jack stands under the under the pinch welds. Remove the rear tires.
Step 2:
Place the jack under the center of the rear cradle for support.
Step 3:
Working one side at a time, loosen the front and rear cradle bolts.
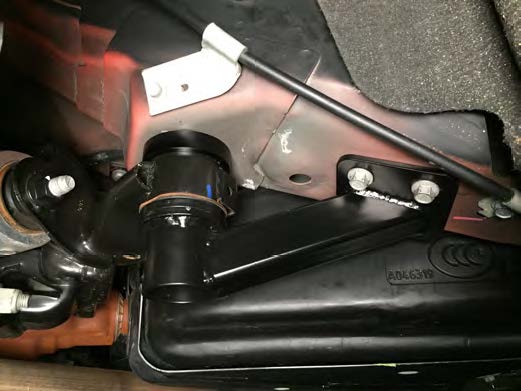
Remove the front cradle bolt and apply slight pressure downward to slip the upper isolator into place. **Note: Front upper isolator is the taller/thicker isolator. The cup faces down. Then install the lower isolator and the tie down bracket.
**Note: Tie Down brackets are side specific. Loosely reinstall the factory bolts.
**Note: If you have problems lining up the bolt holes, try jacking the cradle up and thread the 21mm bolt in half way before trying to line up the (2) bracket bolts.
Step 4:
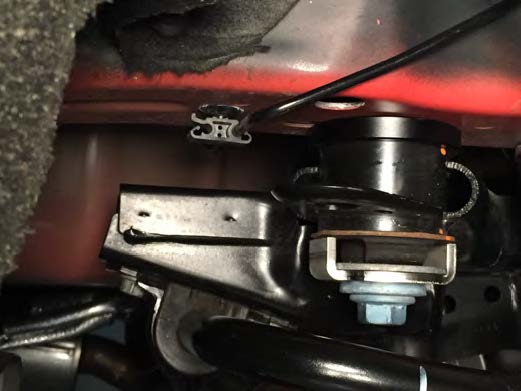
With the front bolt loosely installed, remove the rear bolt.
Install the shorter/thinner isolator on the top of the rear mount (cup facing down).
Then install the lower Tie Down as seen above.
Tighten both the front and rear bolts. Large bolts (21mm socket) 130ft/lbs and the smaller bolts (13mm socket) to 40ft/lbs.
One Side Pictured