Guaranteed Free Delivery by 12/24! available on most items - Details
How To Install a SR Performance Aluminum Radiator - Manual on Your 1996 Mustang with 4.6L Engine
Installation Time
2 hours
Tools Required
- Large and Small Pair of Pliers
- 8mm and 10mm Deep Socket and Extensions
- Spare Rags
- Large Drain Pan
- Funnel with Small Opening
- 3/8 inch Hose (optional)
- Phillips Screwdriver
- 1/4" Ratchet for Crossover Tube Plug
- Allen Wrench Set

Shop Parts in this Guide
Directions:
1. Place front end of car on jack stands or ramps, be sure to set parking brake and chock rear tires.
2. It is always good practice to remove the negative battery terminal when working on a car equipped with air bags. Removal of the battery for this install is not required, but may allow you some extra wiggle room when removing and installing and the radiator and accessing the radiator mount bolts. 8mm socket/wrench will remove battery terminals.
3. Place a drain pan under the passenger side of the radiator. There is a drain valve there. To avoid a mess, you can attach a 3/8” hose to the drain opening. Use pliers to gently open the drain valve. Coolant should start flowing slowly. Open the coolant overflow reservoir tank cap and coolant should start flowing much faster. When it has stopped flowing, move the pan under the block drain plug. You may not be able to access the plug on the passenger side. Lying behind the front driver’s side tire, follow the mid-pipe up to the manifold. The block drain plug is visible there. The drain requires a large allen wrench. Eye protection is recommended.
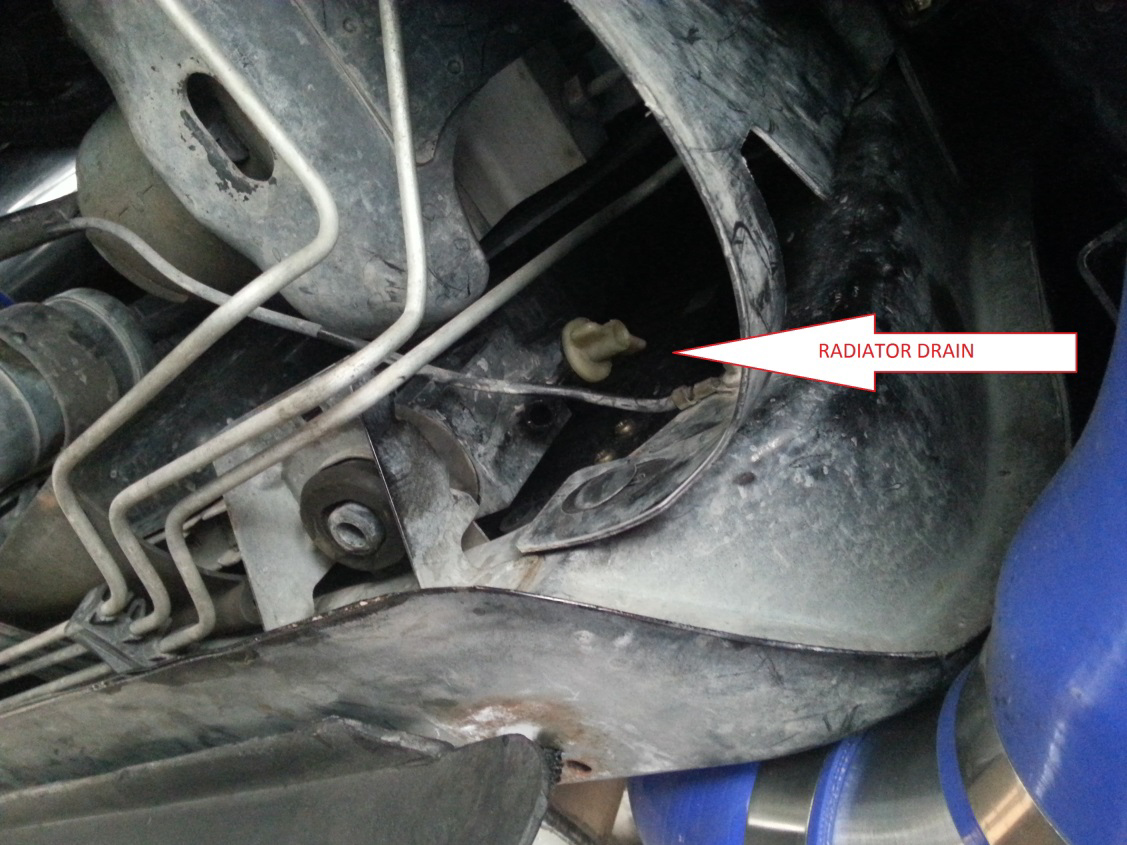
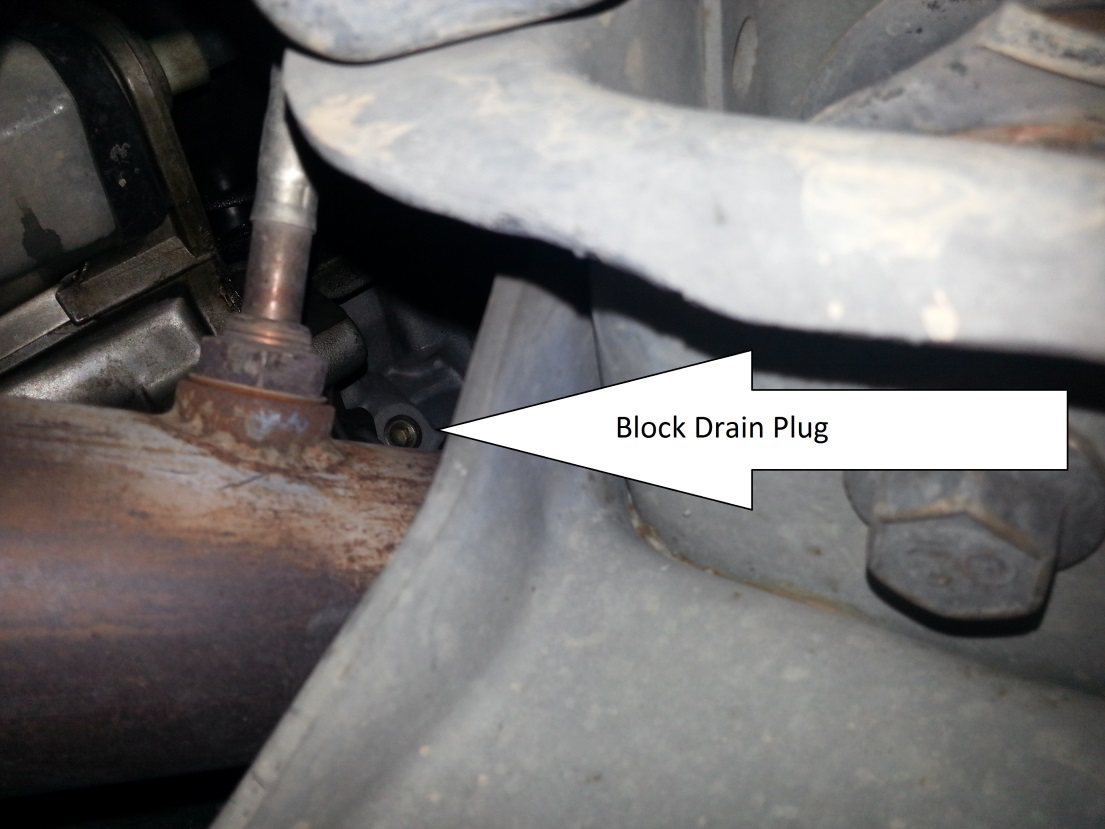
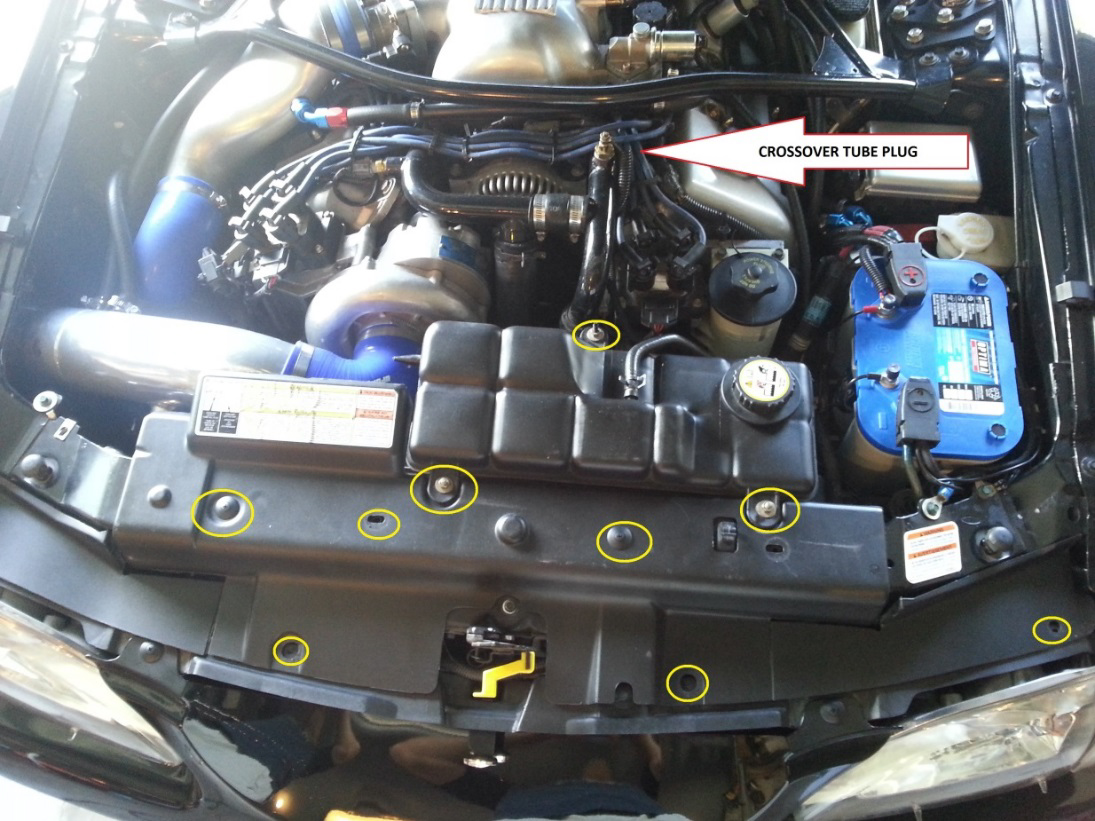
4. Once the block drain plug is out and it has finished draining, it is a good time to flush the system to remove any sediments. Remove the lower radiator hose using a large pair of pliers. Now remove the crossover tube plug and attach water hose there. Hold/Flush the water hose there until the water from the lower radiator hose and block drain plug run clear. Reinstall the block drain plug.
NOTE: This would be a great time to replace your thermostat if it is old, or if your looking to get a lower temp one.
5. Remove plastic rivets that hold on the radiator cover, and then remove it. Remove the coolant over flow tank by removing the three 10mm nuts holding it in place. Also, using a pair of pliers remove the large hose from the bottom of the tank, and the small hose that connects the over flow tank to the radiator. Finally disconnect the sensor plug at the bottom of the reservoir. Remove the entire reservoir assembly.
6. Disconnect the top large hose from the passenger side of the radiator using large pliers.
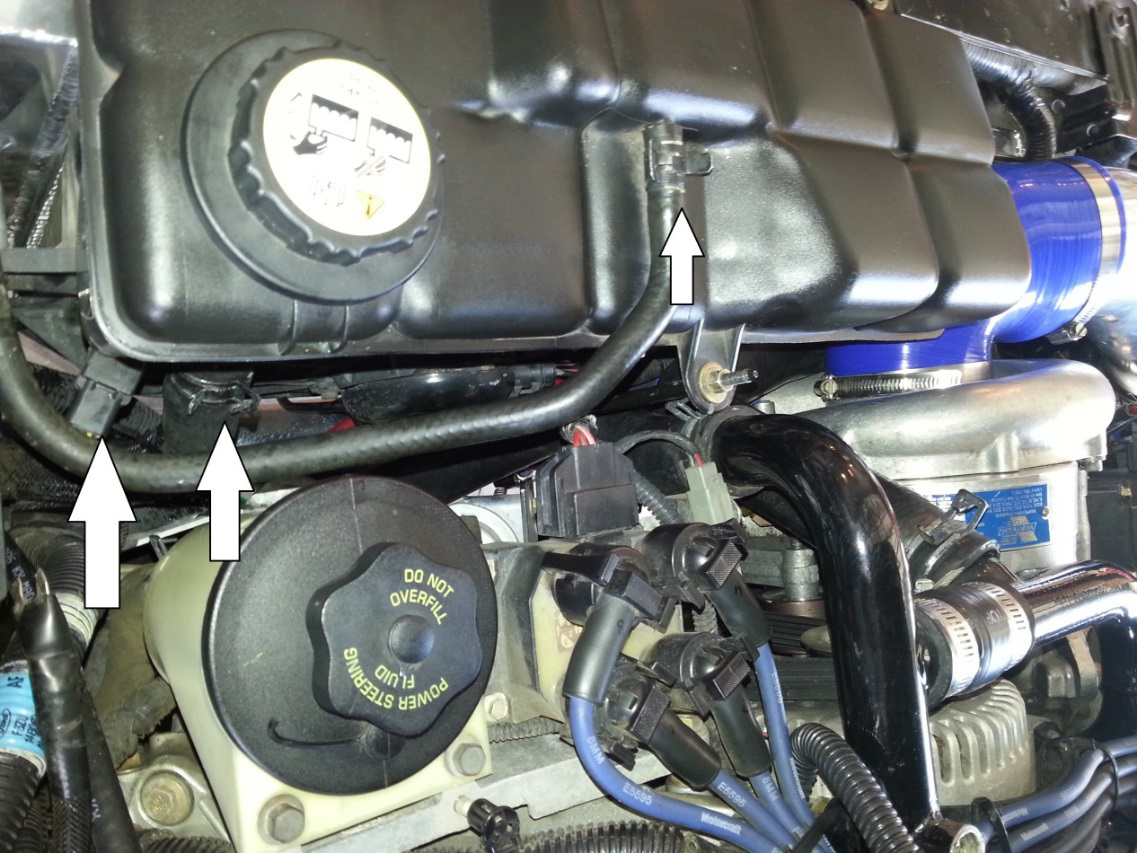
7. Disconnect fan connector and other connector on passenger side of radiator.
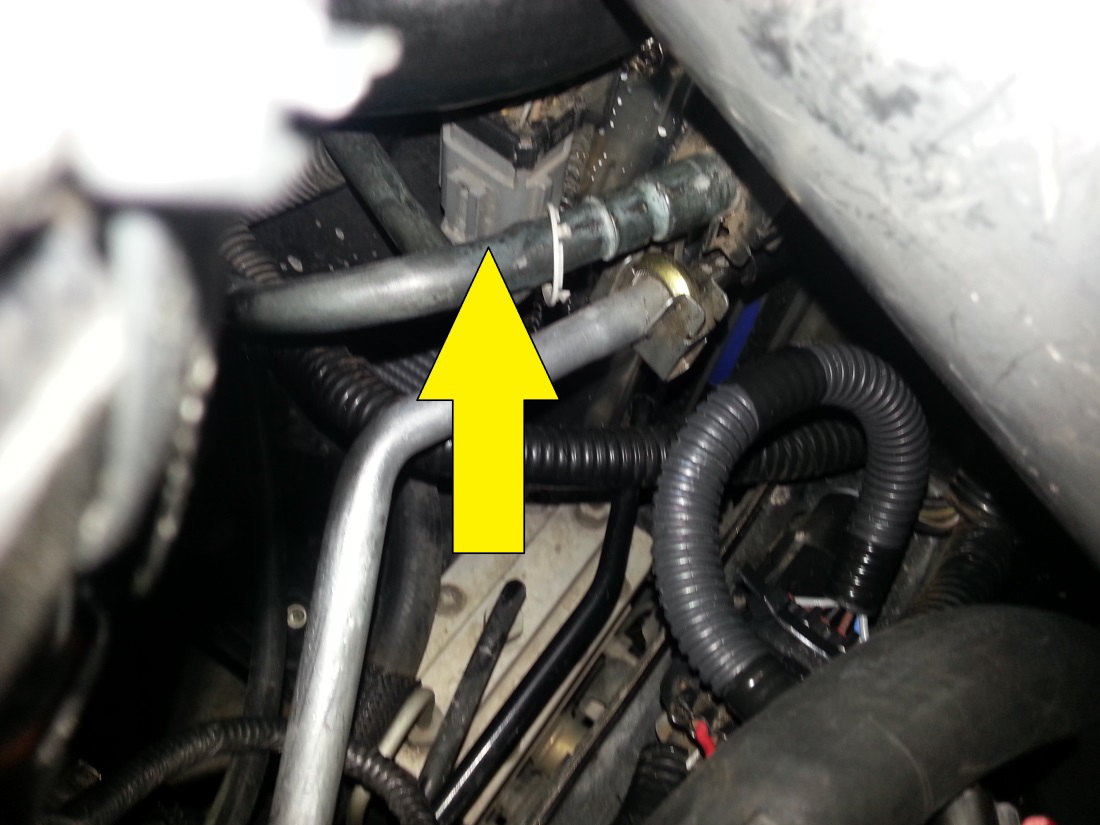
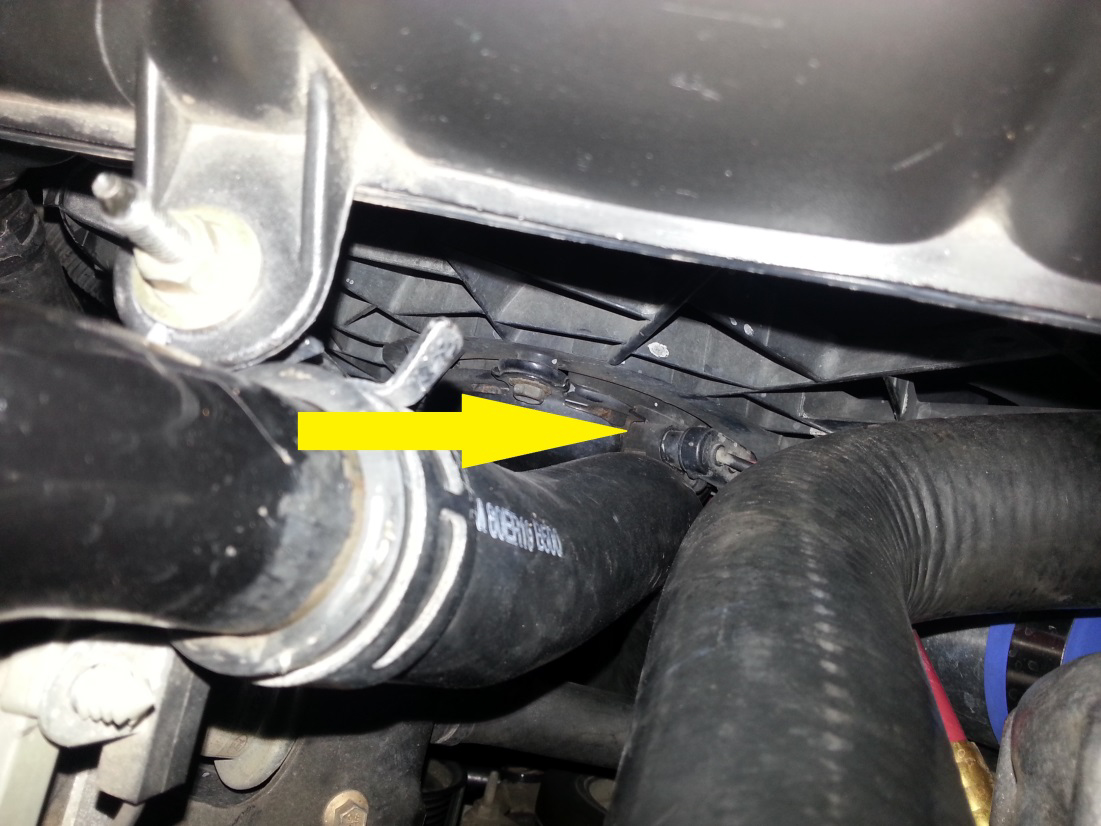
8. Remove the two bolts that hold on the fan shroud to the radiator about half way down each side of the shroud. Once bolts are removed, pull straight up to remove the fan/shroud assembly.
9. Remove the two radiator supports from the top left and right side of the radiator. Use an 8mm socket.

10. Shove a rag in the bottom radiator hose connection to prevent coolant from leaking out when lifting the radiator.
11. Gently pull straight up on radiator and work it out of the engine bay.
12. Transfer rubber flap from the bottom of the factory radiator to the SR Performance unit.
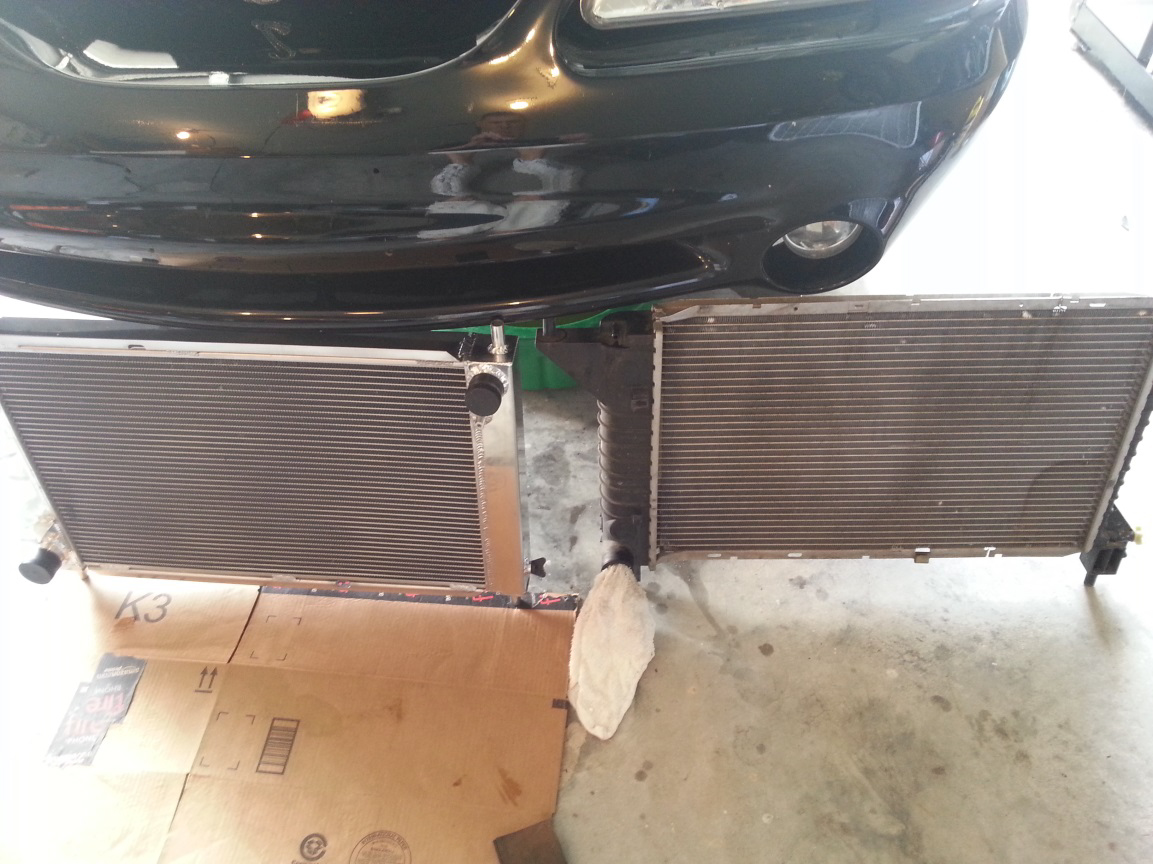
13. Gently slide new radiator in place being careful not to bend any fins. Get it close to seated and then get under the car and guide it in to place. There is minimal clearance between the new radiator and the ABS unit on the passenger side. I slid a piece of foam in between them just in case they rub. If there is not enough clearance, you could notch the abs unit bracket holes and slide it over a bit, or modify the bottom radiator mount.
14. Re-install the top two radiator mounts.
15. Re-install fan shroud to new radiator. Reconnect fan connector and the other two harnesses.
16. Re-connect upper and lower radiator hoses.
17. Re-install Coolant reservoir, connect the sensor plug, large lower reservoir hose, and small hose that connects it to the radiator. Attach the other end of the small hose to the radiator.
18. Re-install battery if removed and attach terminals.
19. Attach a funnel to the coolant crossover tube that will fit in the hole and hold itself up.
20. Fill at the crossover tube, 50/50 coolant mix until reservoir is full. Put cap on reservoir and continue filling crossover tube until it is full and there are a couple inches of coolant in the funnel.
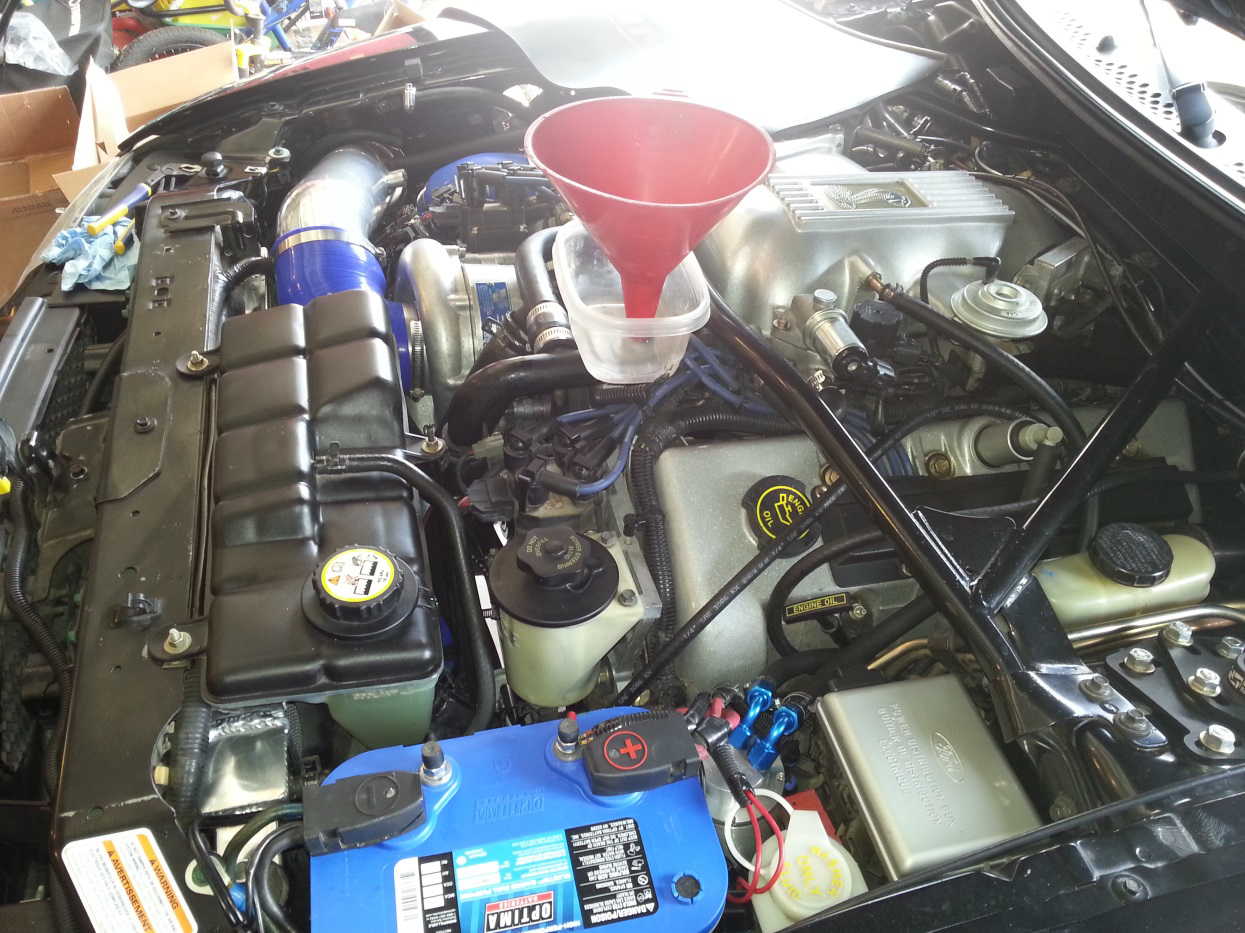
21. Start car, place heater on max and let it warm up until the thermostat opens and coolant cycles. The funnel will bubble indicating air is being released, if the coolant drops below the funnel, add some slowly until you have some remaining in the funnel. Do not let it run so long that the coolant begins to rise in the funnel.
22. Let it cool down for a while and then vent coolant reservoir cap until it begins to overflow. Coolant in funnel should drop; add more to bring level back into funnel.
23. Repeat start/cool down process until no further coolant will fit in the reservoir. Squeezing hoses and leaving front of car elevated on ramps helps get the air out faster.
24. Soak up coolant in funnel with a rag until it is level with coolant crossover tube, then reinstall plug. This should have got most of the air out of the system, if it is running hot, there may be more air in the system and you will need to continue the burping process.
25. Lower car off stands/ramps and enjoy your lower temps!
Installation Instructions written by AmericanMuscle Customer Lee Crouch 9.7.2014
