FREE 1 to 3-Day Delivery on Orders $119+ Details
Best Sellers


How to Install a Steeda Shifter Base Bushing - MT-82 on your 2011-2013 Mustang GT and V6
Installation
Removal of the Factory Shifter Base Bushing
1. Lift the vehicle so you can work comfortably underneath the center of it. Use caution operating a lift or jack stands to ensure the car is stable and safe to work around and underneath.
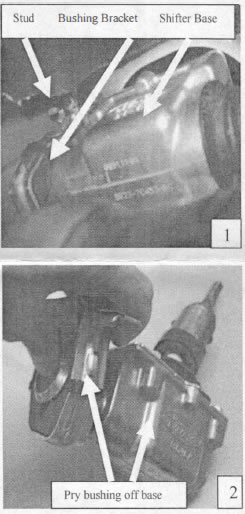
2. Remove the two 10mm flange-head nuts at the rear of the shifter assembly, above the driveshaft, from the threaded studs securing the factory shifter base bushing assembly to the floorpan. See figure l.
3. Gently lower the shifter base and bushing assembly off the threaded studs.
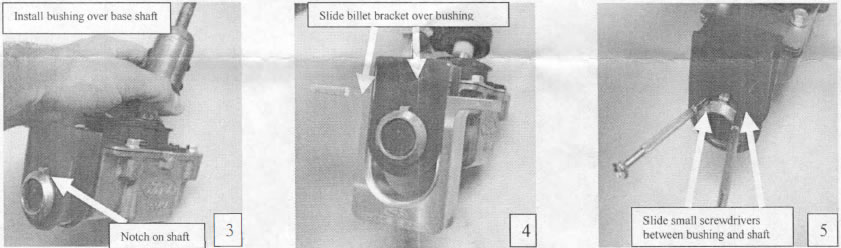
4. Gently pry the bushing assembly off the rear of the shifter base. See figure 2.
5. Allow the shifter base to rest on the driveshaft.
Installation of the Steeda Shifter Base Bushing
Note: This kit comes with a low durometer bushing for no noticeable increase in shifter NVH, and a higher durometer bushing for minimum shifter compliance (slight increase in shifter NVJ:I). You can use either b hing deJ)e.nding on your hifier preferences.
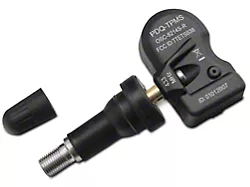
6. Slip the bushing over the same shaft you removed the factory bushing assembly from. There is a small notch cut out inside the inner annulus of the bushing to mate with the notch on the top of the shifter base shaft. See figure 3.
- If using the lower durometer bushing (the red one), you have to force the bushing over the barb on the end of the shifter base shaft.
7. Slide the billet bracket over the polyurethane bushing with the bracket's Steed a engraved face to the rear of the vehicle. See figure 4.
8. Re-install the two nuts you removed earlier and torque to specification.
- DO NOT OVERTIGHTEN THE NUTS OR THE STUDS WILL SHEAR OFF FROM THE FLOORPAN!!!
If you want to switch from the low durometer bushing to the higher durometer bushing a couple of small screwdrivers between the base shaft and bushing make removal of the bushing over the shaft barb much easier. See figure 5.