How to Install Stifflers Driveshaft Safety Loop on your Mustang

Shop Parts in this Guide
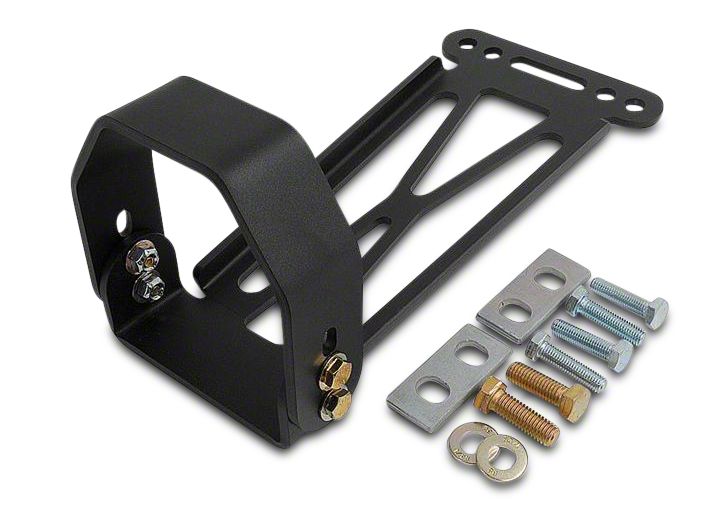
Driveshaft Safety Loop1999-2004 Mustangs(DSL-M01)
Engineered to exceed NHRA regulations, this one of a kind driveshaft safety loop will save you and your investment from the destructive effects of a broken driveshaft. Quick and easy bolt-in application requires no drilling or welding and weights almost 2 lbs. less than most popular styles! Comes complete with all mounting hardware and spacer plates to maintain correct driveshaft angle. Works with all automatic and manual transmissions, most aftermarket exhaust systems and aluminum driveshafts. Launch hard with confidence!
(Please read all instructions prior to beginning installation. Contact your dealer with any questions.)
Installation:
1. Raise vehicle to allow access for installation; support with jackstands.
2. Support transmission with floor jack. Do not block access to cross-member mount.
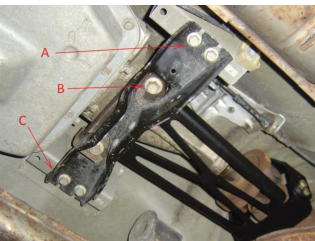
3. Remove the four bolts (“A”) securing the transmission cross-member to the body. They will not be reused.
4. Remove the two bolts (“B”) in center of the cross-member attaching cross-member to the transmission. They will not be reused.
5. Install DSL base plate between the transmission and cross-member as shown; loosely secure using supplied ½” bolts and washers.
6. Insert supplied spacer plates between cross-member and body (“C”); tighten with supplied 10mm bolts and 3/8” washers.
7. Confirm DSL base plate has equal clearance on each side around driveshaft and tighten ½” bolts (“B”).
8. Position DSL loop over mounting tabs on base plate. Confirm which set of mount holes are best
for your application (Recommended setting is bottom hole of loop to bottom hole on base plate.). Insert four 3/8” bolts from the outside and fasten tight with supplied washers and nuts. [Note: When installing loop, it may be helpful to bring from the rear forward, following the driveshaft.]
9. Confirm adequate clearance (1/4”min.) between DSL and driveshaft assembly, adjust if necessary.
10. Remove floor jack and jackstands and lower car.


