Top Sellers in Mustang
Billet T-Handle Shift Knob ('87-'04 Auto) - Installation Instructions
Installation Time
30 minutes
Tools Required
- Torx Drivers
- Allen Keys
- Wire Cutters
- 1 Small Zip Tie

Shop Parts in this Guide
Installation
Handle Installation Directions:
1. Set the parking brake. If vehicle is not on a flat surface, block the rear drive wheels.
2. Turn on the ignition, but do not start the car.
3. Push the release button on the factory shifter and pull the shifter back until the car is in 1st gear.
4. First, check your factory shifter handle to see if there is small hole on the back of the shifter handle. Inside the hole is an Allen head set screw. Not all models have one. If you locate a set-screw, loosen it with an Allen key.
5. While holding in the release button, pull up on the handle gently.
ATTENTION: If your vehicle has the overdrive button mounted in the handle, skip to #1 in the next section.
6. If you do not have the overdrive button on the factory handle, remove the handle.
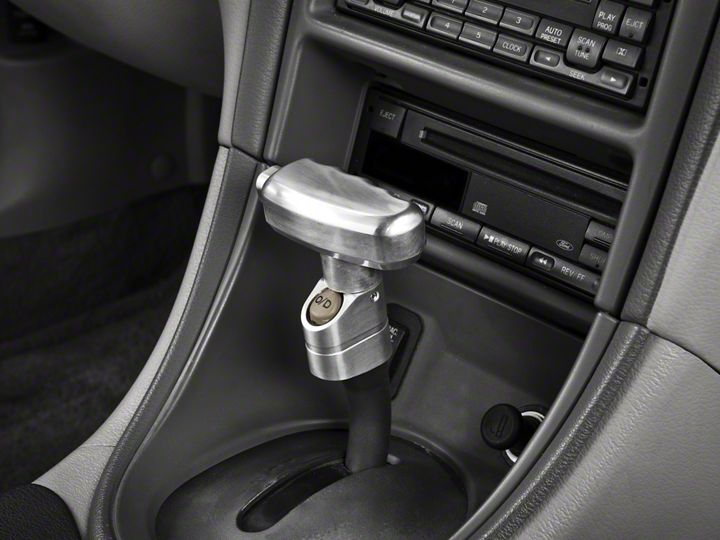
7. With the stock handle removed, install the new shifter with the release button sticking out approximately 1/4 “.
8. Install the set screw in the side of the handle and tighten it to keep the handle in place.
9. Test the handle by pushing in the button and moving through all gears.
Overdrive Bracket Installation Instructions
1. Remove the shifter/lighter trim panel by pulling straight towards you. When you release the panel you will need to unplug the electrical connectors for the lighter and any other accessories that your car has on the panel.
2. The trim that holds the shift position panel will also need to be removed. Look to the lower left of the trim, screwed to the floor, you will see 2 Torx head screws that will need to be removed to gain access to the OD button wires. Remove the trim panel and cut the small zip tie that is attached to base of the shifter shaft and then unplug the wires from the harness. Remove the shifter knob and wires from the car.
Note:The connector can be difficult to locate, but can be found without cutting wires.
3. Now you can pull the shifter button, housing and wires out of the handle, install the wires, housing and button into the new shifter button housing, slide the new housing over the shifter shaft and reassemble all the parts in reverse order of removal.
4. Determine the desired height for the bracket and secure using the provided set-screw.
5. Continue installation from #5 above
Installation instructions provided by Manufacturer


