
Throttle Body Spacer ('05-'10 V6) - Installation Instructions
Installation Time
60 minutes
Tools Required
- Flat-head screwdriver
- 5/16 socket wrench
- Dry, lint-free cloth
- Tube of silicone adhesive sealant
- Aluminum throttle body spacer and accompanying 4X bolts and washers.
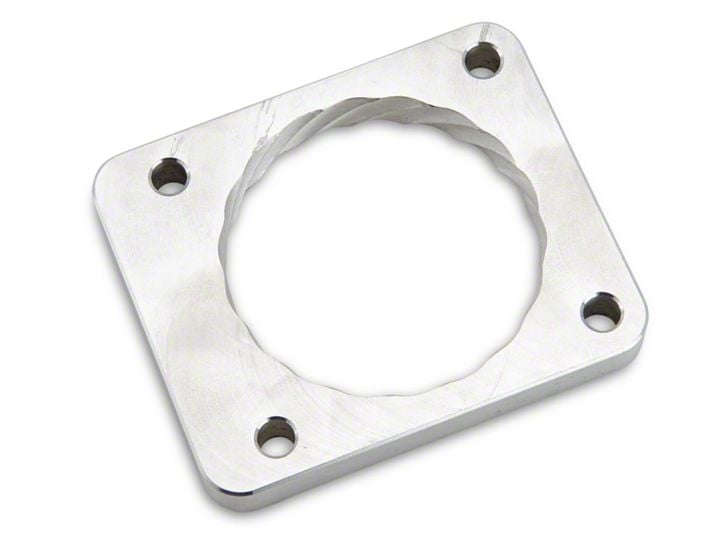
Shop Parts in this Guide
Installation
1. It is absolutely necessary to DISCONNECT YOUR CAR'S BATTERY before beginning the installation. Do so now.
2. Once under the hood of your Mustang, you will first need to disconnect the power leads to the electronic throttle body system. There are 2 electrical connections on the left and right side of the throttle body unit, as pictured below.
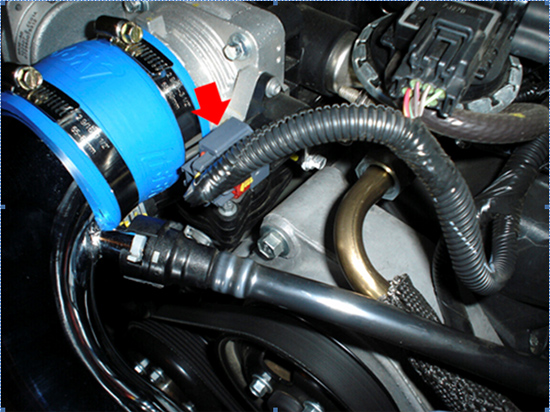
Figure 2: Remove this connector from right side of throttle body
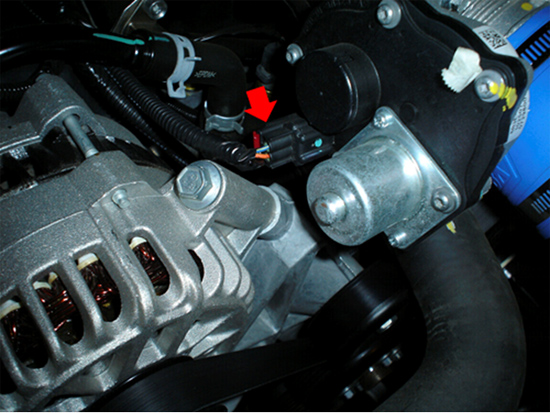
Figure 3: Remove this connector from left side of throttle body
3. Gently pull back on the red, plastic connector tabs on each of the electrical connections, to unlock the lead connectors. Next, gently pull each lead connector until they are disconnected from the throttle body unit.
4. Once power has been disconnected from the throttle body, you will need to disconnect your Mustang’s air intake from the front intake of the throttle body unit. Note that you should be able to install the throttle body spacer without having to completely remove the air intake unit from your vehicle.
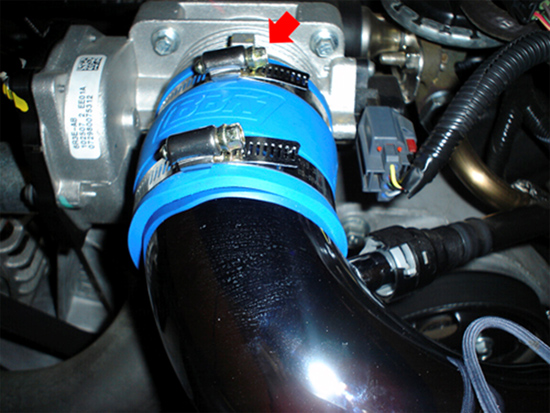
Figure 4: Loosen clamp from throttle body
5. Use a flat-head screwdriver to loosen the circular clamp holding the air intake to the front of the throttle body unit. Set the circular clamp aside and reposition the air intake unit so that you may reach the four 5/16 bolts on the front of the throttle body unit.
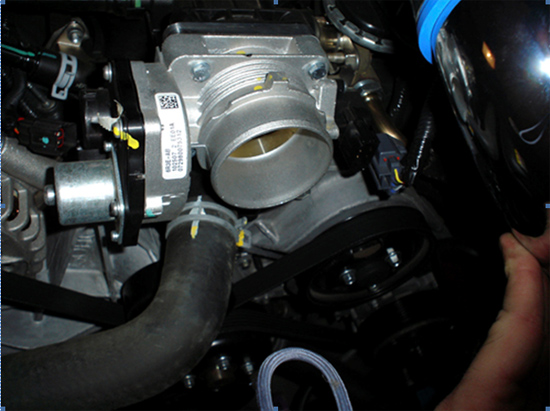
Figure 5: Cold Air Intake removed from the throttle body
6. Using a 5/16 socket wrench, loosen the 4 bolts holding the throttle body unit to the front of your Mustang’s engine. Then, carefully remove the throttle body and bolts.
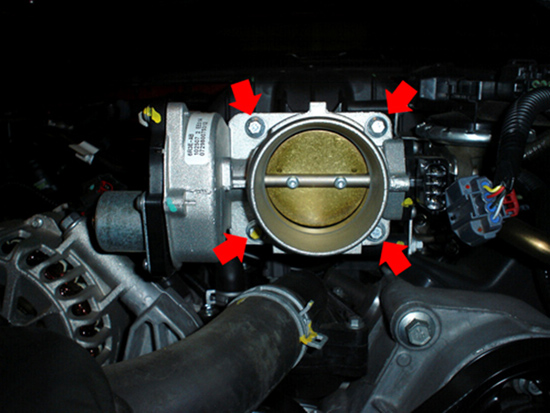
Figure 6: Remove these bolts
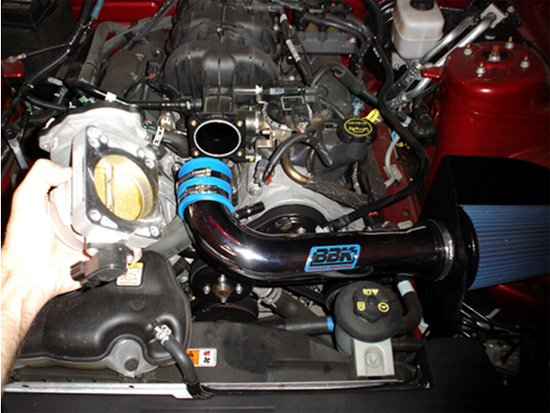
Figure 7: Removing the throttle body from the engine
7. With a dry, lint-free cloth, wipe off any dust, packing material or residue from the throttle body spacer. Next, you will need to apply a coat of silicon sealant around the outer edge of the throttle body spacer aperture. Be sure to apply the sealant to both the front and rear sides of the throttle body spacer. The silicon sealant will ensure that, after installation, an air-tight seal will be maintained as air passes from the throttle body unit, through the spacer and into the engine.
8. Attach the spacer to the rear of the throttle body unit as shown in the photo below.
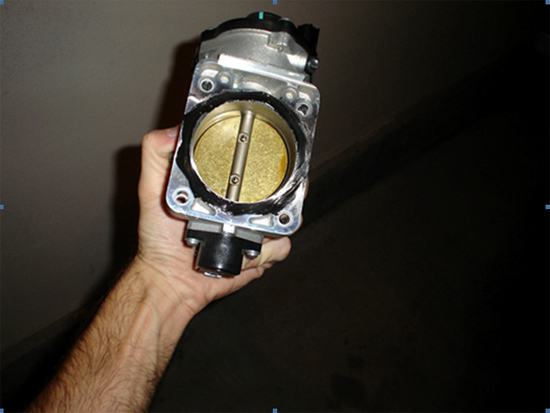
Figure 8: Throttle body with spacer attached and sealant applied
9. Using the lint-free cloth, wipe away any excess silicone sealant from the interior of the throttle body spacer/aperture, that may have seeped through after attaching the spacer to the read of the throttle body.
10. Discard the original bolts that attached the throttle body unit to your engine. In their place, insert the 4 replacement bolts and washers that shipped with your throttle body spacer. You will notice that the bolts are significantly longer than the original OEM parts, in order to accommodate the added length of the throttle body with the spacer installed.
11. Finally, reattach the throttle body, inserting the 4 bolts into their proper location to secure the throttle body to the engine.
12. Using a socket wrench, tighten the 4 bolts to secure the throttle body to the engine. Reattach your vehicle’s air intake to the front of the throttle body and then reinsert the 2 power leads into either side of the throttle body.
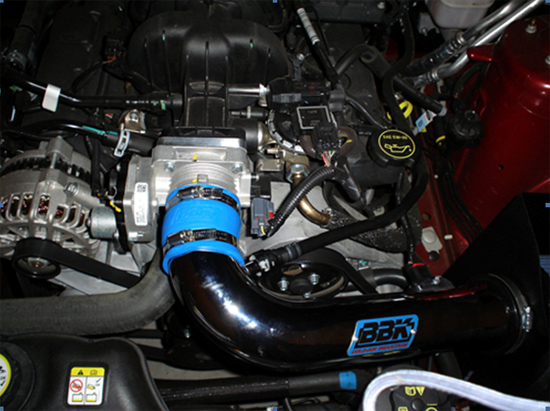
Figure 9: V6 Engine with throttle body and spacer attached. Cold Air Intake and power reattached
13. Congratulations, you have just added some rear-wheel horsepower and torque to the overall performance of your 2005-2008 Ford Mustang!
Installation instructions provided by AmericanMuscle customer Gary Spillman 1.8.09

